Tuesday, August 19, 2008

Whoopie!

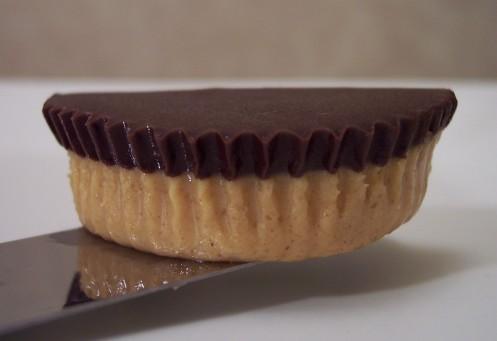
Even though the oven had to be on for quite some time, I had such a blast making the Weekly Wednesday Treat Day today! For this week's treat, I made these Mini Banana Whoopie Pies.

We've made chocolate whoopie pies that had a marshmallow fluff filling, but these little pies go in a different direction. I loved the texture of the banana batter - it was thick, yet billowy and was a dream to pipe with. Besides adding a tangy background, sour cream is used in the batter to keep the small cakes very moist with quite a tender crumb. To give them the best banana flavor, you'll want to make sure you use a very ripe banana - the blacker that former yellow-y outer skin is, the sweeter and more intense the meat inside will be. One large banana should yield just enough after being mashed for this recipe.

Let the cakes bake long enough so the edges take on a light golden tinge while the tops remain slightly pale - they are done when the tops spring back when slightly touched in the center. Once the myriad of rounds had cooled (we got an even 72!), I started slathering half of them with a creamy concoction of softened cream cheese, sweet confectioners' sugar and a dash of vanilla. While you can spoon the filling on the cakes, you'll make your life much easier and save time if you fill up a pastry bag or even a zip-loc bag and quickly squeezing it on.

Once assembled, give the whoopie pies a dusting of confectioners' sugar before serving for a little flare (I'll do this to the rest of them tomorrow morning). I loved the more traditional marshmallow-esque filling like we used in those other whoopie pies I mentioned earlier, but since these were much smaller, I can honestly say that we both thought this richer cream cheese filling was a good choice! The banana flavor in the cakes was nice, but I think what I really enjoyed was the depth from the combination of brown sugar and granulated sugar used for sweetness. If I would have thought about it, I would have swapped the granulated for some of the vanilla sugar I keep in a big 'ol jar in the pantry for a punch of fragrance.

Tonight's dinner was dead easy... I didn't need to use any mixing or prep bowls, no cutting boards and certainly not even a knife! The only things I dirtied up was a baking dish, measuring spoon and a measuring cup to prepare this Maple-Baked Oatmeal.

The best part? I didn't even need to turn on the oven as the baking dish was small enough to fit in our toaster oven - score! Old-fashioned rolled oats, lightly toasted sliced almonds, maple sugar and pure maple syrup are the base ingredients for this dish. Just lightly toss those together inside of the baking dish so they are evenly mixed - if you don't happen to have the lovely maple sugar (worth it though!), you can always use brown sugar. Pour in a few cups of milk and bake until the oats have softened and the milk has been absorbed. As soon as the pan comes out from the oven, dust the top with as much of your best ground cinnamon to taste - we used our favorite Vietnamese cinnamon since it is pungent, sweet and the aroma is irresistible. The texture of the baked oatmeal was soft, yet still firm enough to hold its shape while keeping a chewy quality to it - Jeff mentioned he was afraid it was going to be completely mushy, but he was quite happy with the result!


The only thing I think I would do differently is to toss a couple pinches of that cinnamon right into the dry oat mixture so the flavor would have been developed more. While we both ate it as is from the pan, you could definitely pour some additional milk on your portion for a creamy aspect. We also thought it was sweet enough for us as is, but if you have a wicked sweet tooth, stream a drizzle of pure maple syrup on top for a bit of decadence. Not a fan of almonds? Dried blueberries or cranberries would make for an excellent stand-in!

Monday, August 18, 2008

Crisp, chewy and light Wheat Berry Waldorf Salad...

Well, we enjoyed a cool stretch over the last few days, but as usual around in August, the temperatures have started to shoot up again. I was planning on another dish for dinner tonight, but I moved that to tomorrow so we could cool down with this Wheat Berry Waldorf Salad.

Some recipes call to soak wheat berries before cooking them, but I've never found it to cut that much time off the total needed to soften the hard grains. I was glad to see this one left that step off. The wheat generally takes about an hour to an hour and a half to soften... I check at the sixty minute mark and they are usually close to being done, depending on if they are cooked at a light simmer or closer to a boil.

While the tender, chewy wheat berries were cooling, I had plenty of time to knock out the preparation for the rest of the ingredients. We chopped up two types of apples for this salad - Gala for their sweet, light flavor and Granny Smith for a tart, juicy bite. A thinly sliced rib of celery, dried sour cherries and plump golden raisins round out this fruity salad, adding flavor and their contrasting textures. For a nutty note, a handful of chopped walnuts that we toasted are also tossed into the mix.

To keep the salad light and refreshing, we prepared a zippy dressing made of freshly squeezed juice from a sweet orange, zest from said orange and a few glugs of seasoned rice vinegar. Do note, seasoned rice vinegar is different that regular rice vinegar - the seasoned has salt and sugar added. A couple green onions lend a savory aspect, while a bit of chopped mint brought a breath of fresh (literally!) air into the salad. With all of these sweet flavors, it may seem a little odd to season at the end with salt and fresh ground black pepper, but don't skip this part as it ties the rambunctious tones together. I quite enjoyed the dried sour cherries in this dish, but I can see how you could replace them with dried cranberries if you couldn't find them (I finally located a bag at Trader Joe's). While I can appreciate the lighter nature of the dressing, we both commented that we thought a splash of a good, fruity olive oil would have been a nice accent. You certainly don't have to serve this salad with those tender Boston lettuce leaves, but it does make for a more dramatic presentation. Jeff decided to make good use of them, ala a tortilla, and making a wrap out of the salad and lettuce!

Sunday, August 17, 2008

Making some improvements to this Spicy Peanut Chicken over Rice...

Gus is officially 8 weeks old today! Woo! We had our first visit at the vet's office yesterday and he was thoroughly smothered with lots of love from everybody - I was afraid we were not going to get him back when they took him in the back to show him off! Gus still hasn't found his bark yet (and we're not complaining!), but I think it will be any day now before he is yappin' away.

We are very happy to say that Max has really taken a liking to the little guy and they are having a blast chasing each other around. Although, Max does get a little grumpy if the pup gets too close to his toys... hee hee!

A little lighter on the recipe front this time for us - 7 new recipes for this past week. Being extra choosy, our favorites this go 'round where the Fresh Corn and Basil Tart and those Cheesecake Thumbprints.

I made quite a few changes to this Spicy Peanut Chicken over Rice as I wanted to amp up the flavors a bit for our dinner tonight. One of the first changes I made was to add a few chicken thighs into the mix, rather than using completely breast meat as the original recipe called for. Besides staying a bit more moist throughout cooking, we both like the depth the darker meat adds in general. Rather than just tossing the tomato paste with a bunch of liquid into the pot, I added it to the cooked chicken meat before any other ingredients so it had a chance to intensify and caramelize.

The next change I made was the amount and type of peanut butter - the original called for less and used a chunky commercial version. Because I wanted a creamier texture without any added sweetness, I used our homemade natural peanut butter to amplify the nutty flavor. After seasoning the chicken in the saucepan with curry powder and crushed red pepper, we tossed in chopped plum tomatoes and a bit of chicken broth. After a good half-hour simmer, the sauce had thickened slightly, but was still runny enough to leave you with a generous sauce that yearned to be served over rice. I opted for a bed of brown basmati rice rice using the no-fuss method we've come to rely on. Just for added nutty insurance, we scattered the top with chopped peanuts for crunch.

While we did find this a little spicy, it was kind of one-dimensional as the only heat came from the crushed red pepper. We both felt it could have used a little help to ratchet up the spice and while the dollop of thick Greek yogurt on top was cooling, it would have been more beneficial if the heat was there. Other than that, the peanuttiness (is that even a word?) was definitely where we wanted it to be and Jeff and I both agree that the changes we made we needed as it might have been a little lackluster if we strictly followed the recipe.


Saturday, August 16, 2008

Creamy Chocolate Dessert...

Saturday morning is usually the time I make us a special treat for dessert that will take us a few days to get through. This morning was no different, except for the fact that I'm not sure if it is going to last long enough around here!

When I turned around to clean a spatula at the sink, Jeff came quietly around the corner and stuck his finger into this (almost) assembled Creamy Chocolate Dessert - I guess he thought he needed to do his "quality-control" duties (sigh... that just means he gets the piece with a hole in it!). I caught him as I turned around, tapped him with my now clean spatula and noticed he was too busy enjoying the piece he scooped out to care! Humph... at least I didn't have to wait to find out if it was going to turn out well or not.

Instead of a graham cracker base, the bottom of this creamy dessert is a mixture of flour, powdery confectioners' sugar, butter and nutty toasted pecans. Once pulsed together in a food processor, this crumbly mixture is pressed down into a baking pan to form the crust. The pan is then slid into the oven long enough for it to melt together and form a solid crust.

Once the crust had cooled completely, we started preparing the fillings that will be slathered on top. The first layer is cream cheese that we whipped with confectioners' sugar to add some sweetness. Because it is still a little dense, the cream cheese is lightened with an overstuffed cup of stabilized whipped cream. Stabilized whipped cream ensures that it doesn't weep when it sits around and allows the texture to be a little more firm. You can use a product like Dream Whip to do this, try out a method using gelatin or if you think you won't keep it sitting around long, a mixture of confectioners' sugar and a little extra cornstarch usually works well. If you are looking for an easier method, I won't tell if you use something like Cool Whip instead - you'll need one eight ounce container (which is what the original recipe called for). I don't have anything against it, but we just prefer to taste of real whipped cream.

While that layer was chilling out in the refrigerator, I did take some help from the market with the next addition by using a couple packages of instant chocolate pudding mix! The pudding does need to set up a bit before spreading it on, but this is fine as you already have downtime waiting on the first layer to firm up. The remaining cream we whipped is the final addition, making this four-layer dessert sing! Just before I served this, I dusted the top with cocoa powder for a pop of color against the final white layer (and who would say no to another dose of chocolate?). Luscious, creamy and soft, without being runny, I didn't find it as easy to get clean slices as we usually try to do. However, scooped into a bowl or a tidy piece on a plate, I don't care how it is served as I'm already thinking it will make a fine breakfast, lunch and dinner! The cream cheese added such a pleasing, clean silky body while the pudding cut through the richness of the whipped cream. And I can't forget about that buttery nut-laced crust on the bottom that added just the right textural contrast to the above layers.


Friday, August 15, 2008

Three-Cheese Pizza Bianca for another Friday Night Pizza...

Like a lovely little (and slightly annoying) tune, our food processor was humming along again this Friday evening as I needed to make a batch of our favorite whole-wheat dough to use in this Three-Cheese Pizza Bianca I prepared for dinner.

While both of us enjoy pizza loaded with toppings, every now and then it is good to prepare a more innocent pizza by keeping the toppings to a minimum. While the dough was resting and rising, I flavored a tablespoon of oil with a few cloves of minced garlic. This won't take too long and because you want to keep the garlic, do this over medium heat - when the garlic just begins to take on a golden tinge, remove the skillet from the heat and let it cool.

That garlicky oil, along with the obligatory salt and pepper, is then stirred into a mound of ricotta cheese. This creamy concoction is dolloped over the top of the stretched pizza dough and spread smooth. I used the twelve-ounce version of the dough for a thinner pizza, but if you want a heftier piece, don't be afraid to up it to the sixteen-ounce recipe. That's only one cheese, right? The other two come in the form of shredded lightly sweet Gruyère and sharp fresh grated Parmesan cheese. Baked until the bottom of the crust is crisp and the cheese on top is molten, bubbling and spotted with golden brown dots, I couldn't wait to let it cool down. So, even though I burned my tongue (I hate that!), I would do it again for that first bite. As the heat from the oven firmed up the mild ricotta slightly, it also warmed up the oil and garlic, allowing its subtle flavor to permeate through the stronger cheeses on top. You know, a few years ago, pizza was not really a pizza to either of us unless it had a tomato-based sauce on it (hey, what did I know?), but I've learned my lesson over the past few weeks and am glad to know that pizza can still rock without it.


Thursday, August 14, 2008

Thumbing for cookies...

While Gus was off taking some time to relax in his new playpen (yes... he has his own playpen!), I had enough time to make these Cheesecake Thumbprints Jeff took in this morning for the Treat Day this week.

Before you begin working on the dough, you'll want to whip together the creamy cheesecake filling for these cookies. Softened cream cheese, a few tablespoons of granulated sugar, an egg yolk, a touch of sour cream and a few drips of vanilla form this mixture. Right after being mixed together, the filling is quite liquid-y... but a short stint in the refrigerator while you prepare the cookies will allow the mixture to thicken slightly.

These round gems are a basic shortbread cookie - a combination of flour, unsalted butter and a little sugar. However, an egg yolk is also tossed into the dough to add to their tender melt-in-your mouth quality. The dough should not be too dry, but not too moist either - you should be able to roll them into balls without it sticking to your hands. Once all scooped out, the balls are given a tidy indent in the center by using the thick handle end of a sturdy wooden spoon - so the handle glides through the dough, be sure to give it a light dip in flour before moving to the next cookie. You don't have to worry much about the size as the center will blossom open as the cookies bake.

After a few minutes, the cookies need to be removed and the indent re-made as they puff up slightly as they bake. I just used my thumb to press the centers back down, but as the cookies will be quite hot, you can also use that same wooden spoon handle to do this. They go back into the oven until the are just starting to take on a golden hue around the edges. Once the cookies have cooled completely, the open centers are given a dollop of that luscious cheesecake filling and the filled rounds go back into the oven just long enough to set that batter. While we very much enjoyed the simplistic flavor of these rich and buttery two-bite buttons, you could add a little citrus note by tossing in some fresh grated zest into the cookie dough or even into the cheesecake filling. We taste-tested these last night only after a couple hours and the flavor was nice, but if you let them chill out in the refrigerator like you would a regular cheesecake, the flavor does bloom a bit more and the cookies really shined when we had one during breakfast!

This German Apple Pancake we had for dinner tonight was quite interesting! Now, I'm not saying that in a bad way, but it was just a little different than I was expecting. You'll need to plan ahead if this baked pancake piques your interest as the batter needs to rest for roughly half an hour before using it. While the vanilla-scented batter is not too unusual, it does have quite a high proportion of eggs in it.

As the batter was resting, we forged ahead with the recipe by dusting one of our larger skillets with a combination of granulated sugar, cinnamon and nutmeg. We then laid down thinly sliced Granny Smith apples in a circular pattern around the bottom, completely covering it. The original recipe has you just sprinkle additional granulated sugar on top, but why not take advantage of adding a little more flavor? Instead of splitting the half cup of sugar and spicing up one-half as the recipe stated, we increased the amount of the sweet spices and used that to dust the skillet and then top off the apples.

Before pouring the pancake batter on top, the apples and sugar are first heated, allowing the apples to soften slightly and let the sugar begin to turn into a sweet caramel-esque syrup. Be gently as you pour the batter into the skillet as the apples will have a tendency to move around if you add it too fast. The whole shebang is slid into the oven and will cook until the pancake is quite puffy in the center and the edges burst up and slightly out the sides of the skillet. Because of that sticky syrup that formed on the bottom, you will need to give the pancake a nudge or two with a spatula to gently cajole it out of the skillet.

We both commented on how we liked that the apples were fork tender, yet not mushy - what we weren't expecting was how "egg-y" tasting the pancake was. It wasn't as intense of a flavor like you would find in a frittata or anything, but it was fairly pronounced. While the center was completely cooked, I found the texture to be more moist and dense like a set-custard rather than a lighter pancake. Jeff's favorite part was the crispy, golden sweet edges that had a little crunch from the extra granulated sugar. Served with an adornment of confectioners' sugar, there is no maple syrup needed as that caramelized sugar on the bottom brought that needed layer of flavor. Different texture (at least to us) for sure, but it still tasted good!


Wednesday, August 13, 2008

Baking gnocchi...

In anticipation of Gus's arrival this week, I planned ahead and chose recipes for the remainder of the week that didn't take much effort to maximize puppy playing time! While tonight's dinner, Baked Gnocchi with Spinach and Ricotta, took awhile to bake, it just took a few minutes to throw into the baking dish.

You could basically think of this as a lasagna, except the gnocchi stand in for the sheets of pasta. I used some homemade marinara that I've had in the freezer from quite awhile ago (almost time to get more going!), but feel free to use whatever red sauce you like - a meaty batch would work well here too. Do note that the packaged gnocchi are added without being boiled first - since a generous amount of sauce is used, there is plenty of moisture for them to drink in as they bake.

In between the layers of sauce, tender baby spinach leaves and gnocchi are dollops of a three-cheese blend of ricotta, mozzarella and fresh grated Asiago cheese. I love the assertive nature of Asiago, but you can always swap that out for Parmesan if that's what you have. I use those two interchangeably often, but I know not everyone may like its flavor. Fresh basil leaves are also added, along with a pinch of crushed red pepper and an egg to add a little puff as the heat from the oven warms the dish through. The gnocchi transformed from their firm potato-y selves into soft, pillowy nuggets that tightened up the dish well. Those creamy pockets of cheese were a delight to find and added a needed richness. If you can wait long enough for it to cool down some, I think this dish might even hold its shape when you portion it out, but we were ravenous and didn't care to push it!

And lest we forget, I did get the baking done for the Weekly Wednesday (I mean Thursday... at least this week!) Treat Day. We didn't get a chance to take pictures yet, so I'll get those done and slip them into tomorrow's post.

Tuesday, August 12, 2008

Welcome home, Gus!

We are very happy to let you in on a little secret... we went and picked up a little guy we have been waiting for awhile now - meet our new little daschund, Gus! He is a long-haired chocolate dapple.


Warning - be prepared for lots of pictures!

Needless to say, we'll be too busy playin' around with new squeaky toys and seeing how his older brother Max adapts to this interesting creature invading his home, rather than making dinner tonight. Doesn't Gus look like a toy himself?

I will, however, be making a treat for Jeff to bring in for treat day, but it will be pushed back to Thursday this week!

Jeff has longed for a daschund and we had been tossing the idea around of getting one for quite some time. However, with Spike's passing a few months ago, we decided we wanted to wait until we both felt ready and the time has come for a new adventure!

So far, he's been getting used to his new kennel, tromping around outside and gobbling up his food... ahh the life of a puppy! We were pulled to this pup because of his outrageous looking coat and his laid back temperament - he also has gorgeous light blue eyes that will melt your heart!

Uh oh... I think he spotted a bunny - time to go run and catch him! Good exercise for all of us!

Monday, August 11, 2008

Skillet Shrimp with Basil, Garlic and Tomatoes...

Jeff asked if we could slip in a shrimp dish at some point while I was menu planning for the week ahead this weekend. It is going to be pretty busy around here the next few days, so I was more than willing since shrimp take no time to cook!

I dove through my smaller to-try pile of seafood recipes and decided on this Skillet Shrimp with Basil, Garlic and Tomatoes as I already had everything on hand. Before I added the shrimp to the skillet, I let loose a few thinly sliced cloves of garlic, a little orange zest and a pinch of crushed red pepper into a small pool of olive oil. Keep the heat on the low side at this point - you are just looking to release those brilliant flavors into the oil and not gain any color on the garlic.

When that aromatic punch wafted up from the skillet, we slid the peeled shrimp (and yes, I whisked those shells into the freezer for stock this time!) inside and let them cook on one side until they began to pink up. Once we flipped them over, we doused them with fresh orange juice and let the shrimp bubble away in that sweet acid until they were just cooked through. To bring in that timely summer flavor, a chopped tomato and shreds of basil leaves are added at the end just to warm through. As it was fairly saucy, we served this over a bed of nutty brown basmati rice, cooked using the no-fuss method that I've really taken a liking to. Orzo, quinoa or any other of your favorite grains would also be a good choice to serve this with. With such bright flavors and a mild kick, we both thought this was a solid dish and a snap to prepare - I'll be sure to remember this light recipe when we want something tasty and quick!

Sunday, August 10, 2008

It's getting corny around here...

A rousing end to the week with a total of 8 new recipes for us. I'm pretty sure you could guess that those Peanut Butter and Fudge Brownies with Salted Peanuts were one of our top favorites this week, but that Egg, Ham and Spinach Pizza and Sausage and Feta Hand Pies were not far behind.

Guess what has finally hit the markets up here? Sweet-as-a-sugar-cube Minnesota grown ears of fresh corn! Maybe I'm crazy, but I get pretty excited when those husky wrapped cobs, studded with milky golden kernels, have grown enough to finally be ready to hop in my belly! You can be sure I've been plenty busy cleaning, stripping and freezing the kernels so we can enjoy that summery flavor in the dead of winter. You can blanch the ears of corn first if you were to do the same thing, but when it is as fresh as this, I usually don't bother. Before I packed the bags away, I snuck out a heaping cup so I could make this Fresh Corn and Basil Tart tonight.

While there is plenty of corn in the filling, we tied that flavor into the crust by using equal parts flour and cornmeal for the dry ingredients. Due to the cornmeal's firm texture, the mixture will be a little moist at first - to give it time to absorb some of the liquid and firm up, the assembled crust needs to rest in the refrigerator before using it.

Once the dough rested, we easily patted it into one of those nifty tart pans that have a removable bottom. The crust needs a head start to cook completely, but before we placed it in the oven, we lined the top with foil and weighed it down with dried beans to ensure the bottom didn't bubble up or crack during this process. As that was in the oven, we threw together the simple filling consisting of fresh corn kernels mixed with half-and-half, a couple eggs and a handful of torn fresh basil.

The filling was moist, but firm enough to get clean slices, while the crust was sturdy enough to pick up a slice without falling apart, yet our forks could easily glide through the tender bottom. The crust also had a pleasant crunch from the rough cornmeal. Juicy ripe tomatoes are also starting top pop up in the market along side the corn, so we finished off the slices with halved fresh cherry tomatoes and of course, a sprinkling of torn basil leaves. While I'm sure you could do some preparation a head of time, I highly suggest preparing this on a night where you know you will have plenty of time (this is why I chose a Sunday to make this!) as there are quite a few steps and resting times. However, Jeff and I both thought it was worth the time and effort!

And by the way, I've burned my arms too many times trying to push the removable bottom from the tart pan while wiggling that hot outer ring away from it, but this time I finally smartened up and just set it down on a ramekin. Took me long enough!


Saturday, August 09, 2008

Smacking down a craving...

I was in the mood for decadence today... I thought of different cakes, cookies or other assorted goodies we could make, but I kept coming back to one thing - brownies!

I've said frequently that one of my favorite combinations in sweets is chocolate and peanut butter - that is exactly what I found in these insane Peanut Butter and Fudge Brownies with Salted Peanuts.

The base of these bars is a devilish layer a decidedly fudgy chocolate brownie, generously studded with coarse pieces of salted peanuts. To really electrify the chocolate flavor, we used a mixture of bittersweet chocolate and unsweetened chocolate that we backed up with a dose of instant espresso powder. The powder doesn't make them taste like coffee, but it seems to excite the chocolate, allowing its flavor to blossom and grow. When you test for doneness, you are looking for no raw liquid batter, but you don't want the toothpick to come out clean - moist crumbs attached is what you want.

While these dark brownies cooled, we prepared a peanutty frosting by combining chunky peanut butter with a few tablespoons of softened butter, confectioners' sugar, a dash of salt and a sprinkle of fresh grated nutmeg. It is somewhat thick at this point, so a bit of milk is added, along with vanilla, to slightly thin it out, allowing it to spread well. These peanut butter frosted brownies were approaching decadence, but ached for another layer. So, to add that killer final touch, we melted bittersweet chocolate with butter and poured it over, creating a thin slick of richness on top. While it is liquid-y enough to pour over, the intense mixture does have some body to it, allowing you to make a design on top. I used an off-set spatula to spread it smooth, then swirled it back and forth to create those ripples you see.

Because of the toppings and fudgy quality of the brownie, you'll want to allow enough time for the bars to chill before cutting them. However, I found that we both liked the flavor best when they had come back to room temperature versus eating a piece right out of the chilly refrigerator. If you have a burning desire for a potent chocolate and peanut butter treat like I did, these wicked layered brownies satiated my fierce sweet tooth, at least for a little while!

*Looks over at the clock* I think it's treat time again - care to join me in this indulgence?

Friday, August 08, 2008

Eggs on toast... err I mean pizza!

Another Friday... and guess what I made for us? Yep, another pizza! Woo! Fourth in a row and Jeff couldn't be happier as he would eat pizza breakfast, noon and night if he could. Although, he was quite worried when I read off the title of this Egg, Ham and Spinach Pizza - I think that freaked him out a bit... hee hee!

Of course I threw together our favorite dough again - however, if you really don't feel like giving it a try (it is so easy though!), you could use one of those thin pre-baked crusts for this pie. Because the pizza was not going to take very long to cook the toppings, we did give the crust a head start on the stone so it wouldn't take long to get crispy once it was assembled.

A generous grassy layer of shredded tender baby spinach leaves went onto the crust, followed by a drizzle of olive, a light sprinkling of salt and fresh ground black pepper. Sliced prosciutto comes next - I know it is already quite salty, but with the amount of spinach used, I felt the need to lightly season it before continuing on. A shower of fresh grated asiago cheese is added along with three full cloves worth of thinly sliced garlic being sprinkled on top. Jeff was doing good up to here and then he cocked his eyebrow and said "Where the heck are those eggs you have on the counter going to go?". Without saying a word, I turned around, grabbed a ramekin, cracked the egg and just poured each golden yolk in its own little quadrant on the pizza! His only response was "I see...." - humph!

If you are worried about the whites running away from you, you could make a little nest in the layer of spinach to ensure it stays contained. I slid the full pizza back onto the stone and let it cook long enough just to set the whites, finish crisping the crust and let that luscious cheese melt. I thought this was excellent - the spinach wilts slightly, anchoring the pizza with an earthy feel, while the warmed prosciutto and garlic released their rampant flavor over the entire pie. The yolk was still soft enough to ooze, cutting the salty nature of the ingredients below it, as its golden richness flowed like a small stream on top. Jeff's reaction - Eggs on pizza? I'm in love!


Thursday, August 07, 2008

Still have access to fresh strawberries and rhubarb?

Fresh, light and filling, without feeling stuffed to the brim... that's the best way I think I can describe how dinner and our dessert felt tonight. I could start with dinner, but this Meringue-Topped Strawberries and Rhubarb dish I made for dessert was much more fun!

Underneath a fluffy layer of airy meringue are chunks of rhubarb and fresh strawberries. As the rhubarb is much more fibrous than the strawberries, the ruby stalks are gently stewed in their own juices in a few individual ramekins. To take an edge off the tartness, the rhubarb is first tossed with granulated sugar and for a mysterious tingle on the tongue, a bit of grated fresh ginger is added to the mix. Besides sweetening the rhubarb, the sugar helps cajole the juice from the sturdy stalks, leaving them tender and soft. Once the pieces reach this point, hunks of fresh strawberries are tucked in between the rhubarb and left to sit while you whip up the meringue.

The meringue is a simple combination of egg whites, cream of tartar and granulated sugar. To get the best volume for your buck, you'll want the whites to be at room temperature with the bowl and beaters sparkling clean. I know not all meringue recipes call for cream of tartar, but I like to add it just for that extra dose of stabilization. Once the whites were firm, glossy and held peaks, we added dollops of the light-as-a-feather topping over the juicy pieces of berries and rhubarb. You could spread the meringue smooth on top if you like, but to give some visual interest, we used a small off-set spatula to create small spikes and peaks on top. If you have a handy kitchen torch on hand, feel free to brown the meringue away with that... I don't, so we just stuck the ramekins back into the oven and let the heat inside work it's magic. Either warm from the oven or served at room temperature, this refreshing dessert is one way to take advantage of the gorgeous berries and rhubarb before they begin to vanish from the markets! PS - The egg whites do not get fully cooked using this method of creating the meringue, so if that concerns you at all, feel free to use a pasteurized egg or even those dried egg whites commonly found in the baking isle of your local market.

Just because I talked about that dessert first, doesn't mean that this healthy Whole Wheat Fusilli with Pistachio Pesto we had before that was any less tasty. I know... another basil recipe - surprise! I can't help it as the plants are shooting up like no-one's business with this beautiful weather we have been having!

While you are left with having to clean up the food processor afterwards, the speed that this pasta dish comes together makes up for it! As we waited for the corkscrew pasta to cook, we dirtied up our food processor with a twist on pesto. While I love using buttery pine nuts, this recipe calls for the use of toasted nutty pistachios instead! I've used walnuts and almonds before with successful results, but the depth the pistachios added was a nice touch.

The pesto is a little lighter since it isn't as heavy on olive oil as some, but if you prefer it to be a touch more oily, you could certainly bump that amount up. Because of this, the pesto is fairly thick... however, a bit of the starchy cooking liquid from the cooked pasta will thin the sauce out without giving it a watered-down flavor. For a burst of raw freshness, halved cherry tomatoes also receive the pleasure of being tossed into the pesto and pasta. To add another punch of pistachio, crunchy chopped pieces are scattered on top as the finishing touch to this speedy dinner.

Wednesday, August 06, 2008

Just a few simple ingredients...

I know I used to be someone who was afraid to even think about making homemade pie dough a few years ago... I mean, why go through all the work and have it not turn out when there are a few tasty ones you can buy already prepared? However, it doesn't need to be scary at all if you follow a couple tips!

I needed to make a batch of Pâte Brisée (fancy name for a basic butter pie or tart dough) so I could assemble these Sausage and Feta Hand Pies for our dinner tonight! The dough for these hand pies can be used for savory or even sweet recipes -I needed all of it for our recipe tonight, but it also makes enough for a double-crusted pie or two 9" pies. If you do decide to try it out for a sweet dish, I suggest adding a teaspoon of sugar to the dough.

The key to this pie dough is to make it cold and bake it hot - use well-chilled butter and icy water. I like to use our food processor just because the dough can be made in about a minute, but you can cut the butter into the flour with a pastry blender or your fingers and stir it together by hand. As you work the butter to the flour, you want the pieces to be the size of coarse crumbs with a few larger nuggets to make sure the dough is tender and flaky. Add just enough water (keep the ice bits out though!) so the dough is moistened, but not wet - it may look a little sandy, however if you squeeze a piece in your hand, it should form a clump. If doing this in the food processor, it should take less than 30 seconds - you don't want the flour mixture to form into a ball; just mixed enough to distribute the liquid.

By now the butter will have softened a bit, so you'll want to divide the dough and form each into flattened rectangles to be placed into the refrigerator to firm the butter up. Why this specific shape? Well, you'll eventually be rolling the dough out into a large rectangle, so you might as well start that way! If you would be using the dough for a pie, shape it into a disc instead. Flattening the dough allows it to chill down faster. This dough also keeps well - make a full batch, even if you only need half of the recipe, and keep the extra well-wrapped in the freezer to use at a later time!

While we waited on the dough to chill, I started on the savory filling to be stuffed inside the dough. After I browned and crumbled a few links of Italian turkey sausage, I started softening an onion - after a couple minutes, we added thinly sliced bulb of fresh licorice-y fennel and a sprinkling of crushed red pepper. To add some moisture and flavor, chopped ruby-red plum tomatoes were tossed into the tender vegetables and allowed to cook until their acidic juices released. Now, you've done all that work to keep the dough cold, you don't want to add a steaming hot filling to it! So, this mixture needs to cool down completely before you begin the assembly process. Only one problem with this, at least for me, I couldn't keep my spoon out, taking "test" bites, to see if it was still too warm! Grr!

To brighten up the filling and add a salty bite, fresh parsley and a generous amount of feta cheese is stirred in. When the filling is ready, we started rolling out the dough - just work with one piece of dough at a time so it doesn't get too soft. It is not so much a problem here, but in other houses, we had an exceptionally warm working space in the kitchen and the dough would start giving me a headache by getting sticky. I solved this by filling up a bag with ice cubes and letting it sit on the counter to chill down the work surface before I began rolling... this also works well when rolling cookie dough! Once the hand pies are all assembled, we gave them a quick brush with a beaten egg - besides adding a golden shine, this also allows the crunchy fennel seeds we scattered on top to stick and tie in with the flavor from the filling.

After being baked hot (425 degrees is sizzling!), the crust browned well and the filling remained juicy, thanks to those fresh tomatoes! The crust was excellent - light, tender and buttery, without being greasy, and the savory filling with those chunky pieces of sausage was excellent. Before even finishing his hand pie, Jeff asked to have this pastry for his breakfast tomorrow morning since they are not too large in portion size... good idea and I think I'll be doing the same!

Tuesday, August 05, 2008

Muffinpalooza...

After getting poked way too many times while seeing an allergist this morning (no reactions at all though!), I was more than ready to get some baking done for the Weekly Wednesday Treat Day!

Jeff wanted to bring in muffins this round, so in the interest of variety, I made two different kinds - up first are these Crumb-Topped Thin Mint Muffins.

Yes, I didn't mistype, we made muffins using those classic Girl Scout Thin Mint cookies! The recipe I worked from actually called for using Oreo's, but I had stashed a box of Thin Mints into the freezer (oh come on, I can't be the only one who does that!) that we had not busted into yet and it sounded like a good experiment.

Besides using those cookies, the preparation of these muffins is a little different as you cut cold butter into the dry ingredients, rather than creaming the butter and sugar or simply using melted butter or oil. We thought this gave the muffins a slightly more cake-y texture with a more tender crumb. After I tossed in about a stack of coarsely chopped Thin Mints and a small handful of miniature chocolate chips (I couldn't help myself!) to the thick, puffy batter, I caught myself gazing at the bowl, with a finger poised to take a taste, as it looked very much like soft cookies-n-cream ice cream! Then I reminded myself it was muffin batter and I'd rather eat a finished muffin.

To give the tops a tantalizing finish, we finely chopped a few more Thin Mints and mixed them with flour, sugar and a couple tablespoons of softened butter to form a crumbly topping. When they test done, be sure to let them sit in the muffin tin for about 5 minutes before turning them out - this cools them down slightly and I find they release easier. However, don't leave them longer than that or the bottoms will begin to steam and toughen.

As soon as I sunk my teeth through those minty nuggets on top, I think it only took a few seconds for me to polish off my muffin! Using all those cookies, I thought the muffins might end up being a bit too sweet... but only using enough sugar in the batter to give them structure, it actually wasn't too much! Sweet, yes, but not tooth-achingly so and you'll have the benefit of fresh minty breath!

The next recipe on tap, Banana-Macadamia Nut Muffins, used a more traditional and speedy version of preparation as the fat needed is simply melted when added.

This time I used the ripe bananas I had leftover and froze from making those cupcakes last Saturday - I set them in the fridge last night and mixed the meat of the banana with the juices that released as they thawed. To give this batter a little more depth, a combination of granulated sugar and dark brown sugar is used to sweeten the muffins.

What makes these muffins special are the rich and buttery chunks of toasted macadamia nuts studded in the muffin and as a sprinkling on top. A little fresh grated nutmeg adds some spice, but don't be tempted to add much more than we listed as it is a pretty powerful flavor. When testing for doneness of the muffins, you can use two methods - you can touch the tops of the muffins and they should spring back when lightly pressed in the center. If you don't want to do that, you could also pierce the center of the muffins with a toothpick and it should come out mostly clean with a few moist crumbs attached.

The texture of these was slightly more dense than the above, but they weren't heavy by any means. These dark honey-colored muffins are also quite moist, thanks to the generous cup of mashed banana. It does call for a bit of melted butter, but if you wanted to lighten them up, I think you could get away with using drained applesauce for half of the butter. I wouldn't mess with the nuts much as they add such an interesting and tropical flavor and if I would have thought about it, I think toasted shreds of coconut or a few pieces of diced dried pineapple would have complimented the muffins well! Having said that, I know that these nuts are fairly expensive, so if you really don't want to use them, I would love to try these again with dark chocolate chunks to play off the banana flavor! Don't feel like muffins? This would also make a delicious banana bread if baked in a loaf pan.


Sunday, August 03, 2008

Homemade sausage patties and savory chive waffles...

10 new recipes for us this week - our favorites this time were those Banana Cupcakes with Honey-Cinnamon Frosting, the Goat Cheese, Prosciutto and Leek Frittata and just because they were so easy, those Classic Ice Cream Sandwiches.

Jeff has been asking for a breakfast-for-dinner night, so we prepared these Sour Cream and Chive Waffles with Sausage and Spiced Syrup dish that had a very intriguing combination of savory and sweet.

We have had plenty of sweet waffles (we have even made them into cookies!), but I don't recall us ever making a savory version. What makes these waffles savory? The combination of onion-y chives and tangy sour cream! They do have a couple teaspoons worth of sugar, but that is more for even browning than sweetness.

Before we worked on those waffles, we got our hands dirty by making rounds of delicious homemade sausage patties! Lean ground pork, steak seasoning, whole fennel seeds, fragrant smoked sweet paprika and a handful of fresh chopped parsley. This meaty mixture does have a tendency to want to stick to your hands when working with it, so just keep a bowl of water nearby and dip your fingers in once in awhile and it will help. While they were busy cooking in a skillet, we warmed up pure maple syrup with a cinnamon stick and a couple whole cloves to let their flavors infuse, creating the spiced syrup.

Speaking of that syrup, I did need to sway a bit from the original recipe. Instead of the spiced syrup I ended up with, the recipe called for heating lingonberry preserves. However, I had no luck finding it after visiting three stores, so Jeff and I both agreed that maple syrup would work for us. If you do happen to come across some and want to make that sauce, warm up a cup worth of the preserves, along with the cloves and cinnamon stick we used, and add a tablespoon of lemon juice along with a splash of water to loosen the mixture up.

You'll end up with about three full batches of waffles, so to keep the others warm and crisp while waiting, heat your oven to its lowest temperature and just set the cooked waffles right on the racks. We both enjoyed the chive-flecked waffles with their light texture and savory nature, but those sausage patties stole the show! The little nuggets of fennel perked up the sausages with little bursts of anise flavor and the alluring nature of the smoked sweet paprika captivated my attention. If you are not a big fan of pork, you could switch that out for ground turkey or chicken to lighten the patties up. If you are a little adventurous and looking for a different take on waffles, this may just be the recipe for you!


Saturday, August 02, 2008

Let those bananas go extra dark for these Banana Cupcakes with Honey-Cinnamon Frosting...

Last weekend while we were at the market, I made sure to pick up a few extra bananas. I didn't need them until today, but I wanted to give them plenty of time for their their sunny yellow jackets to turn quite dark, letting me know that the sweet banana meat inside was aching to be used.

I used those extra-ripe bananas to make a batch of these Banana Cupcakes with Honey-Cinnamon Frosting. These cupcakes contain the spirit of banana bread, but are not quite as dense as you would find a typical loaf. They are also a bit more special as their crowns are covered in a luscious spiced up buttercream.

Depending on the size and ripeness of your bananas, I suggest picking up four whole ones to get the amount of mashed banana required. If you end up with a bit left over, don't let it go to waste - wrap it well and stick it in the freezer. Bananas will freeze quite well for recipes - you can either leave their jackets on or take them off, if desired. If you do leave them on, when you go to use them, let them thaw in the refrigerator and then snip off the bottom or top - then you can just squish out the juicy meat inside and you have instant mashed banana! As they thaw, they will release quite a lot of juice - however, do not throw this out! Mix that sweet liquid back in with the banana.

The frosting for these moist cupcakes is a simple mixture of powdery confectioners' sugar, softened butter, a drizzle of honey and a sprinkling of cinnamon. When it is first combined, the smooth frosting will have a darker tinge to it, but as it goes round and round in the the mixer, it will begin to lighten up as it looks in our picture. The small amount of honey brought a fantastic depth and I'm sure this will sound odd, but it seemed to help cut that extra sweetness of an easy buttercream like this. That whisper of cinnamon made the transition of frosting to the very banana-flavored cupcake feel seamless as it tied the two together and yes, we did use our favorite Vietnamese cinnamon as that is the only one I keep stocked in the pantry. We both commented that the cupcakes were almost on the verge of being a muffin because of the more open texture on the inside, but I do think these are still worthy of the cupcake title with that spiced buttercream on top!

Friday, August 01, 2008

Another Friday night pizza...

I sense a theme happening... for the third Friday in a row, we've made pizza! I'm all for a simple cheese or pepperoni pizza, but we have really been enjoying the unusual ones like that Nectarine and Prosciutto Pizza and the Malaysian Chicken Pizza we did last week.

While tonight's pizza isn't that unusual, this un-sauced Venetian Rolled Pizza isn't your everyday pizza either. Of course, we did throw together our trusty homemade whole wheat pizza dough for this pizza, but you could certainly use your favorite dough - I know many local pizza places will even sell you their dough if you ask!

After a few pulls and presses, I tossed about a cup of mozzarella cheese over the large naked circle of dough. Paper thin strips of prosciutto are then laid on top of the cheese - I gave an ounce measurement for the prosciutto, but just use enough to cover the top in a single layer as it can get fairly salty. Hand torn leaves of tender baby spinach are sprinkled on top, along with a couple pinches of crushed red pepper. Since we follow the rule of "more cheese please", another dose of shredded mozzarella is the final addition.

When you roll this stuffed pizza up, try and keep the dough tight as you roll it, pinch the seam well at the end and gently tuck the sides under. Pay attention to that bottom seam and pinch it together well - this will ensure all of those lovely fillings stay inside and do not blow out as the dough expands in the hot oven. To crisp up the dough and give it a golden crust, while also adding a little flavor, the assembled log in rubbed with olive oil. If you are overly sensitive to salt, you may want to skip the sprinkle on top of the dough as the prosciutto has enough as is, but both of us loved that added touch. Once baked, leave the roll be for at least 10 minutes - the cheese is quite molten and the pizza roll will not slice well when pipping hot.

I loved the layered look on the inside with the lighter crust, the pinkish prosciutto and the hint of green from the spinach. My basil plants needed to be left alone since I've been picking on them so much, but I think a few fresh leaves would be a nice addition to those circular layers too. While we had the slices (probably a bit too many!) with a side salad for a main dish, you could slice these up and serve with your favorite marinara as a striking appetizer.