Thursday, December 31, 2009

Out with the old...

and in with the new! Happy New Year!

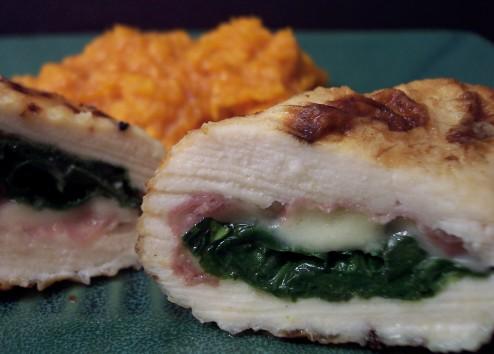
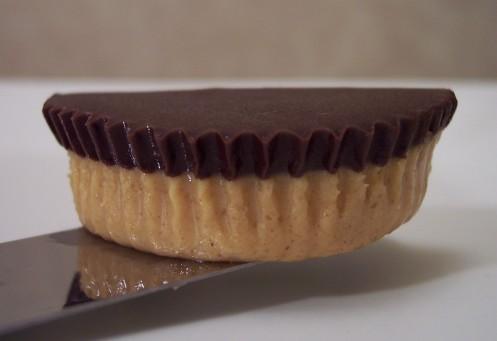
2009 was certainly a roller coaster, with many highs and too many lows... Jeff and I are definitely looking forward to a fresh new year. This year we prepared over 300 new recipes, which brings the total to a whopping 1,880 we have posted since we began this journey!

We thought we'd end '09 with a recap of some favorite savory and sweet recipes we prepared throughout the year. It was hard to keep the list compact because we were lucky enough to enjoy quite the bounty of fantastic recipes, but below are the few we chose (in no particular order). Here's a question for you! Did you get a chance to try any recipes from the site this year? What were your favorites?

Wednesday, December 30, 2009

Fontina-Stuffed Potato Skins...

Since we were having a repeat dish for dinner, it gave me time tonight to write up a post about these Fontina-Stuffed Potato Skins I made as a side a few weeks ago, but didn't get to talk about.

These are basically just twice-baked potatoes, except the creamy filling has been souped up a bit. I made the full recipe which calls for just over three pounds of potatoes, not because we were serving a bunch of people, but it would give us plenty to eat off for the week.

To get the taters goin', each one was baked in the oven whole until they were tender enough to easily glide a thin knife through their centers. Unless you have hands that can handle rocket-hot potatoes, give them however long needed to cool down until you can work with them enough to slice in half. When you go to scoop out the moist fleshy insides, hold back and don't try to get every last bit out - leave about a quarter-inch shell behind to give the skins strength to stand up.

To the potato innards, we smashed in milk, sour cream and a touch of buttermilk for its complex tang. When you get the texture you like (just barely smashed or fairly smooth), plenty of shredded fontina, finely chopped chives, a couple pats of butter and of course, an ample amount of salt and fresh ground black pepper, was stirred in to ensure the filling was well-seasoned and flavorful. If your filling is on the smoother side, you can scoop the mix right into a pastry or zip-loc bag, snip off the end and squeeze it right into the shells. However, if you keep the mix on the coarse side (which we did), a spoon will be your friend to get the filling in.

Packed close together on a baking sheet, the potatoes were sprinkled with a shower of nutty Parmigiano-Reggiano before going into the oven to bake. By the time these plump potato boats had almost completely warmed through, the cheese on top melted, but had not taken on much color. To rectify that, we flipped the switch on the broiler and gave them a few extra minutes to finish coming to temperature and get that lovely golden brown crust on top.

You don't need to bake these all at once if you want to hang on to the extras - assemble them up to the point before they go into the oven (holding back on the Parmigiano), but then cover them and keep them chilled in the refrigerator for up to two days. When you want the rest, bring them out and let them sit for half an hour, scatter the tops with the rest of the cheese and then bake as called for.

Tuesday, December 29, 2009

Sesame-Orange Shrimp...

I wish I would have doubled the recipe we had for dinner, Sesame-Orange Shrimp - it was suppose to make four servings, leaving us with two for tomorrow. However, Jeff and I couldn't manage to stop eating these and finished the whole darn thing tonight ourselves!

Before tossing the shrimp in a skillet, they were first coated in a light batter made from cornstarch, a couple frothy egg whites and a combination of black and white sesame seeds. You can use either the light or dark seeds, but since I happened to already have each in the freezer, I figured using both would make for a more dramatic appearance. If you've never tried black sesame seeds before, they are not all that different in taste, except they have a slightly more earthy note to them.

Once they go into the hot skillet, don't stray from the stove as the little guys cook in a flash, taking only one or two minutes per side. Because we had a mess of shrimp to cook and we didn't want to crowd the skillet, we did cook these in two batches. When the second batch was out, we started the lip-smacking sauce by tossing in fresh orange juice, a generous splash of dry sherry, a couple glugs from our bottle of soy sauce and a pinch of sugar to balance.

When the sauce had reduced and thickened slightly, we added the shrimp back in to thoroughly coat and warm through. Served over a bed of nutty brown basmati rice, cooked using our favorite no-fuss method, we added a bit of freshness to the plates with a sprinkling of thinly sliced scallion on top. With their ethereal-like crust and wicked orange sauce, it wasn't long before out plates were barren and we both went back to finish off the rest.

As I have some free time tomorrow morning, I think my plan is to run over to the market, pick up more shrimp and since this was done in less than than half an hour, make it for lunch tomorrow! This time though, I think we'll be having a salad of steamed snow peas on the side, drizzled with a touch of toasted sesame out, to try and hold us over from eating the entire skillet-full again!

Sunday, December 27, 2009

Linguine with Garlic and Breadcrumbs...

I had to be sneaky when buying an ingredient for tonight's dinner, Linguine with Garlic and Breadcrumbs. It sure sounds innocent enough, but I know Jeff would have thrown down the veto stamp if he knew about the tin of anchovy fillets it called for. Thankfully, he was too enamored sifting through the Christmas clearance that I checked out before he knew about the dirty little secret in the cart!

You'll want to make sure all the ingredients are prepped and ready as once you get this started, it will be ready to eat in no time! Using a single pot for the whole dish, the first job was to get the thin linguine pasta prepared - be sure to use the shortest cooking time listed on your box as you want to keep the pasta al dente. Even if you like your pasta without a bite in the center, you'll be adding the pasta back into the pot to warm through with the sauce, so it will have more contact with heat.

After draining the pasta, the same pot was put back on the heat, with a couple spoonfuls of the oil from the tin of anchovies and three cloves worth of minced garlic inside. If you don't have enough oil or are concerned that you'll end up with too much anchovy flavor, replace that oil with quality extra-virgin oil. When your nose catches a whiff of garlic, it's time to add in several anchovy fillets, which thankfully melted into the oil in just a few seconds. Since this was our first experience working with the little buggers, I decided to hold back and only add in six, but if you're more accustomed, eight or ten would certainly be appropriate. I imagine one could also use the paste version if you already have it - start out with a tablespoon or so.

Now that the anchovies have almost completely dissolved, the pasta was tossed back into the pot, along with fresh grated lemon zest and enough pasta cooking liquid to create a thin sauce that allows the pasta to move freely without being soupy. Set aside a full cup of the cooking liquid, but you may not use it all - we ended up adding just about three-quarters worth. Once seasoned and plated, there was just one more ingredient to add contrasting texture - toasted breadcrumbs!

I was admittedly nervous as Jeff had no idea just what was hiding in his plate of pasta and I think he knew something was afoot when I kept looking to see his reaction. His first couple bites resulted in an eyebrow raise, then use of his fork to move the pasta around to see if he could see what was different. He said "Alright, what did you do? I can pick out the lemon and ample use of garlic, but I can't place this saltiness that is kind of nutty and I don't see any nuts!". I said "Just keep eating and tell me if you can figure it out.".

He did, and in fact his plate ended up completely clean... so I figured it was time to to let him in. "Hee hee! You just devoured little fishes! Yep, there were anchovies in that plate-o-pasta.". And what did I get in return? "Oh, really? Neat! When can we do that again?".

I'm sorry... what? Who are you? I couldn't believe it! I figured he wouldn't have taken it so well, but darn it all if he was pleasantly surprised. Talk about taking the wind out of my sails!

Oh, don't get me wrong as this opens up a whole new field and I'm happy about that, but I can't help feeling a little satisfying evil when I get a new ingredient past him that he is certain he doesn't like. Oh well - on the table in probably under 20 minutes, I guess I can see us making this pantry-staple dish now (well, I guess if you keep anchovies handy...) on hectic weeknights when we just don't have the time or energy to do anything more elaborate.

Thursday, December 24, 2009

Merry Christmas 2009!

Merry Christmas 2009!

Jeff and I just wanted to wish everyone a very happy and safe holiday. Slow life down and take some time to enjoy those precious moments with friends, loved ones or anyone that is special to you! We are in the middle of a very large winter storm that is bringing Minnesota to a halt - so far we've gotten 8" of snow, with another 8" to 14" coming tonight and through the day tomorrow!

So, needless to say, we're going to hunker down here at home with Gus and forgo the tradition of loading up the car and driving around the neighborhoods to look at lights. Gus hasn't ever had to deal with this much snow at once and he is having a blast running around outside - though, he has gotten "stuck" a few times and needed rescuing where we haven't shoveled him a run in the backyard! We took a few snaps of him running around and thought we would share...

Weeee! Look at me go! I'm super doggy!

Help me! I've fallen and can't get up!

What are you talking about? I wasn't stuck... I was just taking a break!

We'll be back to business in a couple days, in the meantime, take care and enjoy the holiday feasts!

Wednesday, December 23, 2009

Apple-Bacon Pancakes with Cider Syrup

When we have pancakes during our breakfast-for-dinner nights, a side of crispy bacon slices is never far behind. However, we picked another side to go with tonight's pancakes because the bacon managed to work itself right into them, creating these Apple-Bacon Pancakes with Cider Syrup!

To make sure the syrup would be ready as soon as the pancakes came off the griddle, we tuned our attention to making that before we got involved with the batter. Using a half cup of apple cider to start, we sweetened the pot with a bit of brown sugar, then tossed in lemon juice for brightness and just enough cornstarch to tighten the cider enough so it will grab onto the pancakes. As soon as the cider bubbles, you'll see the cornstarch has done its job as the syrup will thicken quickly - set the pot aside until you are just about ready to eat.

The batter for the pancakes utilizes soft whole-wheat pastry flour and all-purpose flour to bump up the nutrition, but of course, using entirely all-purpose flour would be fine. Because we're juicing up the batter with diced apple (Honey Crisp is this case) and drizzling the sweet syrup on top, there is only a single tablespoon of brown sugar added into the dry ingredients, which helps add to the color and structure of the pancakes.

Tangy buttermilk, along with an egg and egg white, moistened the flour mixture to make the thick batter, which was then ready for the apple and crumbled crisped bacon. Because the batter is on the thick side, once you dollop the batter onto the hot griddle, you'll need to take the back of a spoon or spatula and gently work the batter out into a rough three inch round as they won't spread out enough by themselves. When you get your last pancakes on, nudge the heat back on underneath the pot of syrup and it will be just a minute or two before it comes back to temperature for a warm, shiny topping.

If you want to be extra decadent (and perhaps a little naughty), you can use the leftover bacon grease to lube the griddle top, but we went with a drizzle of canola oil to be good. The pancakes themselves are not as airy and light with the weightier add-ins, but that isn't to say they were brick heavy. What we ended up with was hearty rounds that had an intriguing salty/sweet bite, which then led to a whisper of smoke from the bacon that really drew us in. The syrup really hit the spot, but while Jeff thought it just right, I found it a bit on the lemon-y side - if you're sensitive to that, cut the juice down to a teaspoon or a touch less.

Tuesday, December 22, 2009

Broccoli with Oyster Sauce...

I'm always looking for ways to perk up vegetables that we have as simple side dishes. Oftentimes, plain ol' roasted or steamed broccoli makes its way onto our table when we don't have a ton of time. After tonight though, this snazzy Broccoli with Oyster Sauce may be first dibs when we have those green florets languishing around in our refrigerator.

In just a tablespoon of heated canola oil, we tossed in a large head's worth of broccoli, first sliced into long, slender pieces, along with a couple cloves of smashed garlic to start sizzling away. To help the broccoli cook through, just enough water was added, which started bubbling right away, creating a steamy environment when the lid was placed on. This shouldn't take too long to do, depending on the thickness of the broccoli stems - if you're unsure if it has cooked enough, err on the side of being underdone. I know I'd rather have a slightly crunchier piece of broccoli than a mushy one!

To bring the salty, complex zip that makes this dish special, a generous amount of the viscous oyster sauce was mixed with soy sauce, cornstarch, water and a pinch of sugar, then stirred into the skillet to coat. The heat in the skillet activates the cornstarch quickly, allowing the slick sauce to tighten up just enough that each crisp-tender floret gets a piece of the action.

Just as before, Jeff was a little nervous about a "fishy" accent as the sauce right out of the bottle can smell a little strong (Jeff has another description for it... we won't go there!), but that didn't translate into the finished dish. We did think there could be two additional ingredients that might have been a nice compliment to this - perhaps a bit of minced fresh ginger and a drizzle of toasted sesame oil for a little bang at the end. If you need this to be completely vegetarian, we have seen "oyster-flavored" oyster sauces, which uses more of a mushroom base, but we've never tried any of them.