Tuesday, May 31, 2011

Black Forest Cookies...

I was very tempted to scrap the treat day baking when I realized just how hot it was going to get outside today. The average temperature is supposed to be around 80 degrees, but we shot right past that and ended up just under 100. I guess that shouldn't be completely awful, especially after our stint in Phoenix, but it is as thick as mud out there with humidity... it felt like I was opening a heated oven when I let the pups out into the backyard! I decided to keep with tradition though and just put the AC to work to crank out these Black Forest Cookies.

The dough for these cookies is decidedly decadent, with a triple threat of chocolate using melted bittersweet, cocoa powder and stocky pieces of semisweet. The recipe didn't call for any, but I did add a splash of vanilla to the dough while mixing - it also didn't specify sweet or tart cherries. We went tart since that's what we have - I'd suggest the same if you make them, although I don't think it would be that big of a deal if you went sweet.

You should note in the recipe that I don't suggest preheating the oven before you begin the process - once the dough is combined, it will need a good half hour or more rest in the refrigerator to firm up, leaving you plenty of time to warm the oven. There's no point in having it blasting away when it won't be working (especially when its already way over 90 degrees outside!).

When you pull the cookies out from the oven, don't try to transfer them off the baking sheet for at least 4 or 5 minutes as they are delicate when they are hot. The directions did state to move them after a minute or two, which I did, only to see the sad cookie fall apart through the cooling rack! After leaving the rest to sit for a good 5 minutes before going near them, they held together as one would expect.

Close to brownie-like, these thick cookies are dense, moist and chewy, with chunky pieces of tart cherries and an abundance of those semisweet chocolate drops in each one. The baking time is important since you won't want to over-bake these for the best texture (moist vs dried out) - if you're not comfortable with the "until the edges are firm" is as far as doneness, let me suggest baking a test cookie or two to nail down the time before loading up a full tray.

If you touch the edge of the cookie it should be firm, but it shouldn't look like it is darkening more than the rest. The tops will be shiny and look set, but if you were to stick a toothpick in the center, it will look damp and underdone - this is what you want! As noted above, the cookies will finish cooking through the residual heat of the pan before moving them to the wire rack to cool.

Tuesday, May 24, 2011

Sticky-Fingers Bars...

Yikes! A week has raced by already since our last post... I miss being able to spend the time writing up the dinners and treats we make each day. Such is life these days, especially with the extra time we're having to pay towards Dora.

She's a great pup, but has become a bit protective of us around strangers and other dogs (to the point of being aggressive sometimes!) - since we have no idea about her history before we rescued her, we figured it would be best to nip this in the bud as quickly as possible. We've been working with an excellent and innovative trainer we found in our area and Dora seems to be taking to the teachings quite well - she is one smart cookie!

Since it is Tuesday after all, you can bet I did get a goodie made for the Weekly Wednesday Treat Day we do for Jeff's co-workers. This one is a real doozy that I found while browsing foodgawker looking for inspiration and with a title of Sticky-Fingers Bars, how could I dare say no? Especially since you know of my infatuation with chocolate and peanut butter!

To get these dangerous treats going, the base was concocted by simply smashing together butter, sugar and plenty of sweet vanilla with a couple scoops of flour and chopped salted peanuts. The consistency should be a little tacky, but not sticky - it should also not be dry and crumbly either. I was able to press the dough into the baking pan without it grabbing hold of my fingers or peeling out of the pan - if you do find yourself struggling with this, lay a piece of plastic wrap on top of the dough and let that barrier help you smooth it to an even layer.

To ensure the shortbread crust bakes through, it will need to be pre-baked before topping it - slip it into the oven and let it go just until the top begins to turn golden brown. Once pulled out and left to rest for a few minutes, the crust is littered with a surprise ingredient - thinly sliced Snickers Bars! Not one bar, not two or even three - you'll need four full bars (though if you're anything like me, have a fifth bar around as a few slices may have accidentally ended up in my belly while cutting them!) to cover the top.

Rather than dirty another bowl, I did use the same mixing bowl that we made the crust in to prepare the rich filling that covers the candy bars - less dish washing is always a plus! Consisting of eggs, granulated sugar, caramel-y Golden Syrup, a couple tablespoons of melted butter and a heavy glug of vanilla, the thick mixture is poured over the sliced snickers and baked until completely set. As in, the filling shouldn't have a loose jiggle when you take the pan out of the oven. If you'd rather not purchase the syrup (it can be pricey, but it is spoon-worthy good), swap it out for light corn syrup.

If that already was not enough, there is one more step to take these bars out of the galaxy - a smearing of slick creamy peanut butter, more of those crunchy peanuts and a psycho drizzle of melted bittersweet chocolate to finish them off.

Now, I won't lie - these are diet busters. However, let me assure you they are worth every. single. lick-your-fingers-clean. calories they might have.

Recipes

Tuesday, May 17, 2011

S'mores Cookies...

It's getting to be that time of the year when marshmallows, graham crackers and chocolate bars go on sale as everyone becomes a kid again and sets out to make those gooey layered treats over a campfire, or even over your stove if so inclined! Seeing as that would be fairly hard to replicate at an office (although I guess a microwave could work in a pinch!), we decided to go with that theme in mind for the Weekly Wednesday Treat Day, making these S'mores Cookies.

While there are no actual graham crackers used in the dough, the recipe does do a little magic to try and impart a similar profile, using ground rolled oats (done in the food processor), along with whole-wheat and all-purpose flours. If I had any, I would have probably swapped out the whole-wheat flour for graham flour, but alas our freezer was bare - we used the last of it making yet another batch of those Homemade Graham Crackers a few weeks ago.

Scented with cinnamon and laced with brown sugar and plenty of butter, the cookie dough is scooped out onto lined baking sheets, then each ball is adorned with a solid, chunky block of bittersweet chocolate. Use a good-quality bar of chocolate for this - bittersweet if you can, which will help cut through some of the sweetness. However, if bittersweet is too strong for you, knock it down a notch by using semi-sweet. I wouldn't go with milk chocolate though - that may make the cookies a bit on the cloying side and not as enjoyable. You still want to be able to taste the wheat-y goodness of the cookie without being overwhelmed by sugar.

So how does the classic marshmallow ingredient that goes into S'mores come in? Once the cookies have baked, each is given a hat by laying a halved large mallow right over the dark pool of chocolate in the center. To give the pillowy topping a toasty element, the cookies are lined up like little soldiers and blasted under the heat of the broiler for just a few seconds. I do have one important note - be sure you don't take your peepers off these for a second when they go back in as the marshmallow can go from golden to blackened in the blink of an eye! If you happen to have one of those hand-held kitchen torches, use that instead and go to town!

I do realize that these fun treats probably won't have the same oomph as they did when they came fresh out of the oven, but by the time we got to trying them they were completely at room temperature and we still found them crazy good. I may, however, have Jeff send a suggestion out with his e-mail that if they want the true experience, to nuke them for just a few seconds to remelt their chocolate centers and give the marshmallow a little puff.

Saturday, May 14, 2011

Apricot Cheesecake Bars...

With a few packs of cream cheese staring at me every time I open the refrigerator door (hello sale plus coupons!), I've been meaning to dive in and start using them. While they do last for some time unopened, we haven't made a dessert just-for-us in awhile and I figured finding a recipe that used cream cheese would be a good start. Of course cheesecake came to mind, but I wanted one a bit different... like these Apricot Cheesecake Bars!

A traditional graham cracker crust as the base was what the recipe called for, which sounded like a good match as is, but I had to go and put a slight spin on it. Instead of heating the butter only to melt it, we took it a step further, letting it turn golden brown and intensely nutty. Do this on the stove slowly as it can go from nicely toasted to an unpleasant bitterness in short order - I prefer to use a stainless skillet for this as its not as easy to track in a dark nonstick skillet. I wouldn't say that you have to do this, but it did lend a welcomed complexity.

When you add the crumbs into the baking pan to line the bottom for the crust, you could use your fingers to press it together. However, if you use the flat bottom of a smaller measuring cup, it will be less messy, move a little quicker and tend to be more level. The crust does need to be pre-baked at this point, so be sure to plan in enough time for it to set and cool

Before the cheesecake filling is made, there is another step to these bars - a quick homemade apricot jam! Sliced fresh apricots, granulated sugar and a dash of salt are brought to a bubble, then left to simmer until the apricots begin to melt down and the juices turn notably shiny. To give the jam a smooth texture, the mixture is poured into a food processor and pureed with a splash of lemon juice and water. The latter is used not only as an acidic brightness, but the apricots needed a little help to buzz around in the processor.

For a tangier bite to the softened cream cheese, it was whipped together with a generous scoop of sour cream before being blended with the remaining filling ingredients - sugar, vanilla and a couple room-temperature eggs. You will want to be sure that the sides and bottom of the bowl are scraped down once or twice while blending to ensure the filling will be silky smooth. Spread over the crust, small dollops of the apricot jam are dropped over the top, then swirled in for a marbled effect. You will need to use your judgment on the jam - I held back a little as it looked like the amount would be too much, but you could certainly use every last drop.

As far as baking is concerned, let this stay in the oven until the edges have puffed slightly and the center looks set, yet still has a gentle wobble to it when the pan is given a couple taps. It may feel underdone, but by the time it has sat to cool completely, with an additional couple of hours in the refrigerator, it will come out just right. What is "just right"? For me, the bars should be firm enough to slice, yet yield with gentle pressure from a fork - soft and luscious. The colorful smears of jewel-toned jam on top are a bit sweet, but not so much it takes away from the apricot's fresh fruitiness. You could let these hang out in the refrigerator for a couple days or stash them (cut into bars) in the freezer if you need longer storage - we did the latter and thawed two a few days later. They were just as good, though the crust did come out softer.

Tuesday, May 10, 2011

Pork Tenderloin Roulade...

With a few extra minutes this morning before I went out to enjoy the day, I decided to assemble the protein that was going to go with tonight's dinner. Certainly you can prepare this Pork Tenderloin Roulade right before you'd like to make it, but we were going to be home a little later than I had originally intended and I didn't want to feel rushed later this evening.

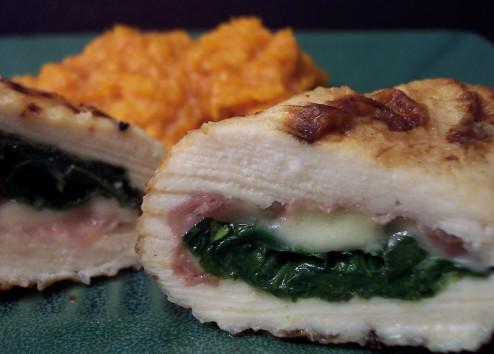
To allow all the fillings we were going to stuff into the tenderloin to fit, it needed to be reshaped into a big flat canvas. The easiest way to do this is to simply slice the pork in half, lengthwise, but stop short of cutting it in half. Once that's done, open the tenderloin up like a book, then use a mallet (or frankly, a heavy skillet would do the job too) to flatten the meat to an even 1/2" thickness. You could also do another method, called double butterflying, where you partially slice into the top and bottom thirds (opposite sides), then open the meat to flatten, but the first works just as well.

Crumbled goat cheese, toasted walnuts, fresh thyme and a couple chopped shallots, softened first in a splash of olive oil, are the ingredients sprinkled over the flattened piece of pork. If you like, use raw shallots for a more potent bite, but Jeff requested them cooked first - just be sure to cool them completely if using them this way. After rolling and tightly securing the pork with butchers twine (spaced around 1" apart or so), it was wrapped tightly and set in the refrigerator to chill while we were gone.

If you would be doing the same, be sure to take the meat out of the fridge for a good twenty minutes or so to take the chill off before cooking. The original recipe calls for pulling the pork when it registers around 155 degrees - which is ok, if that makes you feel more comfortable. However, for our preference, we're perfectly fine taking it out when it reaches 145 degrees and still retains a juicy and robust pink hue. Whichever temperature you do, my one request is that you please let the meat rest for at least 8 to 10 minutes before taking your blade to it - I'm sure you have heard or read this a million times now, but letting those natural juices redistribute into the meat makes all the difference.

The straightforward filling is definitely adaptable to your tastes - use a different cheese, switch up the fresh herbs or think about a different toasted nut for a revamped meal. We were thoroughly pleased though with this combination though - clean and simple, yet enough complexity to keep our taste buds interested after the first bite.

Tuesday, May 03, 2011

A trio of fantastic dishes...

I have three recipes to share with you today that have been sitting here, practically begging me to give them the attention they deserve on the blog. They each do deserve a post on their own, but I figured I better get them up before I forgot! We made a couple of these several weeks ago, but time is still slipping through my fingers faster than I care for. The weather outside is partly to blame - when heat of the sun's rays are shining outside, and I know back in Minnesota they just had snow the other day, I find it hard to keep myself holed up inside and not enjoy the warmth!

The first recipe, A Dozen Simple Bagels, came from one of our most trusted recipe sources. We've made a couple other bagel recipes over the years that were a bit more intricate, but this one was pared down in steps and came out just as good, though perhaps with a hare less developed flavor than one that has a refrigerated resting time.

If you don't have the non-diastatic malt powder for the water dunk step, simply replace it with brown sugar. The brown sugar has more sweetness than the robustness in the malt powder, but don't drive yourself bonkers trying to find it. The bagels were wonderfully golden and crisp on their outer shell, while the inside stayed true with a wicked good chew.

The next recipe is a ridiculous trip on brownies. Anna, whose been under the weather lately (we hope you get well soon!), posted these Killer Kahlua Brownies awhile ago and you can believe I eagerly printed them off as soon as saw them.

Moist and fudgy, without being too gooey, the brownies are decidedly decadent with a subtle coffee-like booziness from the Kahlua. I know subtle is fairly subjective, but we both agreed that it is a good way to describe the essence of each bite - there is just enough so you knew it was there, yet you wouldn't feel guilty sharing with a younger eater. We used white chocolate chips for a sharp visual contrast, but if you like nuts in your brownies, swap out those chips for chopped pecans.

The final dish I have to share, Savory Fig and Goat Cheese Tart with Arugula, was a real knock out.

While the toppings are superb for being so simple, what really made this tart was the rich crust, made from ground Marcona almonds, flour, butter and a generous drizzle of golden honey (and what made this even better was the fact it was all done in a single bowl using our trusty food processor!). If you've never had those almonds before, they are a real treat! The nuts have a more rounded shape to them, are not as crunchy and have a pleasant sweetness you don't normally find in the regular "California" variety of almonds) - they are also roasted in olive oil and then salted.

You don't need to have the fancy rectangular tart pan that we used either - a regular 8" or 9" tart pan would be just fine. Jeff was tempted to cut the Arugula out on top of his portion, but I urged him to just give it a try before tossing the salad off. The lightly dressed peppery greens bring a needed bite to cut through the richness, which we both (Jeff too!) appreciated.

Tuesday, April 26, 2011

Chocolate Chunk Cookies...

Jeff has been and will be in a few intensive meetings this week - he originally thought about skipping the Weekly Treat Day, but I thought bringing in a plateful of cookies might be a nice way to lighten the mood. He agreed - I zeroed in on a recipe I've had marked ever since I picked up that snazzy cookbook I can't keep my nose out of. These Chocolate Chunk Cookies are basically a rift on the classic, well-known Toll House recipe, yet seemingly injected with steroids.

When you have the buttery dough combined (if you have a scale, definitely haul it out for this recipe - I've included both gram and cup measurements), scoop the mass into a separate container or leave it right in the mixing bowl - cover, then as hard as this might be, stash it in the refrigerator and forget about it for a day. Believe me, I know wholeheartedly this is torturous, but trust me with the fact that you will be rewarded for your patience.

Why is this really that important? If you give the dough that aging time, the flour has time to absorb all the liquid-y properties from the butter and eggs, resulting in a well-textured cookie that has practically accelerated its own flavors into another level. Probably a little dramatic on my part, but I could taste the difference.

If you have a few exquisite bars of quality semi or bittersweet and milk chocolate that you've been wanting to use, break them out for these cookies. While I did use a bar of milk chocolate, I decided to use bittersweet chips only because I had a bag of excellent drops already in the pantry. I would suggest using a higher end brand that has at least 60% cocoa content to truly give these cookies that dark chocolate wallop they deserve.

I didn't look for reviews of the cookie before I made the dough, but I noticed how it seemed almost too light and sticky once it was thoroughly mixed. I searched around and found that the author posted the same recipe here, but the measurements for the both flours were a bit different. They ended up being about 1/4 cup off, so I went ahead and stirred the extra in a couple hours after the dough had been chilling out in the refrigerator - the texture definitely seemed better. If you'd like to try and match the dough to exactly what is listed in the cookbook, bring the all-purpose flour down to 140 grams (about a cup) and the bread flour down to 150 grams (again, about one cup). Let me know how they turn out that way!

Now, did this affect the cookie? I think so, but in the positive factor - they had some definite heft in the thickness department, but at the same time they were not too puffy or cake-y. The edges are crispy, while the centers stayed soft with a delightful sweet chew (thanks to the strong bread flour!). I think that if the extra flour would not have been added, the cookies may have spread into thinner, flat rounds - not what I had hoped for. I'm sure they still would have tasted wonderful, but texture can make all the difference!

Saturday, April 23, 2011

Couple of new recipes...

We've had some crazy weather out here - from cold snaps, to highs close to 90 and then there was that horrendous tornado outbreak last weekend. We didn't receive nearly as much damage as they did closer to the coast, but it was pretty gnarly here. The garden did have a little setback due to hail, but it looks like most of the plants survived and have started growing again. Since that seems to be tending to itself, I have some time to share a couple new recipes with you today that we've made over the past few weeks.

The first recipe came about because Jeff spied a killer deal on a few pounds of pork (he's getting good at that!) from one of our favorite places to shop since we moved out here to Charlotte. I trimmed most of the cuts to store in the freezer, but saved out a few chops to make this Pork with Pomegranate Pan Sauce.

Quickly cooked chops, seasoned lightly with a modest rub of garlic powder, cumin, salt and fresh ground black pepper, gave us a base layer in the pan to create the sauce that made this dish. Finely chopped shallots groove in the stuck-on bits left behind in the pan, followed by a healthy splash of pomegranate juice and a scoop of granulated sugar. Also added is a tablespoon of dark balsamic vinegar, giving the sauce a tangy, bright bite.

Not only does this finish in a flash, making for a swift weeknight dinner, it plates well and is quite elegant. The sauce is sweet, yet balanced by the sharpness from the shallots and a subtle snappy tartness that made it pop on the tongue. Do keep on eye on the chops - depending on the thickness, they can become over-done rather fast. If you are unsure, keep an instant read meat thermometer close by and pull the pork out of the pan when they reach 145 to 150 degrees - at this temperature, you'll keep the meat tender and juicy, while not having to worry about it being too underdone. The pork should retain an ever-so-slightly pink hue in the center when sliced into.

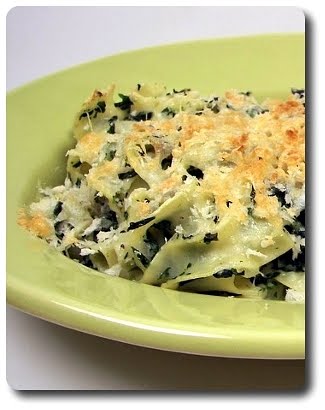
The other recipe we made in the past couple weeks was this hearty Spinach-and-Egg Noodle Casserole, which could be served either as a side, filled to the brim in a ravishing family-style baking dish, or as we did, in individual oven-safe crocs for a meatless main dish.

I did modify the pasta amount from the original recipe - it called for a full pound of egg noodles, which sounded a bit heavy handed for the amount of sauce. Bumping it down to twelve ounces worked well for us, giving the curly noodles room to groove, yet not end up soupy. The sauce, made with milk and thickened with a pale roux (butter and flour, cooked just enough to remove any raw pastiness), is also given a boost in richness by whisking a bit of the hot mixture into a couple egg yolks. This brings the temperatures of the yolks up slowly, allowing you stir them back into the hot pot and keep that silky consistency, preventing a scrambled mess.

Already cooked spinach, onions and garlic, along with the al dente cooked pasta, are stirred into the warm sauce, then the whole shebang is portioned out into individual serving dishes. For a textural bite, the tops of each dish are sprinkled with a sharp concoction of panko breadcrumbs, nutty Gruyère and salty Parmigiano Reggiano cheese. The assembled dishes won't need to bake for long - just a quick trip under the broiler to turn that top golden, cheesy and crisp.

As a meat-free main dish, Jeff and I were completely satisfied when we scraped the last bite out of our portions. Again, you could serve the pasta up in a large help-your-self casserole dish, but we also think you could finagle this into a slick side dish by throwing on a more personal spin. Simply divvy out the noodles between the wells of a 12 cup muffin tin and bake them off that way. You may want a bit more of the breadcrumb topping though, giving each portion a generous sprinkling as some may consider this the best part!

Tuesday, April 19, 2011

Chocolate cookie repeat...

There is a cookie recipe that we made way back in 2005, shortly after we started this website, that we have sent to friends and family, made for neighbors and prepared for a few bake sales over the years since then. What we haven't done was make them again for the Weekly Wednesday Treat Day!

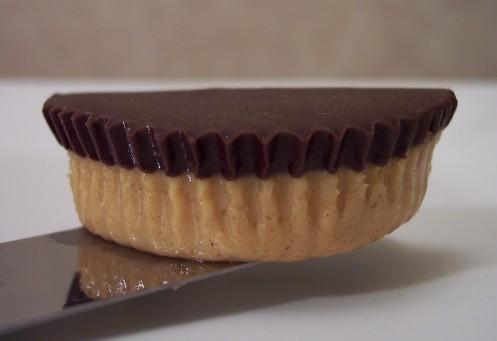
I was thinking about this the other day and mentioned those Peanut Butter Filled Chocolate Cookies to Jeff - he suggested that we skip a new recipe this week and get these into the oven as soon as possible. Because we both even liked the picture we took way back then, I gave the camera a break this week too!

What I did do was tool around with the recipe we had posted - no differences in the ingredients really, but I wanted to update it to how I write out recipes now. I honestly don't have much else to say that I haven't already said when we first talked about these, other than these cookies are still just as exceptional as when we first tried them out - if you haven't made them yourself, what are you waiting for?

Saturday, April 16, 2011

New twist on snickerdoodles...

I'm a sucker for hazelnuts - I'd keep them stocked in the pantry more often than I do, but I know I'd just eat them all before I got to use them in a recipe. A few recipes have been kickin' around my desk using the nuts for a couple weeks as they have been whispering my name when we travel down the nut isle in Trader Joe's. We finally nailed down what we were going to use them in - these extraordinarily-lengthy-titled Hazelnut-Cream-Stuffed Snickerdoodle Sandwich Cookies.

The dough for these cinnamon-y (and, of course, I used fancy Vietnamese cinnamon - I find it has more muscle, mixes in well and has this dimensional sweetness that does a lingering dance on the tongue, rather than fading instantly away) cookies uses a pure butter base, a duo of sugars and a splash of vanilla to round out any rough edges. You won't need to chill the dough, we means you'll get cookies that much faster!

While the original recipe called for making a whopping 6 sandwich cookies, we figured we could stretch the dough out a bit more and not be so overkill with the size - 24 cookies (making 12 sandwiches) felt much more sensible without compromising the end result. The dough is soft, but we were able to scoop and handle it without leaving our fingers covered in stickiness. Instead of rolling the balls to coat, just the tops of the dough balls are covered in a speckled blend of granulated sugar and more of that precious cinnamon.

Once the cookies have baked and are cooling, don't hit the off button on the oven just yet. To make the filling, we scattered hazelnuts on a short baking sheet and roasted them until their brown jackets began to split and the nutmeat underneath began to shift from pale blonde to a toasty light golden brown. To get the skin off the nuts, as soon as you pull them out from the oven, scoop them out onto a clean kitchen towel, wrap them up and let them sit to steam for just a couple minutes. Then, vigorously rub them together (still in the towel, while they are warm) and most of their skins will fall off.

Don't fret if they are not all pristinely clean - the bits that remain only add to the filling, whereas if all of the skin was left, their bitterness would be very present. You can save yourself a step by buying pre-skinned hazelnuts, but I'm rarely able to find them in the store and the extra expense isn't worth it. After coarsely grinding the cooled, naked hazelnuts, they are pepped up with confectioners' sugar, a couple tablespoons of butter and just a note of salt, then processed again to make a spreadable consistency.

Now, I know why they would classify this as a snickerdoodle, but for me, I do feel a real (or maybe traditional is the word I should use) one has to have cream of tartar in it. Why? That's hard to pin down exactly - for me the texture is just slightly different enough to notice and the flavor seems more pronounced in the cookie. With that said, thankfully that's not enough to turn me off trying a cookie, especially these! I am glad we pared down the size some - I could have definitely eaten a giant one, but these spiced sandwiches turned into a decent sized snack that hit the spot, without leaving one feeling overly guilty.

I do have a problem after all of this... I have plenty of hazelnuts leftover (which is good!), but I better figure out soon how to use them before I waste them all by simply snacking on the groovy nuts!

Tuesday, April 12, 2011

Cornmeal-Lime Cookies...

If you remember from back in 2007 (yikes...), we made these lemon biscotti that utilized a technique of using your hands to rub fresh citrus zest into the sugar called for in the recipe that I gleaned from one of Dorie Greenspan's cookbooks. Ever since then, any time a recipe calls for zest in a dough or batter, I instinctively do this extra step and am always fascinated by how intensely aromatic and moist the zest turns the sugar. I used this method today, making these shiny Cornmeal-Lime Cookies for the Weekly Wednesday Treat Day.

Besides the refreshing zing and lightness of lime, what makes these cookies special are the crunchy bits of coarse cornmeal in the dough - seek this out if you don't carry any in your pantry as you won't get the same unique bite using a fine grind of cornmeal. I found the combined dough to be soft, yet a bit tacky to the touch - meaning it would start to stick to your hands if you tried to roll the dough into balls, but it is still firm enough to hold its shape.

Once scooped out onto the baking sheets though, you will want to flatten each slightly - keep your fingers lightly moistened with water and the dough won't cling to you.

You can make these cookies bakery-sized by using scant 1/4 cup measurements for the dough (you will need to tack on a few extra minutes to the bake time), but we scaled them back to roughly 2 tablespoons for each. This ended up being a generously heaped tablespoon cookie scoops' worth, giving us 22 cookies instead of the 14 to 16 listed.

I recommend you keep an eagle eye on these cookies as they bake - you want the tops of them to remain pale, while the edges should have a light golden ring around the edges. If they are taken much farther than that, the cookies won't have that soft, a-couple-steps-away-from-being-a-cake-like quality. I did let two cookies go for a few minutes extra for comparisons sake (curiosity got me!) and instead of being crispy, they just became drier and more crumbly.

While the cookies have a solid hit of lime already, to punch up the pucker, each cookie is painted with a sweet, zest-studded opaque glaze made from confectioners' sugar thinned out with water, fresh lime juice and of course, more of that vibrant zest.

You could dunk the tops of each cookie (not as easy since they are tender) or drizzle it over, but I agreed with the recipe directions by brushing the glaze on with a pastry brush. This gave me the control to make an even, thin coat without making a mess - I was left with this though.

And trust me, none of it went to waste - a few swipes with a spoon (and right into my mouth!) made quick work of any leftover dribbles.

Tuesday, April 05, 2011

Cinnamon-Streusel Coffee Cake...

We've made a ton of cookies for the Weekly Wednesday Treat Day lately, be it in the form of bars, rolled, sliced or drop. I actually had another already sitting on my desk when it dawned on me just how many we've made... I figured it was time to seek out another treat! Luckily I had a pile of food magazines that have been neglected - when I got to the second one in, this Cinnamon-Streusel Coffee Cake danced off the page and bellowed to be made.

It may look like there are a lot of steps and ingredients to this cake, but rest assured it just reads that way - I broke down the listed ingredients into their individual steps, rather than a more concise one that would end up having several ingredients that need to divided. This way, there is hopefully no confusion to what amount of every ingredient is going into each step.

There are four parts to prepare this cake from start to finish - the cake batter, a cinnamon-laced, pecan-packed sugary filling, the slightly nutty, crumbly streusel topping and a slick glaze to run all over the top and sides.

The streusel topping was on tap to accomplish first, which is just a mixture of flour, brown sugar, cinnamon, cubes of icy cold butter, salt and a handful of toasted chopped pecans. When you mix in the butter cubes, you can use a pastry blender if you like, but I used the best tools available - my fingers! All it takes is smashing the butter into the dry ingredients until the mixture begins to come together and forms hefty clumps - as soon as this happens, cover the bowl and keep it chilled until called for.

The filling to this homey cake echos the streusel topping, but not completely - it takes out the flour and butter completely, then ups the ratio of those toasted pecans for a surprising crunch inside. After you've beaten the cake batter into a fluffy, voluptuous mixture, half is scooped and smeared into the bottom of a tube pan, followed by a sprinkling of the filling and the rest of the batter. The generous, and I mean g-e-n-e-r-o-u-s, streusel crumbs are then scattered over the top and the cake is ready to bake.

My tube pan is probably closer to 10" than 9", but it didn't seem to affect the result much, besides the cake being a touch shorter - it took roughly the same time listed in the recipe (about 55 minutes) for the tester to come out mostly clean with a couple moist crumbs clinging. When it comes time to turn the cake out, it may be worth your while to affix a piece of plastic wrap or finagle a sheet of parchment paper around the tube and on top of the crumb mixture. Some of the crumbs will inevitably come loose during flipping and having a little protection over them never hurts - it would also be helpful to have another pair of hands for added insurance.

Even if a few of the crumbs do come loose, it is not the end of the world - call them baker snacks, or just re-position them on the cake. When you add the simple confectioners' sugar and milk drizzle over the top, it will cement all those nubbins together. I would have been completely pleased with a plate of those scandalous buttery nuggets that adorn the top of the cake (and we'll just forget that there is more butter in those nuggets than there is in the cake... oh snap!), but getting through them and reaching the soft sour cream cake underneath was what really sold me.

The sour cream doesn't lend much of a tang, but does wonders to keep the cake tender and light. Jeff was taken by the thick line of brown sugar and crunchy pecans in the filling, scooping them out before he even bothered to get to the rest of his slice! Be sure to use your best cinnamon - I went with our favorite Vietnamese Extra Fancy Cinnamon, which gave the filling and crumbles a rich bite that flowed through into the plain cake with each forkful, without having any in the actual batter.