Friday, December 14, 2007

Breakfast for dinner night...

We're still pluggin' along with creating the gifts and I'm quickly running out of room and storage containers to hold all these Christmas goodies! We're getting anxious to get the packaging going so we can start figuring out how to fit them all in the boxes to ship out on Monday. Tomorrow looks to be quite a busy day as we will be dealing mostly with the more labor intensive chocolate parts (dipping, barks and whatnot) and hopefully decorating cookies if we get to them.

Mainly because I was looking for something quick and easy to eat, I went the route of making breakfast-for-dinner for our meal tonight. I've frozen most of the cranberries that we've stocked up on over the past few weeks, but I had just enough fresh leftover in the refrigerator to throw together a batch of these Cranberry Pancakes.

Cranberry PancakesSince the pancakes take just minutes to cook, the cranberries are first dunked into boiling water for a couple minutes to soften them - this also makes chopping them much easier as they won't bounce around! To give the pancakes a little texture, yellow cornmeal is added to the dry ingredients. You can use either coarse or fine grain cornmeal depending on how much crunch you want in the finished pancake. Instead of adding nuts, we used a little walnut oil as the fat for these - this adds a pretty subtle nutty flavor, but it is probably not a pantry staple and is a little on the pricey side; you could just as well use canola oil. Since these light pancakes were not too sweet, I served some warm pure maple syrup at the table to play off the fresh bursts of tartness from the cranberries.

Cranberry Pancakes

Thursday, December 13, 2007

A good use for those leftover mashed potatoes...

A couple weeks ago, I had some leftover mashed potatoes that I was not going to use up right away and ended up tossing them in the freezer. When I was preparing the menu for this week, I went over my inventory list of what we currently had in the freezer and saw we had a couple cups worth of those potatoes in there. As we have 3 freezers now (one chest freezer in the garage, 1 from the old side-by-side and the one from the new refrigerator we got a couple months ago) I find that keeping an inventory list updated is a must or I would end up forgetting about what exactly we had in there!

I decided to thaw out the potatoes so I could make these Crisp Mashed Potato Cakes for dinner. To try and impart the most flavor we could in these warm golden rounds, we cooked the green onions in a bit of the drippings left behind when we crisped up a couple slices of smoky bacon. The onions and bacon are combined with the chilled mashed potato (this will help keep them from sticking while you form them), seasonings and sharp white cheddar. The mixture is divided into equal portions with each being shaped into a thick patty - they are then dredged through coarse panko breadcrumbs.

To give the bottoms a head start, we preheated the baking sheet for about 5 minutes before we placed the coated patties on. When finished, the potatoes get a delicious crisp golden crust, while the inside stays moist and creamy. Between the salty bacon and cheese already stuffed inside, the flavors kind of reminded us of a twice-baked potato with tasty crunchy bits on top. This would be great as a side dish, but since both of us love potatoes in almost any form, we decided to just fill our bellies with these and a small side of chips - we are stuffed, but pretty content (carb overload anyone?)!


Wednesday, December 12, 2007

Chicken enchiladas with a unknowningly spicy sauce!

I knew that tonight's dinner was going to have a ton of steps to it, so I've been chipping away at a couple them. Whenever I had some downtime over the the past couple of days during the crazy baking spree we are doing now, I got some of the more time-consuming parts of these Green Chile-Chicken Enchiladas done.

By the time I was ready to start preparing these tonight, all I had to do was assemble them and throw the pan into the oven. I made the sauce first on Monday - this is a combination of roasted Anaheim chiles, onions, garlic, a bit of flour to tighten it up, coriander and chicken broth. Besides enhancing their flavor, roasting the chiles is done first so you can remove the tough skins. This is done by broiling them until their skins have blistered and blackened - you then toss the chiles into a zip-loc type bag and after a few minutes, the chiles have steamed enough so the skins slip right off. The spicy seeds can also be easily removed at this point. If you want a very smooth sauce, you could puree the entire batch, but we both thought leaving half of it chunky was a good idea to give the sauce some texture.

Green Chile-Chicken EnchiladasI prepared the filling for the enchiladas yesterday - this began by poaching chicken breasts in a combination of chicken broth, onion, oregano, garlic and a bay leaf. Once the chicken is done, the poaching liquid is no longer needed for this recipe - however, I wouldn't just toss this down the drain! I say strain it and use it for a soup or freeze it for another dish at a another date. The tender chicken is allowed to cool slightly - it is then shredded and mixed with tangy sour cream and sautéed onions. The original recipe called for raw onions, but I decided to soften them first as Jeff is not a fan of crunchy onions. I stopped at this point and refrigerated the mixture until I was ready to assemble tonight. The filling is placed into warmed white corn tortillas, rolled up and placed in a baking dish lined with a portion of the green chile sauce. The remaining sauce is spooned over and a mixture of Monterey Jack and cheddar is scattered on top.

I'm fairly confident that I picked out the correct chile, but I was a little taken aback when I took a bite from my portion! Woo doggy - it was so hot! When we've had Anaheim chiles before, they have always been fairly mild, but apparently these were on steroids or something! It was almost borderline too-hot for me; however, between the gooey layer of sharp cheeses on top and the cool filling, the heat was tempered enough so I was still able to enjoy the flavor. Jeff was loving that spicy heat though!

Green Chile-Chicken Enchiladas

Tuesday, December 11, 2007

Chocolate and peppermint... a match made in sweet heaven!

Jeff usually takes the last couple of weeks off work every year to enjoy the holiday time at home and finish up projects around the house that need to get done. This will be his last week at work this year, so I figured we should do something a little extra special for the final Weekly Wednesday Treat Day of 2007.

I gave Jeff a bunch of options ranging from cakes, cookies or different candies - one of them specially caught his eye and when I mentioned I had an idea to add a little something, he moved the rest of the recipes to the side and said we had to do these.

Chocolate-Peppermint Cheesecake Candy Cane BarsThe first change I had to this final treat, Chocolate-Peppermint Cheesecake Candy Cane Bars, was to fuss with the crust. The original called for those "famous" chocolate wafer cookies, but we decided to add a dash of decadence with a smidge of peppermint and use those Oreo-esque Candy Cane Joe-Joe's from Trader Joe's. Yes, you use the entire cookie, filling and all - this way we didn't need to add any of the sugar as listed in the recipe. The cookies are quite sweet, so a dash of salt in the crust helps to cut that down a tad. If you prefer to just use those wafer cookies, you'll need about 35 to 40 - you may want to toss in a couple tablespoons of sugar as well.

Chocolate-Peppermint Cheesecake Candy Cane BarsWhile the crust is baking, the filling is started by melting a combination of chopped semi-sweet chocolate with an equal amount of bittersweet. I did this in a bowl over simmering water, but you could just as well melt it in a microwave at 50 to 75% power. The slick chocolate is then poured into a mixture of a couple blocks of cream cheese that had been combined with sugar, sour cream and a few eggs. To ensure a very creamy filling, make sure the cream cheese sits out at room temperature for an hour or two before using it - the eggs will also mix in much easier if they are at room temperature. If you forget, you can just submerge the whole eggs in luke-warm water for a few minutes to take the edge off.

Chocolate-Peppermint Cheesecake Candy Cane BarsBecause there can never be too much chocolate, once the cheesecake was done, we prepared an exquisite glaze that included a healthy dose of bittersweet chocolate and another dose of sour cream. This is quite fluid when heated and spread on the warm cake, so it is easy to apply - instead of scattering crushed candy canes on top, we estimated how we were going to cut the cheesecake and placed a miniature cane in the "pretend" center of each bar.

This glaze firms up quite a bit, so the canes or crushed candy will not stick once the cheesecake has completely cooled. Because of this, when you go to divide out the cheesecake, you will want to dip your knife in a glass of hot water when you make each cut - if you don't, the top will crack and take away from that smooth finish on top. So the taste? Let's just leave it that I am too busy rolling my eyes in the back of my head, good. Dense, rich and an intense chocolate-y in-your-face flavor - I felt like I was like swimming through a chocolate pool while taking nibbles from a peppermint-laced wall when I was eating my piece. The crust has a firm peppermint bite against the creamy sumptuous filling - we did think that using half bittersweet and semi-sweet chocolate in the filling added a pleasant depth to these sweet treats. You could get away with just using one or the other though. Can I send the candy cane sleigh your way so you can indulge with me?

Chocolate-Peppermint Cheesecake Candy Cane Bars

Monday, December 10, 2007

Nutty whole-wheat pasta dish with a slightly bitter bite and a pungent finish...

A couple batches of fudge, a few rounds of cookies and a roca can be crossed off the to-make list after today! I'll be doing a large round-up post like we have done the past couple of years - we are aiming to get everything packaged up this weekend and want to have gifts sent out by Monday of next week. We will try and get pictures and recipes posted that day or the day after if we haven't passed out! Did I mention how much I love doing this every year? Hee hee!

Since I knew we were going to have leftover Gorgonzola from those pumpkin ravioli we made last night, tonight for dinner I made a recipe for Whole-Wheat Spaghetti with Gorgonzola and Escarole to use the rest up.

While we waited on the whole-wheat pasta to cook, we lightly browned thinly sliced onions in a couple pats of butter - a minute or two before they were done, I tossed in some minced garlic to release its fragrant aroma. A mountain of trimmed and washed escarole is added to the onions in batches until the vegetable becomes tender. When you clean up the escarole (I got a couple beautiful heads from our local natural co-op called Valley Natural Foods), be sure to not dry it - you want the leaves to have some water clinging to them as that will help steam them in the skillet. When the bulky mixture is added to the nutty pasta, the flavorful cooking liquid that came off the escarole is also added along with another pat of butter - this doesn't really form a sauce or anything, it just gives enough liquid to keep the pasta moist.

Whole-Wheat Spaghetti with Gorgonzola and EscaroleLuscious crumbles of the strong cheese are added on top to finish off the dish. The escarole has just the slightest bitter quality to it that adds a little bite to the dish without being too aggressive like endive or radicchio. While I groove on the more pungent cheeses, Jeff, well, not so much. Unlike the dish last night where the Gorgonzola was tempered by the sauce, straight up like this he thought the flavor was a bit too much for him - however, that didn't seem to stop him from finishing his plate! Maybe there is hope for him yet!

Sunday, December 09, 2007

Folding some pumpkin ravioli...

With 10 new recipes made this week, the three that stood out for us were the Vegetable Enchiladas, Cranberry-Pear Cake Bars and the Boneless Buffalo Wings with Veggies and Spicy Blue Cheese Dip.

December sure is flying by... can you believe Christmas is just a couple weeks away?! This will be crunch week for us as we will be doing the final batches of cookies, candies and assorted baked goods that need to be sent out via mail or hand delivered. My heart skipped a beat while I was glancing over the master list of ingredients this morning to make sure we didn't need anything else when we went to the market - on tap this week to be used is at least 20 sticks of butter, 23 cups of sugar, 8 to 10 cups of nuts and probably around 4-6 pounds of chocolate. Eek!

Once we got back, I spent most of the time today cleaning up, putting away supplies and getting a plan together so I don't forget about anything we've planned on making. I decided on a fairly mindless, but labor-intensive recipe for dinner tonight so I could relax and enjoy the process while not having to think about much. Filling the wontons skins for these Pumpkin Ravioli with Gorgonzola Sauce was just the ticket!

Pumpkin Ravioli with Gorgonzola SauceWe used round wonton skins for these, but you could just as well use square and fold them into triangles. To make sure the filling isn't too wet, the mashed pumpkin is scooped onto some paper towels to absorb some of the excess moisture - you can used canned or homemade mashed pumpkin (we still have a bunch of homemade in the freezer which seems to hold onto a little more water than canned). Be sure to do this step though, even if you need to use canned pumpkin. The pumpkin does not stick to the paper towels or anything - it actually peels off quite easily, so don't worry about that.

Once that had been taken care of, we mixed the pumpkin with breadcrumbs, Parmesan cheese, salt, fresh sage, pepper and grated nutmeg. When you assemble the wontons, it is best to do it assembly line style, working with three or four pieces at a time... otherwise to me it seems like it takes forever to finish. To ensure the filled wontons don't stick to the baking sheet, be sure to do a light dusting of cornstarch before you start adding them. One note about cooking these - they are a little more delicate than a pasta ravioli - when you add them to the water to cook, try to keep it at a simmer, rather than a rolling boil, as this will help them not want to fall apart.

While they were cooking, a quick sauce was made by heating milk and flour until it begins to thicken - butter is stirred in, followed by a handful of pungent Gorgonzola cheese. Jeff and I both thought that the sauce was very good - a little on the thin side though. I must say, I can see how the combination of pumpkin and Gorgonzola might not be for everyone - it is a little different, but we quite enjoyed it! There are lots of soft textures between the silky sauce and creamy filling inside the wontons, so a scattering of nutty toasted hazelnuts added a welcome contrasting crunch. If you want to prepare some of this ahead of time, you could go ahead and fill the wontons a day before - just keep them on the dusted baking sheet and wrap well with saran wrap before putting them in the refrigerator.

Pumpkin Ravioli with Gorgonzola Sauce

Saturday, December 08, 2007

Snacking on some Cranberry-Pear Cake Bars...

We don't have many homemade snacks left as we've eaten through most of what I've had in the freezer over these past couple of week. Since I've been concentrating my time in the kitchen on baking gifts, Jeff made sure to point out last night that we were running low... so I took some time to replenish our stash with these Cranberry-Pear Cake Bars.

This soft cake is bursting with fresh ruby red cranberries, thinly sliced pears and crunchy chopped walnuts. You want to use a pear that is more firm and will stand up to baking, rather than a softer one you may just eat out of hand - we used a couple Bosc pears. You can use fresh or frozen cranberries - if you use frozen, don't thaw them out, just toss them into the batter as is. When you get to the point of mixing the fruit and nuts in, the batter will be extremely thick - it was a little tough to get things evenly distributed, but do your best without overworking the mixture.

If you don't care for pears, you could probably use apples instead. We both quite liked the combined flavor of the sweet pears and the tart cranberries though. Cranberries and orange also have an affinity for one another, so the crumb of the cake is given the scent of orange from a good tablespoons worth of orange zest. Since there is only a half cup worth of walnuts in the whole recipe, you don't want to skimp on toasting them - while you would still get that crunch if you don't, the flavor would get lost in these bars I think. Toasting really enhances their nutty flavor, so you can get away with using less like this. If you want to make it more dessert like, add some slightly sweetened whipped cream or do as we did today and add a big ol' scoop of creamy vanilla ice cream with a dash of cinnamon.


Friday, December 07, 2007

Re-discovering an old favorite...

One of the great things about keeping a food blog is that we are able to easily scroll back to see what we have made in the past (especially useful during the holiday baking season!). Besides bringing back fond memories, it also reminds me of recipes that we've done and forgotten about! Just like these Peppermint Kisses we made almost two years ago. We did a different variation on them last year, but I especially liked how these turned out the first time - dressing up the kisses was fun and added a whimsical twist.

For tonight's dinner, Shrimp Fried Rice, I used a new (to me anyway) technique to cook the rice I needed for it. We've always prepared rice with the method of using slightly less than 2 parts liquid to 1 part rice - however, tonight's recipe prepares the rice like you would pasta in lots of boiling salted water. I used brown jasmine rice, hence the long cook time - you could use a white basmasti if you like, but shorten the cook time to 12 to 14 minutes. I thought the rice cooked this way was a little less fluffy, but much less fussy. Just be sure to check the rice earlier than you normally would to make sure it is tender, but still has a slight bite to it - we usually cook brown rice around 35 minutes or so and ours was done around 28 minutes using the boiling method.

We've only made fried rice a few times now and there seems to be two ways that recipes call for adding the eggs - they either have you add beaten raw eggs once the rice has been added or they have you cook the eggs ahead of time, slice them up and then add them. This recipe uses the former, but I don't see much point to it as it adds an extra step. It does not dirty another pan or anything, but I guess if you want to see the big egg-y pieces, rather than having the egg more dispersed into the rice, then this would be a good way to ensure that. Before the rice and cooked eggs go in, shrimp, thinly sliced carrots, scallions, garlic and fresh minced ginger are tossed into the pan and quickly cooked just until the shrimp are done. When the rice is added, it is moistened and seasoned with salty soy sauce and tangy lime juice. I left the shrimp whole, but feel free to coarsely chop it if you want pieces instead. Jeff quite liked this, especially since it used shrimp - the only thing I would do differently is to make the rice a few hours ahead (or the day before) and chill it before using so the grains stay more separate.

Shrimp Fried Rice

Thursday, December 06, 2007

Taking a warm vacation out of this chilly weather with a full-flavored dinner...

Brrr... so the clouds vanished last night and the temperature plummeted to an icy -14 degrees by the time I woke up this morning (and this was not including the wind chill!). I thought Spike was going to have a mini heart attack when we let him out to do his business this morning... I think that was the fastest we have seen him move in a long time!

Sometimes I worry that the speedy dinners I've been making won't have enough time to develop flavor as they cook, but tonight's dinner proved to me that you don't need a long cook time for a well-seasoned dish. With flavors similar to what you might find in a Moroccan tagine, the Moroccan Chicken over Couscous with Almonds and Raisins recipe we made tonight uses a few short cuts to speed up the preparation.

After diced onions have softened in a couple tablespoons of melted butter, paprika, smoky cumin, sweet cinnamon, hot Madras curry powder and a dash of cayenne are stirred in and left to briefly toast and allow their flavor to bloom. You have your choice of chicken to use - if you want a more rich flavor, use chicken thighs - if you're looking for something a little lighter, you can use chicken breasts. If you go with the latter, you will just need to reduce the simmer time slightly. Once the meaty chunks of chicken have been added, broth and a can of fire-roasted diced tomatoes (one more layer of flavor!) are added and the skillet is covered, trapping moisture inside, to finish cooking the chicken through. This method leaves you with chicken that is moist and tender even if you decide to use very lean chicken breast.

Moroccan Chicken over Couscous with Almonds and CurrantsAs this is a very saucy dish, a fragrant bed of couscous is prepared to serve the chicken over and soak up the enticing juices. The same spices as above (minus the cayenne) are again toasted in a pat of butter - once their aromas become known, broth, whole wheat couscous and golden raisins are added. After the mixture comes to a boil, the pot is covered and the heat is turned off - the couscous absorbs the broth and grows into a tremendous pile of fully-cooked pearled pasta in minutes. Between the tomatoes, chicken and plump golden raisins, there are plenty of soft textures happening - for a contrast to those, sliced almonds are toasted and sprinkled over the top for a crunchy bite. I didn't have a chance to run to the market today to get any, but if you happen to have some, a scattering of fresh chopped cilantro would be an ideal garnish to liven the dish up with a punch of color.

Wednesday, December 05, 2007

Holiday baking keeping us busy...

We have not been baking very much for us lately as we are trying to get prepared for the Christmas Gift Baking Spree we do each year. I try to get as much done ahead of time as I can - getting the packaging together, writing down a good inventory of the ingredients we need and making doughs or baking cookies to place in the freezer. I think we have our list finalized for this year, but I never know until the packages actually get sent out!

When I was going through the list and picking out recipes, I remember how much we loved making those delicious Seven Layer Cookies - it is a bit of a process, but so worth the effort! If you're feeling adventurous and looking for a fun, impressive treat to give away this year, give these a try!

I'm also trying to keep the weeknight dinners a little less time consuming - pasta recipes usually fit well into this category and tonight I made this Penne with Asparagus, Spinach, and Bacon dish.

I didn't notice anything unusual when I was going over the recipe last night to make sure I didn't need to pick up anything from the market today, but as I was getting prepared to make it, I caught something that looked a little odd. The original recipe has you add 1 1/2 cups chicken broth to help cook the asparagus - when the asparagus is done, you are to then add the cooked pasta. However, it only takes 3 to 5 minutes for the asparagus to cook and there is no way 1 1/2 cups of broth is going to cook down enough so you are not eating a bowl of pasta lounging in broth (this is not a soup recipe after all!). I cut the broth down to 1/3 cup and saved some of the pasta cooking water in the event the dish was too dry.

Anyway, 1/3 cup was just enough and I didn't need the reserved pasta water - there would have been way too much liquid if I used the full amount called for. When the asparagus was crisp tender, a few cups of baby spinach, along with the cooked pasta and a handful of fresh grated Parmesan cheese, is added to the skillet. To serve the pasta, crisp crumbles of bacon and a sprinkling of more Parmesan is added to each plate. Jeff and I both thought this healthy and colorful dish was flavorful, speedy and one we will have to prepare again when we can get our hands on some fresh asparagus at the farmers market next spring.


Tuesday, December 04, 2007

Spicy little gingerbread bars and a buttery frosting peppered with orange zest

Jeff said that he wanted this week's Wednesday Treat Day to involve gingerbread in some way - after giving him a bunch of options to choose from, he picked out a recipe for Gingerbread Bars with Orange Frosting. I think he actually just closed his eyes and pointed to this one as he looked a little overwhelmed when I gave him a list options.

These little bars have a spicy flavor from the addition of cinnamon, ginger, cloves and fresh grated nutmeg into the batter. Since gingerbread usually gets its dark rich flavor from molasses, we couldn't forget the good 2/3 cup used in this recipe. The bars are moist and somewhat soft, but they are sturdy enough so you can pick them up to eat if you wanted.

Gingerbread Bars with Orange FrostingYou could dust them lightly with confectioners' sugar if you wanted to keep these bars a little lighter, but what fun would that be? For a striking contrast to the deep, dark cake, we prepared a quick creamy frosting made simply from confectioners' sugar, butter, a little milk to thin and just a touch of fresh grated orange zest. The hint of orange from that bright zest was a nice boost to the generous sweet frosting and we both thought that it married well with the spices in the gingerbread. If you're feeling especially festive, add a little holiday cheer by scattering some sprinkles on top!

Gingerbread Bars with Orange FrostingWhile tonight's dinner, Vegetable Enchiladas, makes quite a few servings, there is a point during assembly that you can stop and freeze half to bake off at a later time.

The sauce for these stuffed white corn tortillas is made first - to start it off, cumin, flour and tomato paste are toasted in a bit of olive oil. Vegetable broth and water are added and the mixture bubbles away until it slightly thickens and reduces a bit.

Meanwhile, the filling is prepared by mixing a hearty combination of cheese, black beans, spinach, corn, scallions and smoky cumin. You could just use pepper Jack cheese, but we used a blend of Cheddar, Jack, Asadero and Queso Blanco to get a depth of flavor. The tortillas, filled to the brim, are rolled up, divided between two baking dishes and topped with additional cheese. A lot of enchilada recipes have you dip the tortillas in hot oil before filling - in the interest of keeping this dish somewhat lighter, we warmed the tortillas, wrapped in moist paper towels, in the microwave for a minute to make them pliable enough to roll without cracking or breaking.
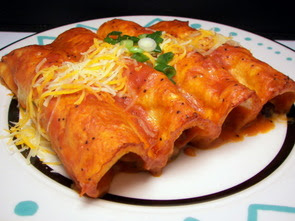
Vegetable EnchiladasAt this point, you can stop and freeze both or one of the baking dishes, well covered, and top with the sauce just before baking. If you do decide to do this, freeze the sauce separately and thaw just the sauce before baking. You will want to cook it at the same temperature, but cook it covered for 30 minutes and then remove the cover and continue to cook until bubbly, about 15 minutes more.

Want a peek inside?

Vegetable Enchiladas

Monday, December 03, 2007

Wheat-free cookie baking for a friend...

We had a friend with a wheat intolerance ask us if we could make her some cookies recently and when I asked what kind was her favorite - she said peanut butter, but she didn't like the sandy texture that some of the flour-less recipes have. She grew up on ones that were a little more substantial and less crumbly as their family version had some flour added to the dough.

I've not baked much with rice flours before, but I came across a recipe for Peanut Butter-Chocolate Chip Cookies that called for brown rice flour and the rest of the ingredients looked like it would work out for our friend. I bought the brown rice flour in one of the local natural foods co-ops in their bulk section, but later noticed it in the regular markets around town too. The great thing about these cookies is all you need is a big bowl and a sturdy wooden spoon to make the dough!

This recipe made about 20 good-sized cookies dotted with chunks of dark chocolate. The cookies did not spread too much when they baked, so they benefit from the dough being flattened a little before going into the oven. They have a fairly strong peanut butter flavor with crisp edges and somewhat soft texture in the center - I did noticed when they were still warm that the dark brown sugar left a sort of grainy texture. However, after cooling, I found that it was not noticeable anymore. While there was only 1/4 cup of the brown rice flour used, it added just enough dimension to the cookie that it brought back the memories our friend was after while they happily chomped away.

Peanut Butter-Chocolate Chip CookiesAs our friend does not bake at all, we assured her she could make this simple recipe - to give her a head start, I placed the cookies inside a big mixing bowl with the recipe tied to a heavy wooden spoon and a tin of the brown rice flour.

We quite enjoy steel-cut oatmeal and have it once a week, usually on Saturday morning. We had to eat dinner a little early tonight as we had some errands to run and I wanted to make us something for dinner that would "stick to our ribs" and keep us warm as the high was only 15 today! Instead of making the same basic oatmeal again, I made us a pot of this Multigrain Breakfast Porridge instead.

There are a few textures that make this porridge more interesting than others - the first comes from wheat berries. Normally wheat berries cook for an hour or so, but this recipe cooks them long enough so they are just tender, but they still have quite a bite to them. Old-fashioned rolled oats are added to the wheat berries after about 20 minutes - 12 minutes later, a few tablespoons of quick-cooking grits are tossed in to tighten up the mixture. At this point, the porridge was still somewhat soupy - the original recipe called for adding 3/4 cup milk to be added, but I thought that would have make it very liquid-y. I added just about 1/4 cup or so to give it some flavor and a creamy edge.

Multigrain Breakfast PorridgeRather than using plain sugar to sweeten the porridge, pure maple syrup is added for a richer flavor. After a couple minutes, the mixture ended up with a consistency that we thought was good - it will continue to thicken as it cools. We opted to top the porridge with a chewy mix of dried golden raisins, cranberries and cherry - if you prefer a crunch, add some chopped toasted nuts instead. After a few bites, we did end up adding a sprinkle of brown sugar on top to add a touch more sweetness.

Sunday, December 02, 2007

He wanted spicy... could I deliver?

We ended up with just about 6 or 7 inches of snow by the time the storm was finished - unfortunately it ended with just enough freezing rain that everything is now a big sheet of ice! We had a hard time trying to drive up the hill to the house after we went to the market this morning and we barely made it this time... this winter should be quite interesting if this keeps up! The big MNDot snow truck even got stuck trying to drive up the hill to clear the street early this morning and since there is a bedroom window that faces that street, we got an unfortunate 5 am wake up call.

We went through 11 new recipes this week - our favorites this round were the Roasted Winter Vegetables with Cheesy Polenta, Hungarian Meatball Stew and just because they were so fun to make and share with the pups... the Holiday Doggie Bagels.

We started off dinner tonight with a sweet Mixed Greens Salad with Pears, Goat Cheese, and Fig Vinaigrette. Dried figs are one of my favorite dried fruits, but for some reason I don't use them often enough! Tender salad greens are coated in a thick, sweet and tangy dressing that is a mixture of dried black mission figs, balsamic vinegar, water to loosen the mixture up, bright lemon juice, minced shallots, thyme, garlic and a drizzle of extravirgin olive oil. The tossed greens are served over sliced Bosc pears and topped with a sprinkling of creamy crumbled goat cheese. The combination of the racy vinaigrette on the greens with the crisp pears and pungent cheese was simple, yet had a sophisticated flare that had my taste buds in a tailspin. The one thing I would think about adding is some candied walnuts or pecans for a nutty crunch.

The main portion of tonight's dinner was intended to be more in the line of an appetizer and doesn't really fit in with the above salad, but Jeff was asking for something spicy enough to challenge his heat tolerance and I think we found just the dish. Thankfully, the dip in this recipe for Boneless Buffalo Wings with Veggies and Spicy Blue Cheese Dip kept our mouth cooled off just enough that we could actually enjoy the food!

If you don't want to bother slicing your chicken into strips, you could just as well buy those packaged chicken tender meat. The sliced chicken is marinated in buttermilk that has been spiked with hot pepper sauce (we always use Frank's Red Hot) and white vinegar. You can let the chicken sit for as little as ten minutes, but I suggest letting it go as long as you can (around an hour is preferred) so the marinade has time to work. To coat the chicken, we dredged them through a mixture of white whole-wheat flour, crunchy yellow cornmeal and a few shakes of cayenne pepper. The chicken is then browned and crisped up in two batches - the cooked chicken is then dressed in more hot pepper sauce and vinegar.

Did I mention this was quite spicy yet? To counter act some of that heat, a cool combination of sour cream, crumbled blue cheese and a splash of vinegar makes a tangy dipping sauce for the spicy chicken. Since I was being a little evil and Jeff did say he wanted to be challenged, I sprinkled the dip with a little more cayenne pepper - hee hee! I did serve some crisp celery and carrots sticks along side so our mouths could take a break in between the boneless "wings". Jeff's face was beet red by the time he finished his plate, but he was a very happy camper and was completely satisfied by the heat level. He says it was not too hot, but notes it did leave a little afterburn in his throat! You could leave out the cayenne in the dip and flour coating and it would be more tolerable if you want some heat, but don't want to blow your top off.

Saturday, December 01, 2007

Homemade bagel treats for the pups...

Quite a bit of snow so far! Max is having a blast in the fresh snow as he pounces through the piles outside.

Spike, however, is not so thrilled as he tries to mosey about without getting stuck - he is 17 after all and does not move all that speedily anymore. He does occasionally stop to chomp at the snow on the ground though... weird, but he likes it!

So, we had an oops last Sunday... I thought we had some homemade treats still in the freezer for the pups, but when Jeff went out to get them, he came back with a sad face and an empty bucket. Apparently he already cleaned out that stash - I did not get a chance to made a new batch for them this week and since we are huddled inside with inches of snow piling up outside, I thought I better get some treats for them in the oven!

We did something a little more festive this time and I made these Holiday Doggie Bagels for them. The dough is simple whole wheat flour, all-purpose flour and rye flour mixed with a little bit of warmed chicken broth, honey and yeast to add some lift.

You don't have to let the dough rise much, but you do want to give it a few minutes to relax before you begin shaping them. After you form the dough into little balls, you just plunge a floured finger through the center to form a hole - you can either twirl or stretch the dough to make the hole bigger; I found it easier to just spin it around my finger a few times. The bagels will rise and puff up a bit from the heat of the oven and since they are so small already, they only need to rest for 5 or 10 minutes before baking.

Right before we put them in the oven, we decided on impulse to dye the bagels in a couple holiday colors - to do this, we just beat an egg yolk with a splash of water and used a tiny bit of red and green gel to tint the yolks. While we left a few completely plain, after we painted the colored ones, we decided to sprinkle on some sesame seeds for good measure. The red worked well, but the green color ended up kind of weak - I probably should have used a bit more of the gel. The spoiled pups devoured their piece in record time and give them two (4 if they could!) paws up.


Friday, November 30, 2007

Warming up with a comforting meatball stew before the big storm...

Around this same time last year while we were living back in Maryland, we did our monthly trip (it was a fairly far drive) to Trader Joe's and came across one of their new seasonal products. We only got one box and quickly snacked our way through it - we decided to make an early trip back a couple weeks later only to find they had sold out a week earlier and they just could not keep up with the demand.

Neither of us forgot about the item and when I saw Jeff do a little happy dance (a sight to be seen!) when we went to the Minneapolis (St. Louis Park actually) Trader Joe's this past weekend, I knew exactly what he found!

They make their "house" version of Oreo's called Joe Joe's (fitting if I do say so myself!) in a few different flavors, but these limited candy cane ones are so good! There is just enough filling, somewhere between a regular Oreo and a double stuffed, between the two crisp cookies and that filling is laced with little peppermint crunchies. We bought a couple boxes and I have a feeling we should probably get a couple extra to hide so we can enjoy them throughout the season - I'd love to give these a try in those Oreo Truffle Balls, dipping them in dark chocolate instead, and dusting the tops with a bit of crushed candy canes!

We are expecting a big snow storm this weekend (or so they say...) and the winds are really howling tonight - thankfully I had already planned to have this Hungarian Meatball Stew which warmed us right up.

Lean ground sirloin is bound together with bread crumbs, an egg and garlic - once combined, the meat is divided into 1 1/2" meatballs. The meatballs are browned in two batches to allow each round to get a golden caramelized crust. Carrots, onions and celery are diced up and added to the oil and juices left behind from the meatballs - while allowing the vegetables to soften, this also gives you a chance to get any of those savory little bits off of the bottom of the pan. So the sauce of the stew has some body, a couple tablespoons of flour are added, along with the same amount of sweet paprika, and allowed to briefly cook to lose that flour-y taste.

Beef broth is the liquid of choice as it brings such a rich depth to the sauce - once the broth has been added and comes to a boil, pungent caraway seeds are tossed in, along with the meatballs, to add a flavor very reminiscent of rye bread. After bubbling for a few minutes to warm everything through, we portioned the stew out over buttered egg noodles to round out the meal. Adding the noodles made this so hearty and comforting - with lots of "Mmmm..." sounds coming from Jeff as he ate, this recipe will definitely be made again, especially in the dead of winter.


Thursday, November 29, 2007

Sweet chocolate cupcake with a twist or two...

I made a cupcake recipe today that was a little different, fun and quite tasty. These Chocolate Butterscotch Pudding Cupcakes have a little surprise in the middle that is actually added before baking, rather than after.

id="BLOGGER_PHOTO_ID_5138454154073708754"We've made cupcakes before where you scoop out a cone from the middle of the baked cupcake, spoon a filling inside, replace the cone and frost the top. We did it a little differently this time and actually layered a scoop of butterscotch pudding as we were filling up the muffin tin with the chocolate batter. Since we were just playing around, I didn't make a from-scratch pudding - I just used a box of butterscotch Jello cook and serve... you could also use those already prepared pudding cups you find in the market. Before we topped the pudding with the chocolate batter, we tossed a few toffee chips on to emphasize that caramel-like flavor.

Since we were not planning on frosting them, we added a scattering of mini chocolate chips on top of the cupcakes before we placed then in the oven. When we bit into them, we found the chocolate flavor was fairly pronounced, but it had a lingering subtle butterscotch flavor before we even got to the center. Some of the pudding and toffee melted into the dark cupcake, keeping them quite moist, however you are left with a little hidden pool of the two when you reach the center. I was hoping for a little more of the pudding to be visible, but I didn't mind that much as the butterscotch hint it added to the crumb of the chocolate cupcakes turned into a nice combination.

Chocolate Butterscotch Pudding CupcakesJeff has been asking for another recipe for dinner that has a peanut sauce of some sort since he very much enjoyed that Chicken Saté we had earlier in the month. After digging around in my to-try piles, I found a recipe for this Aromatic Noodles With Lime Peanut Sauce dish.

While you wait on some whole wheat noodles to cook, a peanut-y sauce with a tang is made in a food processor by pureeing natural peanut butter, soy sauce, vegetable broth, rice vinegar, fresh lime juice, a touch of brown sugar, minced ginger root, one scallion and a sprinkling of crushed red pepper. A few minutes before the pasta is done, broccoli florets along with snow and sugar snap peas are steamed just until they are crisp-tender. The noodles and vibrant veggies are tossed with the creamy peanut sauce and the dish is finished with a scattering of crunchy toasted peanuts. The fresh lime juice added a tempting bright flavor to the sauce that was not distracting as I thought it might be - the majority of the flavor was the nuttiness from the natural peanut butter. Very good while warm, I'm excited to have this for lunch tomorrow as cold peanut noodles are so tasty!

Aromatic Noodles With Lime Peanut Sauce

Wednesday, November 28, 2007

Buttery biscuits and hash...

Buttermilk biscuits are usually worth the effort of mixing up the dough, rolling them out in a dust storm of flour and using a cutter to get those perfect little circles. However, some days you just don't have the time to deal with the mess and crave those buttery biscuits - that's where these easy Best Drop Biscuits come in!

Now, I didn't name these and I can't say for sure if they are "the best" ever, but they were darn good and came together in a flash! Most of the other drop biscuits we've done have you cut cold butter into the dry ingredients - this recipe works a little different as it has you melt the butter and mix it into cold buttermilk. The butter instantly forms little droplets of fat that will evenly spread throughout the dough, giving the biscuits a little extra puff as they bake.

We used a large disher (about 1/4 cup worth) to divide out the dough - you could just used a greased 1/4 cup dry measuring cup for the same effect. The mounds of dough baked into very light, fluffy and tender biscuits that had a inviting crisp crust on the outside. As soon as they come out of the oven, they are given a generous dousing with melted butter for an extra touch of richness. Did they need that extra brushing of butter? Probably not - we left one by itself to see how they were plain and it was still tasty, if not a touch drier, but I would brush the golden biscuits again for that butter flavor as it doesn't add that many extra calories.

I'll be the first to admit that tonight's dinner, Smoked Ham Hash, is probably not that most attractive dish, however the flavor it had made up for its appearance! In a lump of melted butter, country-style hash browns (little chunky cubes rather than shredded potatoes) are sautéed with chopped onions and red bell peppers to doctor up the frozen potatoes with some fresh veggies. As the above start to brown, a mixture of chicken broth, half-and-half, Worcestershire sauce and ketchup is added and allowed to bubble away until the liquids evaporate to finish the potatoes off. Cubes of smoky chopped ham are stirred in and the drab dish is completed with a sprinkling of color from thinly sliced green onions and fresh parsley. This very homely dish was comforting and surprisingly addiciting - we thought it could use a dash or two of cayenne pepper sauce or maybe a few shakes of crushed red pepper to spice it up a bit. If you don't like ham, how about trying it some cooked chicken or turkey?


Tuesday, November 27, 2007

One way to get those leftover Butterfingers used up!

We still had some of those mini Butterfingers leftover in the Halloween treat bowl and while I do quite like them, they don't seem to be disappearing very fast. We thought we could work them into the weekly Wednesday Treat Day and made a recipe for Butterfinger Crunch Blondies.

Rich with brown sugar, these blondies have a sticky chew to them with bits of the chopped candy scattered throughout the bars. I used about 9 of the mini bars - they are not very easy to cut into chunks as they kind of shatter when you slice through them, but I didn't mind much as I found the shards were able to be dispersed a bit better into the dough. I did find the dough was fairly stiff when it was combined, however with the help of an off-set spatula, it spread easily into the baking pan. I don't really think of blondies as being "fudgy" since that term is usually used with chocolate, but these had that same moist and dense quality to them without being underdone or wet. If you don't have Butterfingers on hand or would rather use something else, how about tossing in some chunky pieces of white chocolate?

Since we have quite the supply of cranberries after stocking up with that killer sale last weekend, I thought I could also throw together a batch of those snazzy Sugared Cranberries with their frosted crunchy coatings for Jeff to take in tomorrow. We've made them several times for past co-workers, but we had not made them yet for the Minneapolis crew!

Tonight's dinner, Sesame Chicken with Broccoli and Brown Rice, had a couple things going for it to lighten the more classic deep fried recipe. First, instead of deep frying the chopped pieces of chicken, they are sautéed in a skillet with just a little oil. To give the chicken pieces texture, they are coated in a mixture of egg whites and cornstarch which gives them a sort of ethereal crunch when they are cooked.

To make sure the chicken browns evenly and cooks thoroughly without steaming, the pieces are cooked in two batches. When both are done, all of the chicken is added back into the pan and drizzled in a mixture of honey, toasted sesame seeds, soy sauce and garlic. As soon as this mixture hits the pan, it thickens and coats the chicken in a glossy sweet sauce. Rounding out the dish is a bed of brown jasmine rice and crisp-tender steamed broccoli. Light, yet still filling, Jeff and I thought this chicken dish was quite delicious for being fairly quick to prepare (most of the time required is downtime waiting for the rice to cook!) and is one I'll keep handy for those days we want something healthy and speedy that uses pantry staples.


Monday, November 26, 2007

Dried black mission figs and blue cheese - pungent and sweet never tasted so good...

Tonight's Macerated Winter Fruit dish that we had as a side was a very refreshing and clean way to change up an ordinary fruit salad. Since we only needed a cup of fresh pineapple, I did go ahead and grab a few pieces from the salad bar area of the market instead of buying the whole fruit.

The tangy diced pineapple is combined with apple cider, sticky honey and a whole cinnamon stick - the mixture is heated just until the honey has a chance to melt and dissolve into the cider. This is then tossed with chopped sweet apples (I used a crisp Fuji), sour pink grapefruit, halved red grapes and chewy dried cranberries. A splash of Grand Marnier adds an orange note with a drizzle of fresh lemon juice brightening up the fruit's flavor. Be sure to give this at least an hour in the refrigerator to chill before serving - this gives the cinnamon stick a chance to permeate the dish and the cranberries some time to plump up. You could even make this a full day ahead of time - I think the fruit would hold up just fine and the flavor would only get better.

Since we were on a "roll" with that turkey roulade from Thanksgiving, I wanted to do another stuffed meat dish and went with a recipe for a Fig and Blue Cheese-Stuffed Pork Tenderloin tonight. While we've had figs in a few savory recipes, I don't think we have ever paired it before with a pungent ingredient like blue cheese.

Inside the pounded tenderloin is a scattering of dried black mission figs and crumbled blue cheese. Once the tenderloin has been rolled up and tied, it is simply seasoned with salt and pepper and baked in the oven. When it is almost done, the tenderloin is brushed with apricot jam and put back in the oven for a couple minutes to finish it off. The jam adds a faint sweetness and gives the finished tenderloin a bit of sheen. Once you let the pork rest, it is best to slice the tender meat fairly thick - we cut ours about 3/4" to 1" thick to help keep the oozing cheese in the pork slices and not all squished out. If figs and blue cheese don't float your boat, how about changing it up and using Gorgonzola and dried cranberries? I think that is what we'll try when we make this again.


Sunday, November 25, 2007

A bed of cheesy polenta for sweet roasted winter vegetables to rest upon...

This year really seems to be flying by with December fast approaching in less than a week! We had a total of 13 recipes this week, however a couple of them were repeats at Thanksgiving. We quite enjoyed the Thanksgiving feast, but I don't think I want to count those in our weekly round up of favorites... so making our end of the week list for this round was the incredible Crunchy Milk Chocolate–Peanut Butter Layer Cake, Beef, Black Bean and Chorizo Chili and the Frozen Pumpkin Mousse Pie (okay... Jeff made me include this last one even though I just said we were not going to include the Thanksgiving recipes!). Oh, and can you believe it? Over the holiday we crossed the 2 millionth visitor mark - wow!

The chilly weather has begun to settle in and we are expecting a wicked cold snap to blow in during the middle of the week (highs in the teens anyone?!). With polenta being one of our new favorite comfort dishes, I thought this Roasted Winter Vegetables with Cheesy Polenta would be a good choice to warm up our stomachs tonight for dinner.

The veggies are prepared first - chunky cream-colored cauliflower florets and cubed pieces of butternut squash are tossed with sliced onions and minced garlic. The veggies are lightly seasoned and drizzled with extra-virgin olive oil - the original recipe called for using garlic powder as a seasoning at this point, but opted to toss in a few chopped fresh cloves instead.

Roasted Winter Vegetables with Cheesy PolentaWhile they roast in a fiery hot oven, the polenta is prepared by cooking cornmeal in flavorful vegetable broth, a bit of water and fresh rosemary. The length of time it will take will vary depending on how coarse your cornmeal is - it took us about the full 25 minutes to get it to the consistency we like. Since it is a cheesy polenta after all, a good handful of fresh grated Parmigiano-Reggiano cheese is stirred in at the end for a sharp salty punch. To serve, the soft polenta is plated with the tender and golden browned vegetables strewn on top. Roasting the veggies at such a high heat brought out their light natural sweetness and made them the glistening highlight of the dish - however, the savory polenta with that nutty cheese did not fall into the background either and made this dish very filling.



