Wednesday, July 16, 2008

I hope you are not tired of strawberries yet... check out these homemade Strawberry Marshmallows!

It was quite the happening day around here! Max is nothing but ecstatic as the fence people came today and finished enclosing "his" backyard - now he gets his run of the area just like he did back in Maryland! One happy puppy dog!

Besides the excitement there, I also had to get up early this morning, getting myself and the kitchen covered in dust - edible dust - while cutting the the treats before Jeff drove into work. For this week's Wednesday Treat Day, I made use once again of those berries we picked (I used the ones I placed in the freezer the day we picked them) and prepared these homemade Strawberry Marshmallows!

If you have never had a homemade marshmallow before, I implore you to give them a try because they are worlds better than those packaged ones you find in the market. The whole process may scare some people off because you need to haul out a candy thermometer and work with molten sugar, but it is not nearly as scary as you might think!

I used our frozen whole berries, thawed, to make the strawberry purée because I find that they whiz up a bit smoother than using a fresh berry. We didn't add anything to the strawberries for the purée - it is pure and unadulterated sweet summer flavor! Because I wanted them to be more rustic and "hand-made", I did not strain the seeds out and I'm glad I didn't. They were not obtrusive at all and I loved how they speckled the marshmallows - however, if you don't want them, feel free to pour the purée through a fine sieve.

To create the hot syrup to sweeten these marshmallows, you'll need to boil sugar, water and light corn syrup until it reaches the soft-ball stage (I took mine to 240 degrees). To make sure no sugar crystals form on the side of the pan, I like to cover this mixture while it comes to a boil - the cover will catch the evaporation and lets the water drip back down the sides of the pan to wash anything that may have splashed up back into the sugar-y mix. Once it reaches the boiling point though, make sure to remove its cover and leave it be until it comes up to temperature.

You will want to pour this hot mixture slowly down the side of your mixing bowl, with the whisk attachment running on medium speed, taking care that the syrup doesn't hit the whisk as it may fling it out of the bowl. As soon as the syrup is all in, just throw the speed up to high and let 'er rip until the marshmallow mixture is thick and stiff, yet still pourable. It is very sticky, so just do your best to work with oiled spatulas to help you transfer and spread the marshmallows into the pan. Lots of recipes call for using confectioners' sugar for dusting the marshmallows to remove that stickiness, but we used an equal combination of potato starch and confectioners' sugar. Potato starch is neutral in flavor and doesn't add extra sweetness like the confectioners' sugar does. You could also use cornstarch, but it is a little heavier and not as clean of flavor. I've also read about people using rice flour and it working well, but I've never tried it myself.

Once you get it all into the pan, dust the top with your confectioners' sugar mixture and just set it aside for at least 6 to 8 hours to give them a chance to firm up. This is why I couldn't post about them yesterday! Don't worry about covering them as you do want them to dry out a little as they sit. If you use a knife to cut these tall gems, use a thin-bladed one - I recommend a large pizza wheel though as it makes quick work. Just be sure to lightly coat whatever tool you use with a little oil to keep the sticking under control. Once they are cut, you'll need to dust those clean edges with the confectioners' sugar mixture one last time and that's all there is to it!

With their light pink hue, they are bouncy, soft, and fluffy cubes that melt like butter as they sit on your tongue - the essence of love in the form of marshmallow! I didn't get an automatic strawberry wallop as I took my first squishy nibble, but the flavor slowly worked its way into my mouth as they dissolved, releasing a natural berry spirit that is leaps and bounds better than any artificial combination. I will most certainly be trying this recipe again using different fruit purées like raspberry, blackberry or maybe even blueberry if we get our hands on an outstanding batch. I would suggest straining these though as their seeds would probably not be a welcome addition. Jeff heard many comments like "Wow! You can make your own marshmallows?!" while they quickly vanished from the serving bowl. Yes, YOU can and really, you must try making your own at least once - you won't go back to those stale ones in the store!


Tuesday, July 15, 2008

Trying an Étouffée for the first time...

I'm sure you are well aware that Tuesday is the day I make and usually talk about the Weekly Wednesday Treat Day for Jeff's co-workers. While I did prepare this week's treat this afternoon, it has to rest for a few more hours before we can divvy it out, so the pictures and recipe will need to wait until tomorrow! A clue... by the time I'm done with the treat, the kitchen and I will surely be covered in confectioners' sugar!

As I've talked about before, Jeff is a big seafood fan, especially shrimp, so I've always got an eye out for recipes that sound good to both of us. When I came across this lighter take on Shrimp Étouffée, I made sure it went to the top of my seafood recipe pile for us to try out. I've never made (or eaten) Étouffée before, so I will not be able to compare it to the classic southern dish - having said that, if we ever go down south, I know one of the first dishes I will have to order!

I would love to have made a homemade shrimp stock for this, but I rarely remember to save their shells when I remove them for recipes. I now have a bag in the freezer for such an occasion though! Instead, we went along with what the recipe called for and heated up a mixture of chicken broth, thyme, basil and a bay leaf.

Before we began the vegetables, we started a roux which will thicken up the sauce in which the shrimp cooks. Simply made by melting butter and sprinkling in some flour, the two are cooked together long enough to remove any of the raw taste the flour has - for this recipe, you'll want to continue cooking the roux until it turns very brown. It may look a little stiff or lumpy at first, but as the heat does its work, it will smooth out as you whisk. Once it darkens, the broth mixture is whisked in a little at a time - you heat the broth first because you don't want to add a cold liquid to a roux as it will end up lumpy. However, you also don't want to add boiling hot liquid either - this is why it is warmed before you start the roux and set aside to cool slightly.

In just a little more bubbling melted butter, we softened chopped onions, celery and a red bell pepper - I find green bells a little too harsh, but if you like them, swap out one-half cup of the red bell with green. We tossed in a bit of tomato pasta for richness and let it cook for a minute to deepen it's flavor (though, I don't believe you would find any tomato in a true Étouffée). You'll notice that between the vegetables and tomato paste that there are caramelized bits stuck on the bottom of your pan. To steal those flavorful bits back, water is added which will help release those pieces. Cajun seasoning, garlic and cayenne are sprinkled in to add a little fire and season up the pot before the thickening broth mixture and Worcestershire sauce is stirred in. After a few minutes of simmering, we freshened up the flavors with green onions and parsley - the shrimp are also added and left to pink up.

While I'm sure this is traditionally served over white rice, we still wanted to add a bit of whole grain and decided to make a bed of brown rice instead - use your judgment as to which rice you think you would like the best. Very saucy with a just enough burn to quench our thirst for spicy dishes, serving it with the nutty rice helped keep the heat in check.

Monday, July 14, 2008

Strawberry-Lavender Freezer Jam and a fun Tex-Mex dip...

Besides freezing a portion of the 15 pounds of whole strawberries we picked for use later in the winter, Jeff and I really wanted to make some jam to preserve that brilliant, fresh flavor those berries had. I've never made jam myself, so I decided we would ease into the whole process with a batch of freezer jam. Because we always feel the need to add a twist or two, we infused vanilla, lavender and fresh lemon zest into our batch of Strawberry-Lavender Freezer Jam.

We sneaked the vanilla flavor in by breaking into my favorite jar of granulated vanilla sugar. This isn't something I buy though, I've have an extra-large mason jar filled with regular sugar that I stuff used vanilla beans into and leave it in the pantry, that I give a good shake when I think about it, so that sweet vanilla aroma wiggles it's way into each granular speck of sugar. There may be a few different kinds of freezer jam pectin out there, but the version we picked out does not need to be cooked at all. I wanted this because the berries this season were exceptionally delicious and we didn't want their flavor to be compromised at all. Also, we were able to use quite a bit less sugar.

You'll start out with 8 cups or so of whole berries for this jam - once you mash them though, you should end up with just about 4 cups worth. Since we wanted to keep some texture, we tossed the berries into a big 'ol baking dish and used a potato masher to crush them. We poured the berries into the vanilla sugar and pectin, then added the extra touches with crushed dried lavender and a bit of lemon zest. I know a teaspoon of lavender probably doesn't sound like much to 4 cups of berries, but you don't want to add too much as it is very fragrant and this amount leaves just a mild flavor that still gives the strawberries the spotlight. This should keep in the freezer for about a year (as if it will even stay in there that long!) or about 3 weeks in the refrigerator. Enjoy it on toast (that's where we started!), slathered onto an English muffin, dolloped on pancakes or whatever your heart desires! One of these days, we'll have to make a trip down to the farm and have mom teach us how to properly make jam for canning so we won't have to take up precious room in the freezer!

Do you ever read recipes that are intended to be an appetizer, yet you really want to try it and don't have any plans for entertaining? That was me when I was going over this Tex-Mex Beef and Bean Dip.

I was talking to Jeff about making it the next time we have guests, but his response was why wait? So, rather than serving 12, we decided it would fill us right up at 3 or 4 servings instead! After we browned up a half-pound of lean ground sirloin, we stirred in a couple tablespoons of concentrated tomato paste, chipotle chile powder for a little heat and a few shakes of cumin for a smoky background. As soon as these spices noticed the heat in the skillet, their taco-like aroma shot right up into the air and quickly spread throughout the kitchen, drawing Jeff into the kitchen to see what was cookin'!

See, his memory is fading these days (hee hee!), so as he looked at me all surprised and excited while trying to figure out what smelled so good, I had to re-hash the whole conversation we had while preparing the menu this week! Anyway, after all that, I stirred drained pinto beans and fire-roasted diced tomatoes into the meaty concoction. All it needed then was a few minutes to thicken up and allow the flavors to mix and mingle together. This was screaming for some cheese, so to finish this off, the top is scattered with crumbles of queso fresco. This is a Mexican cheese that is moist, soft, easy to crumble and keeps its shape quite well when heat is introduced to it.

It is somewhat mild, but brings a slight salty note to the finished dish. If you can't find this or don't care for it, you could try using crumbles of feta or even goat cheese, however the flavor will be different. To serve this, we placed the dip into bowls and used those fun mini "scoop" tortilla chips to dunk in and grab enough for a bite. Eating probably a bit more than we should have, we ended up with 3 hearty servings in total, leaving one leftover to fight over for lunch tomorrow!


Sunday, July 13, 2008

Grilled pork served with a Strawberry-Avocado Salsa...

We were able to talk about 7 new recipes we made this week and we picked these as our favorites - the Frozen Strawberry Daiquiri Pie with Strawberry-Rum Sauce, Polpette with Quinoa, Parmesan and Sage and those Cashew Chocolate Tartlets.

I mentioned on Friday that due to the nasty weather that blew through we were not able to get our post up about Thursday's dinner. In an effort to get caught up, I'll talk about this savory Chipotle Grilled Pork Tenderloin with Strawberry-Avocado Salsa dish I made that night which used up the last of the fresh strawberries we picked!

To infuse the tenderloin with as much flavor as possible, we marinated the pork for a couple hours in a mixture of minced chipotle chiles, fresh lime juice, sliced onions and a couple cloves of garlic. While this is sitting in the refrigerator, be sure to give it a couple turns inside the bag to ensure the marinade reaches every inch of that lean piece of meat.

Once we had grilled off the pork (try not to let the internal temperature go much higher than 145 to 150 as pork is so lean these days that it is easy to dry out!), we made sure to let it rest so the juices didn't gush out when we sliced into it. While waiting for it to cool down, we prepared the intriguing sweet and savory salsa to serve along side. You'll want to keep the strawberry pieces somewhat large to stand up against the creamy avocado, so just quarter the berries after removing their hulls. To freshen up the salsa, the rest of the ingredients included sliced green onions, cilantro and a couple squirts of lime juice. I wouldn't recommend preparing the salsa too early as the salt and lime may break down the berries and make the salsa a bit soft and watery.

The chipotles added a deep smoky flavor, but didn't actually impart as much of a fiery punch to the pork as I was expecting! There was a little heat, but it was nicely tempered by that complex and lively salsa. I got one of those "one eyebrow up" looks from Jeff when I started tossing the berries with those creamy chunks of avocado... but he took that look back with a smile on his face one he had his first bite!


Saturday, July 12, 2008

A wicked Frozen Strawberry Daiquiri Pie...

The strawberry train is still chuggin' away! What's up next? This Frozen Strawberry Daiquiri Pie with Strawberry-Rum Sauce that we made a day or so after we picked the berries. Sadly, this ice cream pie is long gone now, but I can clearly remember each and every creamy bite.

To give the pie a substantial base, we made a homemade honey graham cracker crust to line our stoneware pie plate. This crust uses an egg white to help bind it together, rather than using a lot of butter - I liked how that egg white helped to form a little barrier and not let the crust get soggy from the ice cream. However, you could always just add a tablespoon or two of melted butter if you prefer not to use the white. Do note - this crust is baked, cooled and then frozen before the ice cream mixture is smeared on top.

The daiquiri part of this recipe comes in by swirling together softened vanilla bean ice cream with strawberry daiquiri concentrate! And yes, you won't be disappointed because a few splashes of white rum is also tossed into the mix. If you don't want to use alcohol for whatever reason, you could simply replace it by using white grape juice or even apple juice. You'll want to firm this back up slightly before putting it into the crust, so just set the bowl you mixed this in into the freezer while the crust is chilling out too.

Though this needs a bit of time to set back up (due to the added liquid and alcohol), I went ahead and prepared the sauce that is poured on top. Quartered strawberries, just a couple tablespoons of sugar to get their juices going and a shot of rum are all tossed together. After sitting for awhile, half of the berries and a sprinkling of fresh lime zest are placed in a food processor to create a smooth counterpoint when combined back with the remaining chunky berries. We covered this and let it stew in the refrigerator until the pie was ready.

While alcohol doesn't freeze hard, the ice cream mixture does still return to a fairly solid texture, yet the rum keeps it from getting too hard. You may want to place it in the refrigerator for about 15 minutes to soften slightly before trying to serve it. I did taste the ice cream part of the pie before adding any sauce and found it a little lacking in the strawberry flavor department, but once that jeweled sauce was poured on top, it came alive with that fresh sweet flavor I was after! While I didn't have much issue getting this out of the pie plate, I think I would have rather used a springform pan in the end just to ease the cutting process. As I was feasting on my slice, other ideas came to mind - how about replacing the daiquiri concentrate with margarita mix, swapping the rum for tequila and using salty pretzels in the crust?

Friday, July 11, 2008

Book giveaway update and berries from dinner to dessert!

We have a lot to get to today.... grab a drink and get in a comfy chair!

Thursday was quite an eventful day (and night!). We had a very large mass of storms race through our area. Extraordinarily strong winds and pounding rain came down (along with a tornado about 10 minutes away!) which knocked out our internet access until today. The storm also decided one of our large trees in the back would look better laying against the side of our neighbor's house! Ack!

Thankfully there was no real damage done and we may end up saving the tree, as long as the dirt turns from the pudding consistency it is now and firms back up. I did end up making dinner last night though, in between cleaning up all the debris and I'll try to get that posted on Sunday. Just for a little tease, we used the last of our fresh berry supply to make a savory salsa to serve with a grilled piece of tenderloin! Stay tuned for that...

So, we were a little overwhelmed with all of the comments for the book giveaway! Thank you again for the e-mails and notes - below you can see all of the little pieces of paper that Jeff painstakingly (...) clipped out.

The paper we plucked from the pile for the Bobby Flay cookbook was Lonetree72 - congratulations!

Because of all of the entries, we figured we might as well throw in another book and pull out one more entry! This one is slightly different as it is not a cookbook per se, but I think one who spends time in the kitchen would enjoy it! So, congratulations to Sara on winning The Taste of Sweet by Joanne Chen.

I'll be sending you both a note for your addresses and we'll get the books out within the next few days!

So, as you know we went out and picked a large large bounty of gorgeous fresh strawberries...

To preserve them at their peak sweetness, I've already worked through most of them. What did we do? One of the first things I made was this Strawberry-Buttermilk Gelato. Gelato is different from regular ice cream as it tends to be lighter and typically uses milk instead of cream or half-and-half. It is also not as rich since it does not typically include egg yolks. This recipe takes the flavor a step farther and instead of milk adds a delicious tang by using buttermilk. When using strawberries like this, be it gelato or ice cream, it is best to use them in a pureed form. If not, the berries will end up freezing like little icy chunks and not blend in as nice.

To sweeten the mixture, a simple syrup is prepared and allowed to cool. This is just equal parts sugar and water that is heated until the sugar melts into the water to remove any gritty texture. Those pureed ruby berries and creamy buttermilk are then added to the cooled syrup - at this point, I went ahead and chilled it in the refrigerator overnight so the mixture could get very cold before churning it. I find this achieves a better texture in the end, but you could go ahead and process it immediately. Now, I do have to say, I'm not sure that the texture is as close to a true gelato as I would have liked. To me, it seemed a lot more like a sorbet, but that may be splitting hairs as the taste was heavenly! Sweet, but not too sweet, the explosion of fresh strawberry essence was flowing freely in each bite and this was such a perfect cooling treat to wind down with on a hot summer day.

We had a breakfast-for-dinner night and ran with another berry of the season - raspberries! These Almond-Buttermilk Hotcakes with Raspberry-Grape Sauce were actually suppose to be made with blackberries, but the raspberries at the market were so plump and lively that I couldn't pass them up.

To add an unusual and delicious twist to the sauce, crisp red grapes are actually tossed into the mix. Using raspberry jam and bright lemon juice as a base, the sauce is heated just enough to activate a little cornstarch to tighten up the liquids so it will cling to the hotcakes. Grapes are a little more sturdy, so they are added before the sauce is heated - however, since the raspberries are more delicate, we gently folded them in at the last minute.

Once the sauce is completed (just cover it to keep warm), we worked on the lightly spiced hotcakes. Not as thick as a regular pancake, but not as thin as a crepe, these thin rounds are rich with brown sugar and have a crunch due to the addition of toasted sliced almonds. The original recipe didn't call for it, but we added a few drops of almond extract to amplify that nutty tone. If you have a small griddle and need to prepare these in batches, heat your oven to the lowest temperature (usually 170 to 200 degrees) and hold the cooked hotcakes in there to keep warm while you prepare the rest. You'll know they are ready to turn over when the wet batter on top is covered in bubbles and the edges look almost cooked - once flipped, leave them on just long enough to lightly brown the bottoms to keep them moist. I'm a big fan of drizzlin' on warm, pure maple syrup on my pan/hotcakes, but both of us quite enjoyed the enchanting nature of the soft raspberries paired with the juicy burst of crisp grapes. I know I am already anticipating delving into the leftovers for a speedy Saturday breakfast tomorrow!


Wednesday, July 09, 2008

Baked pasta and gooey cheese...

I had to run a bunch of errands today, so I ended up home a little later than I would have liked tonight. I didn't let that stop me from getting something on the table for dinner though! I turned to another pasta dish, just like we did last week, except this one was planned, but had a little more work to it. Not much though!

Because you can easily multi-task on this Baked Bow-Tie Pasta with Mozzarella dish, I think dinner was ready (though still a bit hot) in just around 30 minutes or so. While I was waiting for the farfalle (bow-ties) to cook, I got going on a quick tomato sauce. To a couple fragrant cloves of warmed minced garlic, we added a can of whole tomatoes, crushed red pepper, oregano and just a dash of sugar to take away any tinned flavor from the tomatoes. Cooked until slightly thickened, be sure to use a sturdy wooden spoon to break up the tomatoes as they cook. Alternately, break out the boat motor (immersion blender!) and let 'er rip. I would suggest that you try and leave some texture to the sauce and not get it smooth if you use this method though.

To add some protein to the dish, a couple cooked chicken sausages are thinly sliced into coins and tossed into the sauce, along with the cooked pasta and some cubed pieces of mozzarella. For the sausages, we used a favorite sun-dried tomato and mozzarella version that we picked up from Costco and had in the freezer. Since once can usually not go wrong with more cheese, additional cubes of mozzarella are tossed on top, along with a sprinkling of sharp Parmesan cheese. You only need to bake this until the sauce is bubbling and the cheese starts to turn golden on top - about 10 to 15 minutes total! Just enough time to clean up, get a drink and remove the clutter that always ends up on the table. Since this is a pretty saucy dish, it is not as easy to get firm pieces out like you would with a lasagna. However, if you let it sit for awhile (who can wait?), the pieces will probably not spread as much as they did for us.

I loved shifting the tender bow-ties around with my fork, trying to find those hidden puddles of love in the form of gooey mozzarella! Feel free to play around with the sauce and make it your own - toss in some fresh shreds of basil at the end, sauté a few chopped onions or mushrooms before adding the garlic or even add a splash of red wine if you're feeling adventurous!

Recipes

Tuesday, July 08, 2008

Miniature tarts...

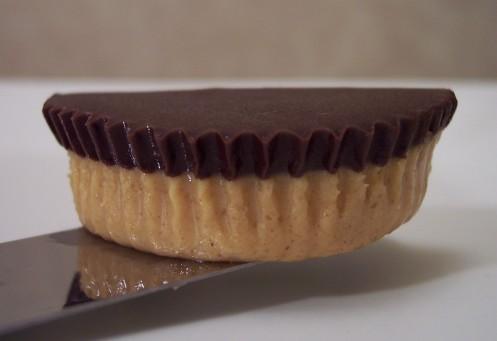
You've heard my affection towards miniature treats before and it has been awhile since we've done some. For this week's Wednesday Treat Day, we ran with that idea and prepared these individual Cashew Chocolate Tartlets.

The only thing I had forgotten about making miniature goodies like these tartlets is the repetitive nature of them. While I don't mind it that much, I keep thinking how much time I would have saved preparing these if I would break down and buy one of those fancy miniature tart shapers/stampers out there!

The crust was the most laborious portion as I had to press the lightly sweetened pliable dough into 36(!) miniature muffin cups. You may want to check the size of your muffin tin before you start - if the wells hold less than 2 tablespoons of water, you may end up with 42 tartlets instead as they are just a touch too small to hold everything.

Once the buttery crusts were formed and baked to a light golden, we laced the bottoms with mini chocolate chips for richness and to form a protective layer against the wet filling. The sweet filling is a combination of confectioners' sugar, butter and Lyle's Golden Syrup - I used the golden syrup as I am quite fond of that sticky burnt-sugar flavor it has. If this is something you don't have or can't find, you could replace with dark (or light) corn syrup or even brown rice syrup. Once those ingredients were combined and brought to a boil, a handful of coarsely chopped cashews are tossed in. If you don't groove on cashews (which happen to be Jeff's favorite), you could use almonds, pecans or even a mixture of your favorite nuts! This mixture is carefully measured into the baked crusts and they head back into the oven to for a quick bake to finish setting the filling. If you do use almonds, I suggest swapping out the vanilla in the dough for almond extract to tie in the two flavors.

While we enjoyed that sweet hidden layer of chocolate, I also loved how the heated sugar-y mixture added a caramelized note to the nuts, giving a rich depth to the filling. The crusts were tender, yet still crisp, which allowed the tartlets to be easily handled without worry of them falling apart.

I know it is not always easy to incorporate whole grains into your daily eats when you may not be used to having them. With our dinner tonight, Polpette with Quinoa, Parmesan and Sage, I'm hoping this may change your mind if you give this recipe a try!

I did have to change one main ingredient with these miniature meat loaves (keeping with the individual theme today!) tonight - the original recipe called for bulgur, which I always have in the pantry. For some reason though, I apparently forgot to refill the jar and found it empty as I reached for it! There was no time to run to the market, so I glanced over the pantry and figured I might as well try the ever-nutritious quinoa! I know that most quinoa supposedly comes pre-rinsed to remove that bitter saponin coating, but I still recommend giving it a good rinse and rub with your fingertips just in case. I skipped this once as I thought why bother if someone else has already done the work, but I was much disappointed when I went to taste it and it was fairly bitter.

Rather than cooking the quinoa in water, the flavor is amped up by using half red wine and a bit of beef broth. A mixture of ground sirloin, hot Italian turkey sausage, garlic, parsley, Parmesan cheese, an egg and fresh sage are smashed together to create the meatloaf. Rather than using breadcrumbs or milk-soaked bread, the cooked and well-drained quinoa is added to act as the binder for these loaves. Since you are using ground beef and turkey, be sure to cook these thoroughly and check their temperature with an instant-read thermometer - you'll want it to reach around 160 to 165.

I have to say that I am a fan of ketchup/tomato topping for meatloaves, but Jeff and I both found the combination of ingredients in this to be so flavorful that we agreed we didn't miss that topping one bit! You could even lighten these a bit and swap out the ground sirloin for ground turkey. Adding that single link of Italian sausage made such a difference, bringing another layer that had you guessing what was so good. The meatloaves were still sturdy enough to slice and hold together, yet retained a good level of moisture so they were not dry. I'd love to make this again into a single large loaf so we could slice it and turn it into meatloaf sandwiches! I'm betting this mixture would also make exquisite meatballs, which in turn could be sauced up for pasta, stuffed into a sub roll or even made tiny to top a pizza!

Monday, July 07, 2008

Gorgeous freshly picked strawberries...

Thank you for the supportive comments and e-mails we have received over the past couple of days! We are humbled and will do our best to continue on with this creative outlet for as long as we are able to. We'll keep taking names (please use that post if you would like to enter the drawing) until Wednesday and will post the winner of the cookbook on Friday!

Jeff and I recently headed over to a local farm that had the most beautiful strawberries we have seen in a long time!

Due to the late start this year, the ruby berries were extraordinarily sweet, big and oh so juicy. Once we arrived at the farm, we grabbed our picking box and hopped on the only way to travel to the many rows flowing with the berries - by tractor! As you can see, we were not the only one with the idea to get outside and have fun pickin' strawberries.

Even though I thought I had picked over my row with my now red-stained hands, as I was walking back to finish up our box, I couldn't resist snagging a few unseen berries that glimmered in the sun, even though my hands were already full!

See! Can't even think of holding anymore now!

It took us less less than 45 minutes to achieve this heaping box of berries - the net weight? 15 pounds!

Once we were done, we walked around the farm a bit to check out the sights. They had a little area full of different animals that the kids could feed (and Jeff too...) and even though he was happy with feeding the animals, I think he was a little disappointed that he was too big to fit into the little cow train they were giving rides in! Hee hee!

We missed this sign heading in, but I think it says it all, especially when going picking for fresh strawberries.

By the time we had gotten home, I think my belly needed a break, but my taste buds said otherwise! So, while I should have worked some of them into a dessert, we wanted to go a different, slightly savory direction, and prepared this Strawberry Spring Salad as a side to dinner.

Use your favorite greens - we decided on a crisp red romaine we picked up from the market on the way home. Because we wanted the berries to shine, the generous dressing for this salad is fairly light, yet has enough tang to keep your attention. To balance the bite from the white wine vinegar, a drizzle of honey is added, along with a little olive oil. To top off the dressed salad, toasted pine nuts are sprinked over to lend a buttery crunch. The fresh berries were kept in quarters for some heft - this gave you something juicy and a little more substantial to sink your teeth into against the greens. As an afterthought, I think both of us would have loved a few crumbles of creamy goat cheese scattered on top to add a little richness and spunk to round the salad out.

Recipes

Saturday, July 05, 2008

Has it been three years already?

I can't believe it... this is the third anniversary of us journaling our culinary adventures - crazy I tell you! I never would have thought we would still be doing this when we started three July's ago!

We did have a couple breaks caused from moving or vacations, but we've pretty much posted daily over these past years. Remember we started this way back west out in the desert heat of Phoenix, made a tremendous move to a farm-like area in Maryland and have now settled back in the suburbs of Minneapolis. How long will we be here? Time will tell, but so far it looks like we are planting our roots for the time being.

Besides starting the blog back in Phoenix, that location was also the jumping off point of the Weekly Wednesday Treat Day! Being able to share our creations with Jeff's co-workers brings such joy and satisfaction, along with giving me a reason to try out new recipes! Speaking of, I went through and made a rough tally of our insane list of recipes - we have prepared, eaten and posted over 1,340! It is hard to believe that just a few years ago we survived on pizza, chicken fingers, fries and cereal since we didn't know any better! The question now becomes, do we continue our journey here? Are you still interested in our daily eats and what works for us?

In honor of this anniversary, Jeff and I have decided to hold our first ever giveaway! Here is your chance at a free copy of Bobby Flay's Mesa Grill cookbook. Just leave us a comment (with someway to contact you if you don't have it in your profile) to have your name thrown into the Dutch oven we'll draw the names from. Please, only enter once and we'll take names until Wednesday, 07/09/08.

I went back and fourth, trying to figure out what we could make to celebrate this occasion and settled on these stunning Espresso Cheesecake Brownies from one of our go-to cookbook authors, Dorie Greenspan.

I decided on this recipe mainly because Jeff has an insatiable craving for coffee-flavored treats and I kind of have an affinity for them too. With three distinct layers, the bottom of these bars is a thin fudgy brownie, followed by a luscious espresso-laced cream cheese layer and topped off with a rich blanket of sweetened sour cream. Those spots in the middle layer? Those are dollops of the same brownie batter that makes up the bottom layer - we just swirled it into the cheesecake layer before baking.

When you go to swirl those two concoctions together, don't try to make a pretty design, just quickly go through it a couple times with a butter knife. Also, take care not to go too far down so you don't interrupt the brownie slab on the bottom. Doneness can always be a little hard to tell with cheesecakes - the top of these bars should be puffy, lightly golden around the edges with the center being a touch beige. Before you add that final, delectable sour cream topping, the brownies will have needed to cool down completely and gone for a stint in the refrigerator to chill out. They will also need to chill again once that topping is on to set. All that time is worth it as you'll be rewarded with one tidy bang up treat that Jeff and I indulged in way too much of this afternoon! I'll even share my piece, can I tempt you with a bite?


Friday, July 04, 2008

Our at home picnic for the Fourth...

Happy Fourth of July!

We had a pretty laid back day today and decided to keep dinner the same, having our own little picnic on the side deck this evening. Since we are fairly high up on a hill, we are lucky enough to have a beautiful view that allows us to see quite a few fireworks displays right from the comfort of home, so we are looking forward to spending the rest of the night watching the colors burst in the sky.

While I've finally come around to like potato salads that are made with mayonnaise, I do prefer ones that are a little lighter. So, I was excited to try out this Country Potato Salad when I came across it recently.

Instead of a thick, heavy dressing, this salad is coated in a delightfully tangy mixture of buttermilk, lemon juice and just a touch of canola oil. This dressing brings a nice creamy component, without adding too much moisture. Since we had to buy new potatoes for that Persian rice dish last night, we went ahead and just grabbed a couple extra pounds to make this salad. But, if you have access to those colorful Purple Peruvian or can grab some heirloom potatoes from the farmer's market, I would suggest using some of those to help the salad visually pop. So the potatoes don't get too soggy, boil them whole and then let them cool slightly, once drained, to chop them up into bite-sized chunks.

For some crunch to contrast the tender potatoes, a cup of chopped celery is tossed into the salad. I've never put ham in potato salad before, but Jeff and I both thought this smoky addition was a wonderful surprise. Don't be afraid to play around with the fresh herbs - you can switch out the chives for green onions or add some dill to replace the mint for different flavor. Finished with a couple chopped hard-boiled eggs folded in at the end, I think this rivals our other favorite potato salad as one of our top favorites!

Keeping with buttermilk theme, we also decided to serve these Buttermilk and Herb Marinated Chicken Breasts too. There isn't too much to talk about here - buttermilk, chopped pungent rosemary and a little salt and pepper are left to work their magic on a few pieces of boneless and skinless chicken breasts. If you think ahead, just plunk everything in a zip-loc bag the night before and stash them in the refrigerator overnight. If you forget, a couple hours would be fine for the refrigerator and if you are in a rush, you can also let them sit at room temperature for 30 minutes.

The buttermilk kept the chicken from drying out and gave them an incredible tender quality. I loved the herbal note from the fragrant rosemary and it finally gave our new baby rosemary plants a reason to grow! To let the chicken reabsorb those succulent juices, let the breasts rest, tented with foil, for about 5 minutes before you serve them. We actually made about 1 1/2 times the recipe, so we could freeze some of the extra cooked breasts to slice up and place on our Saturday salads or to be shredded up for a recipe.

Thursday, July 03, 2008

A spiral of figs...

I love to munch on dried figs as a snack, but I wanted to incorporate them into a treat for us as we were gifted a bunch of them.

These Fig-Swirled Buns didn't originally start out this way and were suppose to be assembled a bit differently. However, I wanted to make them a little more interesting, so we decided to shape them into cinnamon bun-esque shapes instead.

I used a combination of all-purpose flour and white whole-wheat flour for the dough to keep them light, yet add a little more nutrition into the buns. Being prepared in a food processor, the dough comes together in a hurry and only needs to be processed for a minute to knead. You don't need a food processor to prepare this recipe though, you could just as well do it the old fashioned way by hand or even use a stand mixer. The dough should feel tacky to the touch, so adjust the flour as needed.

While the dough was busy bubbling up and rising, we tossed the dried black mission figs into a food processor to chop them up. Because they are unbelievably sticky, you'll need some moisture to help them move and groove in the processor bowl - to brighten them up and add a touch of sweetness, we used freshly squeezed orange juice. This doesn't have to reach a paste, but you'll want the figs finely chopped. Rolled out into a large rectangle, the dough is smeared all over with the processed figs - just leave a clean border along one long ledge so you can pinch the dough together. You can use a sharp serrated knife to slice the log into the rolls, but I always use unflavored dental floss as it won't squish the dough and makes excellent clean cuts.

Rather than placing them all snuggly together in a couple baking pans, I made use of our enormous 24 cup muffin tin we picked up at a restaurant supply store a couple months ago! Since we got 16 buns. I went ahead and filled the empty holes with water to prevent them from scorching. Rising time can be a little tricky - you are looking for them to rise until they are puffy and almost doubled in size. One way to tell if they have risen enough is to poke one gently in the side with your finger - if the indent remains, they are ready to go!

The slightly sweetened dough is not overly buttery or rich, allowing the figs to shine through. I did find that this also made them not as meltingly tender though, but neither of us minded. While they were still warm, we stirred up a glaze consisting of confectioners' sugar and just enough milk to thin it out. With their golden spiral domes, these almost reminded me of those fig bars, except a lot more fun to eat!

Do you happen to be like me and a fan of that crusty layer of rice that forms on the bottom of a paella? While tonight's dinner, Persian Spiced Rice With Crispy Potato Crust, isn't exactly the same, I was certainly satisfied with the outcome!

To give the brown rice a head start, we added it to a pot of boiling water, but drained it after 25 minutes. I didn't have any medium-grain rice on hand, so I ended up using long-grain, but if you have medium use it as it gives the rice a little more sticking power. Once drained (don't forget to press out some of the excess water!), the rice is tossed into a bowl with sour cream, an egg, paprika, a generous pinch of earthy saffron and cumin.

So you can see when that golden crust form, you'll want to use a glass one quart baking dish - I bet you could even get away using a glass pie plate too. In the dish, we drizzled a good layer of olive oil and added a single layer of thinly sliced new potatoes and onions. To heat up the oil before the rice goes in, the dish is placed in the oven for 5 minutes. The creamy rice mixture is then pressed on top of the potatoes and onions (and will subsequently reach the bottom of the dish), then placed back into the oven until the rice has cooked through and you can see a golden crust on the bottom. I think we could have let ours go a little longer, but it was getting a little late and Jeff wanted to eat! Turn this large rice "cake" out so the bottom doesn't get soggy as it sits (I suggest serving it immediately), however be careful when doing this as a little of the oil might drip out as you turn it out.

Sliced into wedges, the nutty rice mixture held together well even with using the long-grain rice while the potatoes along the edges crisped up just like homemade potato chips. If you do use medium-grain rice, which happens to be a little more sticky, I think you could even skip the added egg. If you're not keen on new potatoes, try this dish using half of a small sweet potato, thinly sliced, for a different flavor.

Recipes

Wednesday, July 02, 2008

Change of plans with a quick pasta dish...

Do you ever have one of those nights where nothing sounds good and you don't feel like making a big mess to clean up later, yet you don't want to get take out? Well, tonight was my night and I pushed the scheduled dinner we were suppose to have to tomorrow and opted to throw together this no-fuss Campanelle with Broccoli, Roasted Garlic and Pine Nuts instead.

Including the obligatory salt and pepper, there were just 8 ingredients to this dish and the only thing I needed to wait on was roasting a head of garlic. If you happen to have a toaster oven (which we do!), it works well to do this without heating up the kitchen. I also toasted the pine nuts along side the garlic during the last few minutes to get that out of the way.

While the water for the pasta was coming to a boil, I cut off the broccoli florets needed and made an airy mound of grated Parmigiano-Reggiano cheese with our snazzy microplane grater. To save on dishes, the broccoli is dunked into the same salty pot of water with the pasta during the last couple of minutes. Before draining the two, save about a quarter-cup of the starchy cooking liquid. All of the ingredients are placed back into the same pot you cooked the pasta in (bonus!) and tossed together with the reserved liquid to add moisture. The buttery nuggets from the pine nuts added a needed richness since this dish is fairly light even with the sharp flavor from the cheese. To help distribute it better, I would suggest mixing the mashed garlic with the reserved cooking liquid to help loosen it up. If you want to add a bit of heat, sprinkle on some crushed red pepper flakes once plated for a nice kick!


Tuesday, July 01, 2008

Strawberry-Rhubarb Lemon Squares...

Sunny lemon bars, dusted with their classic coating of confectioners' sugar, are always a delicious treat that appeals to many. Instead of that sugar-y topping, for this week's Treat Day at Jeff's office, we decided to take those bars one step further.

With a little bit of a late start, what is in prime season right now in Minnesota? Fresh, juicy ruby-red strawberries! And what other ingredient that is still going strong up here that goes well with those berries? That's right, rhubarb! We combined those two to gild the lily in these Strawberry-Rhubarb Lemon Squares.

A vanilla-scented crust is the base of these bars - the dough is a snap to combine and was easy to work with. It was not sticky at all, which made fitting it into the baking pan a breeze - the crust is baked just until set, yet not long enough to give it any color. Next, an intense lemon layer is poured on top. This is a very liquid-y mixture, but rest assured it will set up well from the added eggs, cornstarch and surprise ingredient, cornmeal! Don't use a coarse cornmeal, it should be fairly fine in texture so you don't take away from the creaminess of the lemon layer. You'll know when this layer is done as the edges and top layer of the bars should be a light golden color.

You could stop here, cool them completely and dust them with confectioners' for a basic bar cookie. However, to ratchet these up, a cooked mixture of diced strawberries, rhubarb and sugar is slathered over the top. Since the berries and rhubarb get very soft in the process of thickening them up, additional diced strawberries are stirred in once the glaze is removed from the heat, giving it a bit of texture. With an intoxicating, complex blend between sweet and tart, these over-the-top bars gave our taste buds a run for their money and left us with smile on our face while muttering "Mmmmm.....".

Usually we have leftovers for lunches, but last Saturday I had a little extra time to prepare a new dish for us to have. I wasn't sure if this Tijuana Torta would be something Jeff would enjoy, but thankfully, having an open mind, he is usually up to trying anything I make.

This torta is kind of like a burrito, but instead of being wrapped up in a tortilla, the filling is stuffed into a baguette. Black beans, salsa, a little pickled jalapeño and smoky cumin are smashed together, forming the bean paste to spread on the bottom piece of bread. Use your favorite salsa here - since we like spicier foods, I used a favorite habanero and lime salsa. On the top side, we spread a cool, creamy combo of avocado, minced onion and lime juice. If you have green cabbage on hand, you can use that for crunch. However, we weren't going to the market until Sunday, so I had to use a crisp romaine lettuce instead.

The original recipe asks you to scoop out the soft bread from the center, but I didn't want to waste it and decided to skip this part. However, after assembly, I can see why they did this as it was a little messy to eat with the bean mixture wanting to squish out. Either way, if you're looking for a speedy snack, Jeff gave this dish two thumbs up and I agree! If you're looking for a little more flavor, melt on some Monterey Jack cheese to the bean side of this vegetarian sandwich.