If you going to be too busy in the evening to bother with making dinner, but find yourself with a few minutes in the morning to throw some ingredients together, the dinner we had tonight may be something you would like!
Because this recipe, English Muffin Strata with Cranberries and Spicy Sausage, needs a few hours to sit in the refrigerator, it should be assembled in the morning or even the night before you wish to bake it so the English muffins have time to absorb some of the custard and the flavors to meld together. This hearty and savory dish begins by cooking spicy and lean Italian turkey sausage until browned. A liquid mixture made from eggs, plain soy milk (you can use regular milk), sour cream and seasonings is whisked together to form a light but creamy custard. The strata can then be assembled by making two layers of cubed English muffins, the cooked sausage and dried cranberries. The custard is then poured on top to soften the cubed muffins, with a scattering of sharp white cheddar for a cheesy finish. Once this is assembled it can rest in the refrigerator until you're ready to bake - I wouldn't let it sit more than 24 hours though. This bakes into a beautiful golden brown strata full of spicy sausage off-set with a touch of sweetness from the dried cranberries.
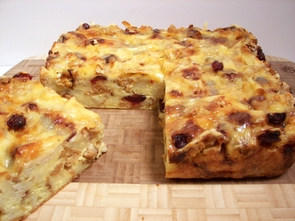
Sometimes these types of recipes don't go over well with Jeff as he doesn't care for the more soft texture they can have, but he especially liked that this was not mushy or soggy - we also both enjoyed the touch of tangy richness the sour cream added in the background.
Thursday, November 30, 2006
Wednesday, November 29, 2006
Quick and refreshing...
For those that have been asking, we did go ahead and send in the treats today. Since we wrapped them individually with plastic wrap, they were not able to run all over and the stickiness factor was minimal. The feedback was great for the taste, but I just wish the texture would have been better!
Tonight's dinner, Chicken, Broccoli, and Lemon Stir-Fry, was a quick way to get dinner on the table, but still enjoy a dish that was brimming with flavor. Letting the chicken rest in a marinade of soy sauce, rice vinegar, honey, garlic and crushed red pepper was the first step in adding zing to this meal. As the chicken is sliced fairly thin, it only takes a few minutes for the marinade to work its magic - it also means the chicken will cook quickly too! Once the chicken is done, broccoli and fresh slices of lemon are added to the hot skillet until the broccoli turns a bright green. A touch of water is added and the broccoli gently cooks until tender. Some of the marinade mixture that was set aside is then poured over with a slurry of cornstarch and water to thicken the sauce. With spice from the crushed red pepper backed up with crisp-tender broccoli and bright lemon slices, this chicken dish was a refreshing end to a hectic day. You could stretch this by serving it over fragrant jasmine rice or enjoy it as is for a light dinner. Next time, I think we will add a couple dashes of toasted sesame oil for another depth of flavor.
Tuesday, November 28, 2006
Oh Martha... you finally steered me wrong...
We've done pretty well with recipes from Martha that we have made... but I can't say that anymore! I had some heavy cream leftover from last week and needed to get it used up - I looked through her baking handbook and selected a recipe I had marked to try for awhile. I figured it would be a good item to make for Jeff to bring in for the weekly Wednesday Treat Day tomorrow - but alas, I have not decided if they will end up going in or not.
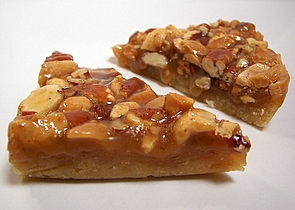
The recipe, Caramel Nut Bars, seemed to be going fine up until the point where the caramel was suppose to be "set". The base is a buttery crust easily made from brown sugar, butter, flour and a touch of salt. While this baked, I toasted and chopped pecans, cashews and peanuts. I thought the caramel was cooking along fine, the candy thermometer went up to 300 as stated (yes, I've even checked to make sure it works correctly - I use it often). As I stirred the nuts into the cooling caramel I thought it still looked very liquid-y, but I poured it onto the crust and into the oven it went to finish. Once the timer went off, I set it on the cooling rack and continued on with other errands I had to do. A few hours later I came back to see it was still sort of jiggly... I stuck it in the fridge thinking it would help get things moving. Well, a couple hours later I went to cut into it and it was still soft - but it seemed to be holding together. After separating the triangles, the caramel started to just run and ooze out... *sigh*. While they certainly taste delicious - salty, nutty and chewy, they are not really presentable and are just too sticky. We will wrap them up and set them in the freezer to see if the texture will be okay in the morning.
I'm not sure if something in the recipe is funky or what, but I diligently followed the directions and am sad that the caramel never fully set up - expensive recipe to not work correctly! Any idea as to what happened? Maybe I was suppose to dance around and hop on one foot when I made it... hmm!
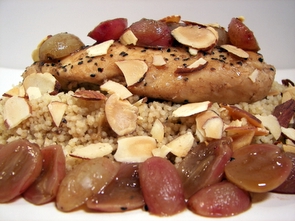
On the other hand, dinner tonight - Balsamic Chicken with Grapes and Almonds, turned out very well. This quick dish starts by searing seasoned chicken breast in a touch of oil until golden on each side. Red grapes, broth, balsamic vinegar and brown sugar are added and brought to a boil. Once reduced, the chicken is added back in and allowed to finish cooking in the simmering liquid. Since this dish is pretty saucy, I threw on some whole wheat couscous while the chicken was finishing to soak up the flavorful juices. The bite from the vinegar was tempered by the sweet brown sugar and we loved how the red grapes brought a soft texture to this savory recipe. Leaving you with minimal clean up and only taking about 20 minutes - this is a perfect dish for those hectic nights when you don't have much time or energy to cook.
Monday, November 27, 2006
Versatile side dish...
10 new recipes made last week and if we were picking out favorites they would have to be Chicken and Black Bean Taquitos with Adobo Sour Cream, Snickers Fudge and Roast Turkey and Prosciutto Pizza. I have also brought the recipe section on the left side bar up to date - you may need to hit refresh on each page to see the new recipes added. Can you believe we have over 600 recipes between the two sections now?! Since we have made every single one, it is fun to stroll back and look through them to see the pictures and what we thought of the recipe.
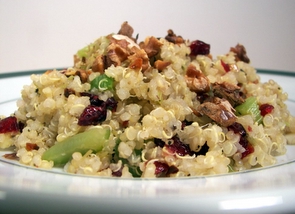
Tonight's dinner, Quinoa Stuffing with Leeks, Walnuts and Cherries, made excellent use one of our new favorite foods. Even though the original recipe didn't call for it, make sure to rinse the quinoa as it can bring an unpleasant bitterness - I also like to gently toast the grain afterwards to dry them out and punch up the nutty flavor. As the quinoa soaks in flavor from the chicken broth while it gently bubbles away, thin slices of leek, chopped celery and seasonings are cooked until tender in melted butter. Minced garlic is tossed in and quickly cooked to temper the harsh raw flavor. Once the quinoa explodes and the tiny curls pop out, they are added to the cooked vegetables along with chopped dried cherries and nutty toasted walnuts so the flavors can meld together as the dish warms through. A little sweet, crunchy, nutty and chock full of healthy ingredients, I can see making this quite often as a side or even with a piece of grilled chicken for a light dinner.
Saturday, November 25, 2006
Chips can be more than chocolate...
I wonder if we will end up making all the recipes from the new King Arthur Flour Whole Grain Baking cookbook... We have done at least one recipe a week now and we hit another winner. I chose this recipe as I liked the way the bones looked, but I did change it some because we wanted a different flavor.
Cappuccino Oatmeal Muffins were originally supposed to be flavored with crystallized ginger and the topping was different, but I opted to change some of the spices and use some cappuccino chips! The last time we saw these for sale was back in Phoenix, but we finally spotted some again while we were out of town and picked up a couple bags. White whole wheat flour is used which adds to their nutritional value, but keeps them tender and fluffy without changing the taste much. We also used oat flour to keep the whole grain theme going - if you can't find this, you can make your own as we did by processing old-fashioned rolled oats in a blender or food processor until they are very fine. This actually measures cup for cup, so you would whiz 1/2 cup regular oats to achieve the 1/2 cup oat flour needed in the recipe. Instead of using a large ice cream scoop to portion out the mixture I ended up using a measuring cup - I found the batter to be a little more runny than other muffins, but I think this helped to keep them moist and added to their lightness. Before baking, I scattered vanilla sugar on top to add a sweet crunchy top to each muffin. If you look at the larger picture, you can see the darker speckles of vanilla bean on top.
Friday, November 24, 2006
Two "pies"... one sweet and one savory...
I made a small mentioned yesterday about the dessert we had for Thanksgiving - instead of a typical pie (even though we are quite fond of the one we made last year) we opted to make a cake... flavored like a pie!
I made the layers for the Pumpkin Pie Cake a few days ago and just kept them in the freezer until this morning. With classic pie flavors of cinnamon, ginger, nutmeg and allspice, these moist cakes are separated by a sweet luscious cream cheese frosting that also adorns the top. The original recipe calls for scattering chopped pecans on top - but for a fun twist, we added some crumbs from the new gingerbread flavored graham crackers! While it certainly does not have the same texture as a pie, the pumpkin pie-like flavor was there and it was a satisfying way to finish a rich meal with a dessert on the lighter side.
While sandwiches are always a must have for leftovers, we opted to start a new tradition and turn part of the turkey meat into a Roast Turkey and Prosciutto Pizza! Instead of buying a prebaked crust as the recipe called for, I opted to make our favorite whole wheat pizza dough and bake it for a few minutes on our pizza stone before topping it. The dough really only takes just a couple minutes to whip up in the food processor. I used a spicy pizza sauce to top the nutty dough, followed by shredded fontina, turkey spiced up with potent balsamic vinegar, red onions, fresh grated Parmigiano-Reggiano and cracked black pepper. Once the crust had a chance to crisp up and the cheese melted, we removed the pizza and showered the top with torn bits of salty prosciutto. If I could have found any Arugula when we went to the market earlier in the week, I would have added some torn pieces on top for another peppery bite.
Thursday, November 23, 2006
Happy Thanksgiving 2006!
Happy Thanksgiving!
We hope everyone is taking a little time to enjoy the day today! We spent most of the morning finishing up and are done cooking for the day - hooray! We kept the menu fairly low-key as it is just Jeff and I.
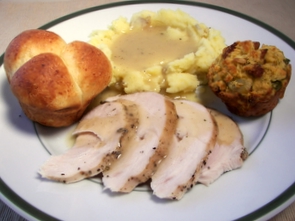
Here's what ended up on our menu today - Roasted Turkey breast, Sausage, Apple and Fennel Corn Bread Dressing Muffins, Roasted Garlic Golden-Smashed Potatoes, Make-Ahead Gravy, Roasted Garlic and Asiago Cloverleaf Rolls and something sweet for dessert. You'll find the recipes for the titles in bold down below.
We did a simple mixture of butter, salt, pepper and poultry seasoning to flavor the turkey breast. We then used a high-heat roasting recipe from Epicurious to cook the turkey breast and were pleasantly surprised with just how moist the meat came out. The bird took just about an hour and 10 minutes at 450 degrees - we will definitely be using this method again!
I ended up making the corn bread for the dressing a couple days ago and then just assembled and baked this afternoon. We took a cue from the stuffing hit last year and just made these in muffin tins instead of a big casserole - perfect for an individual portion size! I used chipotle smoked turkey sausage, but I imagine you could use the sausage of your choice. The corn bread was not sweet like some with sugar, but I liked that as it seemed to meld in with the rest of the flavors better. The mild anise flavor that the fennel brought was a refreshing addition to the crunchy topped muffins. The apples added a cool tartness to offset the spice in the sausage and kept the interior pretty moist. Using a couple eggs in the dressing made sure that they did not fall apart when they slipped out of the muffin tins.
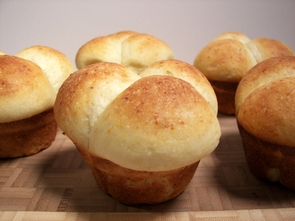
The rolls were pretty much the same as last year execpt for a few changes - I used half bread flour, dried thyme instead of rosemary and added 2 ounces of fresh grated Asiago cheese during the last couple minutes of kneading. These were excellent - soft, tender and the roasted garlic flavor went well with the sharp Asiago.
We started the gravy yesterday by first making a Roasted Turkey Stock from turkey wings and the classic aromatics. Easy, made quite a bit of stock for the freezer and brought a rich fresh flavor to the gravy. When it was time to make the gravy, we first reduced a bit of the stock, added a few cups more and then whisked some of the hot liquid into a mixture of butter and flour. Back to the stove it went to heat back up. This ended up a little thinner than we would have liked, but the amount of flavor the gravy had was so good.
As you can see... the pups and Miss Kitty made sure they were close by just in case something happened to fall while we were getting our plates ready!
Here's a quick snap of Jeff's plate before we went to sit down.
No, we didn't forget dessert - here is a sneak peak at what I made, but you'll have to wait until tomorrow to see what it was!
Wednesday, November 22, 2006
Keeping it simple...
I spent some more time today doing a little prep work to get a head start on the holiday meal for tomorrow. Since it is just us two, we don't really do anything extravagant, but it will be nice to have a majority of it done. We do have to make enough though, so there are plenty of leftovers - the best part of course!
We kept dinner light and quick tonight so there wouldn't be much clean up to do - the kitchen will be ready to go without much work in the morning. The recipe, Penne with Spinach Sauce, was on the table in a flash since we just needed to wait for the pasta to get tender. As it cooks, a simple sauce is made from fresh garlic, goat cheese, cream cheese and tender baby spinach. The original recipe called for three cloves of raw garlic - I find garlic to be a little harsh raw and at three cloves I had a feeling that would be a bit much for us. To help mellow the flavor, I added the garlic to the boiling water when I added the pasta and let it cook for a couple minutes.
I then fished the cloves out and used the food processor to make short work of the sauce. This took just enough of an edge off so the flavor came through, but some of the bite was gone. The recipe also suggested to save a cup of the cooking liquid to thin the sauce - I only added a tablespoon or so and it was plenty thin enough, any more and it would have been soupy. The soft goat cheese brought a nice tang with the cream cheese adding a little substance to the creamy pesto-like sauce. With a sharp finish of fresh grated Parmesan, this pasta dish was a snap to prepare and was quite filling with a slice of the Onion and Fontina Beer Batter Bread on the side.
Tuesday, November 21, 2006
Dangerously good treat....
I've had a recipe in my to-try piles for some time now that has been calling to me to give it a try lately - I don't know where this one originated, but I've seen it on more than a few "recipe" sites. I figured I would finally listen to the call and make the recipe so Jeff could bring it in for the weekly Wednesday Treat Day at his office.
The recipe name alone, Snickers Fudge, grabbed my attention as we are both fond of the candy bar. This candy has 4 layers to it and you need to set aside time for each layer to set up before making the next. The first layer is a combination of milk chocolate, butterscotch and peanut butter that is melted together until smooth. Once spread into the bottom of the pan and left to set up in the refrigerator, the next layer is prepared. This could be considered the nougat layer - but don't let that scare you, it is pretty easy since it uses marshmallow creme (like a fantasy fudge recipe). Instead of pouring the hot marshmallow mixture into chocolate as you would fudge, you fold in chopped salted peanuts and the nougat is quickly spread over the chocolate base. As this layer sets, a quick caramel layer is prepared by melting caramel cubes and heavy cream over low heat until smooth. This is spread over the nougat and since this is a thin layer, you need to work quickly as it will begin to set if you take your time. The next and final layer is the same combination as the base - melted and spread over the caramel.
While fairly lengthy to make, most of the time is just waiting for the layers to set. After a couple hours from applying the final layer, I began to cut them into squares. As I was cutting through, I was very happy to find it was quite easy to make smooth clean cuts with each layer shining through. The taste? Actually very close to a Snickers - the butterscotch flavor comes through a little more than I thought it would and the nougat is a little more fluffy in texture, but these captivating squares are delicious! The salty peanuts add a likable crunch below the chewy caramel layer with the milk chocolate top and bottom adding just enough sweetness. This will definitely have a spot on the holiday candy platter and will be heading to the top of the repeat pile.
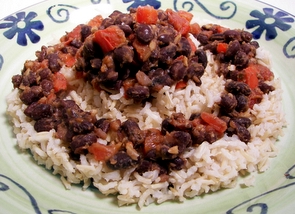
Tonight's dinner, Moros y Cristianos (or Cuban-Style Black Beans and Rice) had some debate on how to actually serve the dish. Neither of us knew if the bean mixture is mixed with the rice, served on top or each served separately so the recipient could decide how they wanted to eat them. We just opted to place the bean mixture on top and left it at that! While the brown basmati rice cooks, onions, garlic and a red bell pepper are cooked until softened. Tomatoes are added with a splash of sherry vinegar and a spice mixture consisting of cumin, oregano, coriander, fennel and red pepper. Black beans and a few dashes of cayenne pepper sauce are added and the mixture is left to thoroughly warm through. The fragrant rice made a good base to the spicy beans - I liked having one on top of the other to just sort of mix them together as you go along, but anyway you like would be good! I served this as a main, but you could easily do this as a side to a variety of dishes. Next time I think I would add a sprinkling of cilantro though for a finishing touch.
Monday, November 20, 2006
Easy make ahead dinner or turn them into an appetizer!
I've been busy getting some prep work done before the upcoming holiday this week - I'm just trying to do bits and pieces when I can so we can relax and enjoy the day. Since I was going to be busy with that, last night I made the dinner we actually cooked tonight since you can assemble and freeze the portions before hand. I only had to pop them in the oven and throw together the dip to complete the recipe for Chicken and Black Bean Taquitos with Adobo Sour Cream.
Chopped cooked chicken breast, shredded Monterey Jack and Jalapeno cheddar cheese, black beans and diced green chiles are pulsed together in a food processor to form the filling. For the tortillas, I used a favorite Chipotle flavored kind that we have been using for the last couple of years. The filling is spread on one side of each tortilla and then instead of wrapping it like a burrito, the tortillas are rolled up like a log. Once sliced in half, they can be placed in a ziploc bag and frozen - this way you can make as many as you want or need at any time, rather than baking up a whole batch. You could also bake them right away, but you will want to check them a couple minutes early so they don't get too browned. The sauce could not be easier - sour cream mixed with fresh cilantro and spicy chipotles in adobo - just enough heat to compliment the mildly seasoned filling. After just a few minutes in the oven, the tortillas have a satisfying, shattering crunch when you bite into them - I had no idea just how easy these were to make yourself at home! We've seen them sold in the market, but never ventured out to try them!
Sunday, November 19, 2006
A peek into our (freezer)Pantry II...
12 new recipes this week... our favorites had be the Kissed Molletes, Onion and Fontina Beer Batter Bread and Falafel Pitas with Goat Cheese Sauce.
We had quite a busy day today and I'm pretty tired, but I did manage to bake something today at Jeff's request. He mentioned that it had been awile since I have made an apple pie and he was correct! I prepared the crust early this morning before we left to do errands and after we arrived back home and started getting the rest of the ingredients together, I noticed I forgot to pick up more apples at the market! I did have a few, but not quite as many as I would have liked so the pie is lacking in the height department!
I never really measure my ingredients here, but it is much like any basic apple pie recipe - the only thing I do different is use arrowroot powder as a thickener and add a couple dashes of ginger to the filling. I also like to sprinkle the top with turbinado sugar for a sweet crunch. The crust recipe I use is one from King Arthur - using mostly butter for flavor, but I do like to swap out a few tablespoons to use some spectrum organic shortening as to not loose out on the flakiness.
I posted a peek into our pantry a few weeks ago... I'm coming back with Part II - The deep freeze!
I've always got a couple bags of King Arthur Flour now in the freezer - Whole Wheat, White Whole Wheat and All Purpose. I keep around 4-6 cups worth in some containers upstairs for easy access - I just find it stays fresher this way. I like to keep a small tupperware dish of instant yeast in the refrigerator, but you will usually find a vacuum sealed package in the freezer too.
Since we've been playing more with whole grains lately, I also keep Whole Cornmeal, Rye flour, Spelt flour and Barley flour in ziploc bags in the chest freezer in the garage.
I love to have options... I'll use that as my excuse on why we have so many different kinds of nuts and seeds in the freezer.
Walnuts, Pecans, Almonds, Hazelnuts and Peanuts (I make our own fresh nut butters often)
Sunflower Seeds, Pepitas and Pine Nuts
Pistachios, Cashews and Soy Nuts
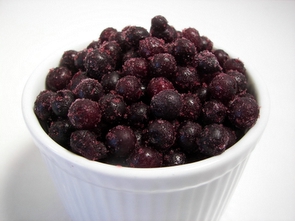
I'm also crazy about blueberries - I have at least a cup a day mixed with some yogurt or in a smoothie. I've got quite a few pounds of these tiny wild blueberries stocked to get me well through the winter season!
How can we forget about butter? Since we started buying the big packs at Costco, I've started storing most of it in the freezer.
I'm scared to find out how much we will use this baking season... remember how much we used last year? *heartattack...*
Saturday, November 18, 2006
Can't help picking up the new products...
I admit it... I'm a sucker for new products - especially when I think we could use them in a baking project. Browsing through the new King Arthur Flour Whole Grain Baking book, I found yet another recipe to try... and better yet, I worked in the new ingredient we picked up a week or so ago - some Candy Cane Kisses! Score number 4 from the new cookbook!
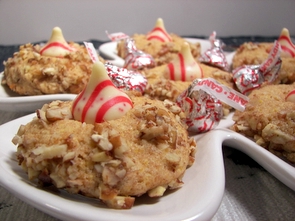
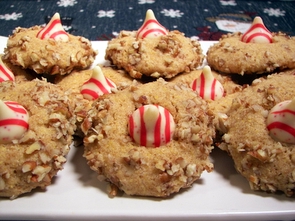
From what I understand, this whole grain cookie - Kissed Molletes, is typically rolled in pine nuts and may or may not have anything placed in the center. To ensure the "whole grain" part of the recipe, whole yellow cornmeal is used - this is not the same cornmeal you would normally find in the baking department. I had to go to the bulk foods area of our local co-op to find it... you can spot this cornmeal easily as it is little more coarse and has darker specs of color throughout instead of being all a golden yellow. Because it contains the germ of the kernels, you will need to keep this in the freezer as it can go rancid fairly quickly.
These do need some pre-planning to make: the whole grain cornmeal needs to soften in orange juice and water for an hour, and the dough will need to rest in the refrigerator overnight. This helps to ensure it will be less sticky when you go to roll the balls. Once you start scooping out the balls, they are dipped in a beaten egg white and go for a dip in finely chopped pecans. They are then baked until the cookies are a light golden. Immediately after they are taken out, we pressed a white chocolate candy cane kiss slowly in the middle of each one. Once you press down, try not to touch the kiss as it will be soft from the heat of the cookie - it will firm back up once the cookies have time to cool. The cookies have a nutty crunch from the cornmeal and pecans, but have a moist fluffy interior. I don't think I would call them cake-like though.
With the use of whole wheat flour, the cookies are pretty hearty - they do have a slight "healthy" taste to them, but Jeff said it was barely detectable. The candy cane kisses had a smooth flavor with small crunchy peppermint bits swirled in. While we thought it was a good pair with the cookie, a regular chocolate kiss might go over better - you could also use the chocolate truffle, peanut butter or caramel filled ones to change up the taste!
We typically post once a day, so if you drop on by and happen to notice that there is not a new post, you may have to hit refresh to get the most updated post on the front page!
Friday, November 17, 2006
Keeping busy in the kitchen...
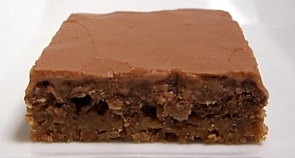
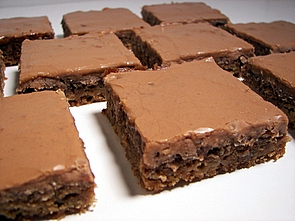
More baking happening from the new kitchen... this time we will be serving up Malted Coconut-Mocha Bars. A buttery shortbread-like crust is pressed into the bottom of the baking dish and unlike the Cranberry-Orange Pistachio Bars, this dough is more tacky than crumbly. You can do a couple things to make pressing the dough in a little easier - lightly dusting your fingers with flour works, but I just used a piece of saran wrap placed on top. It doesn't stick and allows you to easily move the dough around. While the crust bakes, a filling made from eggs, sugar, vanilla, coconut, chocolate malted milk powder and instant espresso powder is whisked together. This is quickly spread over the hot crust and goes for a second bake to set up the filling. Once baked and cooled, a malted mocha glaze floods the surface with a dark, sweet and firm topping. The inside layer almost reminded me of a chewy coconut macaroon with a mild hint of the chocolate malted flavor.
I thought it may end up being too sweet with the glaze, but the buttery base seemed to off-set the sweet toppings. I have found that I like baking with the Carnation brand over the others that are out there for the malted milk powders. If you can't find instant espresso powder, you can substitute instant coffee crystals - you may want to add a touch more though.
While we do eat meat often enough, I do find that we quite like some of the meatless options that are out in the markets nowadays. I've had a couple bags of soy crumbles in the freezer for awhile and finally got around to using them tonight in some Spicy Sloppy Joes. This is also the third recipe that uses a bottle of beer this week! This recipe came together in a snap with very little prep time. To begin, fresh garlic and roasted red peppers are quickly cooked in a bit of canola oil until fragrant. The soy crumbles and smoky chili powder are added in and begin to heat through. Minced jalapeƱos are mixed in for heat, followed by amber ale, chili sauce and soy sauce to buildup the background flavors. To add some freshness right before serving, chopped green onions are mixed in. Thick, hearty and dare I say it, finger lickin' good, we both went back for more when we finished our plates. It didn't taste "fake" and I thought the addition of the ale brought out a meatier flavor to these satisfying joes. I also served these on our new favorite bun recipe.
Thursday, November 16, 2006
'Tater mania
As I was making dinner tonight, it finally hit me that we may have gone a little potato heavy in menu planning this week... oops! At least they have been in different forms and didn't taste too much like each other. So, yes we had another potato dish tonight - but it was a side this time and included a new-to-us vegetable!
For this side, Mashed Roots with Buttermilk, we had to use this funky and gnarly looking vegetable called Celeriac (AKA Celery Root). No, this is not the actual root of a celery plant, but it does have a heavy celery aroma. Along with some more Yukon Golds, this recipe also called for a Rutabaga, which we have only used once before! Instead of boiling the vegetables to cook them, this time they are steamed until falling-apart tender... this way they don't become water-logged. The vegetables are then mashed with garlic and butter just until they are starting to become smooth, but are still a little chunky. Buttermilk and seasonings are stirred in and right before serving, a couple more pats of butter are added for a touch more richness. This is a very different way to enjoy mashed potatoes, but the flavor is very clean with a mild celery background. I was afraid the celery flavor would be more pronounced, but it was a pleasant counter-point to the twang the buttermilk added. We both thought that the texture is better being more chunky than too smooth - so try not to over-mash them. I did wobble a bit when I was at the market getting the ingredients for this recipe... I was a little taken aback when I saw that Celeriac was $3.99 a pound - and as it calls for two pounds, it made for pretty darn expensive side! I noticed this was the price at several different stores as well.
So the main portion of tonight's dinner, Falafel Pitas with Goat Cheese Sauce, may look a little daunting with a long list of ingredients and instructions - but it is not so bad. I was intrigied by this recipe as it uses dried beans that you soak for a few hours... but you don't actually cook them before you continue with the recipe! I thought this brought an exceptional and more hearty texture to the falafel patties as they are baked instead of being fried. A fresh relish made from chopped plum tomatoes, cool English cucumbers, green onions, parsley, fresh lemon juice and a spicy minced serrano chile is served on top of the crisp golden patties inside a whole wheat pita. For a finishing touch, a creamy sauce of tangy yogurt, soft goat cheese and a hint of fresh garlic marries the flavors together - the relish and sauce brighten and make this dish top-notch. These two toppings will definitely be recycled and used in other recipes - very appetizing!
Wednesday, November 15, 2006
Beer... it's not just for drinkin'
I'll be the first to admit that we rarely drink, so I usually pass up recipes that call for beer or some such since we wouldn't really drink anything that was leftover. However, I have been putting some recipes aside that sound like they would be something we would like and found three that used full bottles at a time. I made two of them tonight, and the next will be made later in the week.
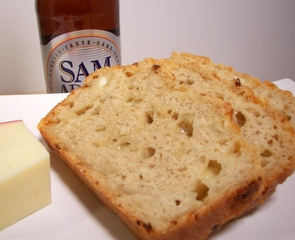
We used amber ale in these recipes, with the first being Onion and Fontina Beer Batter Bread. This is basically a savory quick bread that gets a fair amount of moisture from sauteed onions and lift from the beer. Instead of using shredded fontina as the recipe calls for, I cubed the cheese so we would end up with gooey pockets strewn throughout the golden loaf. The bread rose more than I thought it would, so it was not as dense as I thought it could have been. Besides helping to keep the bread moist, the tender onions added a sweet bite to the nutty cheese. I thought it was interesting that the butter was added in two different steps - once you scoop the batter into the dough, a couple tablespoons of melted butter is just drizzled on top. Halfway through, the loaf gets a brushing of another couple tablespoons. I think you could get away with using one tablespoon in each step if you were looking to lighten it, but we both thought it added enough flavor, without it being greasy, to leave it alone when we make it again.
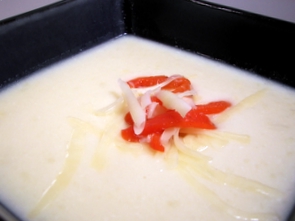
Since we have been wanting to have more soups as the weather starts to get chilly, the next recipe the ale went into was the main portion of tonight's dinner - Cheddar-Ale Soup. This dish was not very labor intensive for the amount of flavor and came together fairly fast. For the potatoes in this recipe, you could use diced and pre-cooked that you buy as the original recipe calls for, but I just boiled some diced Yukon golds until they were tender. After softening a bit of onions, the beer is added into the pot and left to boil to concentrate the flavor. Vegetable broth, water and the soft potatoes are added to cook for a few minutes and warm back up. The potatoes are then mashed into small chunky bits with a potato masher, but if you wanted a silky smooth soup, you could use an immersion blender. To add some body and richness, plain soy milk with a few tablespoons of flour are added and the soup is brought back to a simmer to thicken. The soup is tightened up with handfuls of sharp white cheddar and finished off with thin strips of roasted red bell peppers for a pop of color. Hearty, creamy and cheesy - I can't wait to warm up with this soup in front of the fireplace as the snow begins to fall this winter.
Tuesday, November 14, 2006
Let the holiday baking begin...
I'm starting to weed through the recipes we've made before and what new recipes we are going to try for the upcoming holiday baking that we do. There are some that I want to test out ahead of time and since we needed to bake something for Jeff to bring in for Wednesday Treat Day tomorrow, I figured it would be a good day to start!
I've mentioned before that one or two bite treats are a favorite of mine to make and I was definitely attracted to this recipe for Cocoa Tassies with Peppermint Creme Filling. Buttery chocolate cups are simply made from a dough consisting of flour, sugar, cocoa (I used Penzey's Dutch-Process for a deeper flavor) and of course some cold butter. There is a tedious portion that happens when you start pressing small balls of dough into miniature muffin cups - but since the dough is not too sticky, it would be a good job for a little helper! Once these are baked, a sweet filling is concocted from softened butter, marshmallow creme, powdered sugar and a few drops of peppermint extract. I used a star tip to pipe the creamy thick mixture into the cups and jazzed up the tops with some crushed candy canes. While they were a little time consuming, they turned out to be a fun project and made for a very festive presentation!
For tonight's dinner, I went for a recipe called Indian-Spiced Chicken with Tomato Chutney. The chutney begins with a mixture of shallots and a spicy serrano chile. Fresh ginger and garlic are added, followed by chopped tomatoes, red wine vinegar, a dash of sugar to balance the flavors and a few mustard seeds. This bubbles away until the tomatoes soften and the mixture starts to become thick. While this cooks, I started on toasting a spice mixture made from coriander, curry powder, cumin and black pepper in a bit of olive oil to bring their flavors to life. To easily season the chicken, use a pastry brush to evenly coat both sides with the spice mixture. I used The Griddler as the grill to cook the chicken and it was done it just a few minutes. While I can't really comment on how authentic the flavors were, the toasted spices that coated the chicken seemed to work well together. Jeff and I both thought that the chunky and spicy chutney served over the chicken brought this dish over the edge - but in a good way!
Monday, November 13, 2006
Doin' the fresh cranberry dance...
One reason I love this time of the year is because we can finally find fresh cranberries in just about any market. I always stock up and keep plenty in the freezer so we have easy access whenever the urge strikes to make something with them. I got a giant bag this weekend and began to use them in a bar recipe I made last night.
Cranberry-Orange Pistachio Bars starts out with a light shortbread-esque base using small amounts of butter, sugar and a mix of whole wheat pastry and all-purpose flours. This crumble mixture (which reminded me of a lemon bar base) is easily patted into a baking dish and bakes just until the edges turn a light golden. While waiting, a sweet orange-infused topping is created with sugar, flour, eggs, fresh orange juice and zest, chopped cranberries and toasted pistachios. If you have access to one, I highly suggest using a food processor to chop the cranberries - these little guys love to bounce all over if you do it by hand. Just pulse them a couple times so they are still a little chunky. Once assembled on the pre-baked crust, the bars bake until they puff up and the center is set. Sweet and just a little tart, being paired with the pistachios was a great choice as the color combination is perfect for a holiday cookie tray! After cooling and a small taste-test, Jeff and I both agreed that they needed to rest overnight for the flavors to develop - they were "pretty good" last night, but they were much better today. If you want them to cut clean, you will have to refrigerate them anyway - they are a little gooey in the center, but will firm up quite well after chilling a few hours.
The side for tonight's dinner used a new-to-us vegetable - Rainbow Swiss Chard! I don't know why we waited so long, but this is good stuff! If you ever need a quick side, Chipotle Cheddar Chard is a great choice to use up both the stalks and leaves of this fun colored vegetable. Since the stalks are more tough, they are cooked first in a bit of olive oil and onions. Once tender, fresh chopped tomatoes, chicken broth and ground chipotle are added and brought to a simmer. The leaves from the chard are then added and the skillet is covered to gently steam them. As they soften, the cover is removed and sharp cheddar is scattered on top so it has a chance to melt in. I like how this is served with a bit of liquid, rather than being dry, as we found it brought a lot of extra flavor. The chipotle brought a smoky heat, but if you like things more mild you may want to reduce it to 1/4 teaspoon. Since we have never had this, Jeff was kind of just picking at it - but once he gave it a taste, the change in his face told me he was sold! Now I'll have to go and seek more recipes using it!
Mashed Potato Gratin was probably created to be a side, but since we love potatoes I just increased the portion size and served it as the main dish tonight. Buttery Yukon golds are diced into chunks and cooked until tender. Once drained, rich fontina and earthy Gruyere are mashed in with a nob of butter, a dash of salt and fresh pepper. Warmed milk is then mashed into the mixture - you can take this to whatever consistency that you like, but we left it a little chunky. This is scooped into a baking dish with more of the cheeses scattered on top. Since this is covered and baked until gooey and pipping hot, a quick trip under the broiler adds a fantastic golden color to the melted cheese. Creamy, a little nutty from the cheeses and definitely filling - I don't see how this could be anything but pure love in the form of comfort food... like giving a great big bear hug to your stomach. One note - I did leave the skin on the potatoes as that is what we prefer, but you can peel them if you wish!
Sunday, November 12, 2006
Fess up... who brought back the cold?
What a difference a day can make - it is 46 and rainy outside... 30 degrees cooler than yesterday! Crazy weather! We made 11 new recipes this past week with the standouts being Buttermilk-Rye Bread, Rosemary Chicken Noodle Soup and the Asiago-Parsley Oven Fries. I also got both recipe sections to the left up to date - you may need to hit refresh to see the new additions! Jeff was just mentioning how both lists are getting quite long!
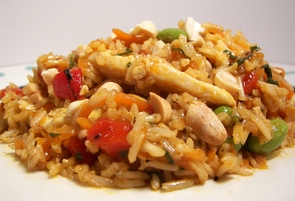
Before we went grocery shopping this morning, I cooked up some brown basmati rice so it would be chilled and ready to go for tonight's dinner of Chicken and Edamame Fried Rice. Working with leftover rice is best as the grain has a chance to loose some moisture before cooking. Thin sliced chicken breast is quickly cooked in a mixture of canola oil, fresh ginger and garlic. Edamame (green soybeans), carrots, green onions and roasted red peppers are heated through once the chicken is done. Both mixtures are set aside in a covered bowl to keep warm while you begin the rice. The fragrant rice is cooked with canola oil in a very hot skillet with a bit of soy sauce. The chicken and vegetable mixture is added back in with broth, seasoned rice vinegar and Sriracha for a punch of heat. Seasoned rice vinegar helps to balance the flavors and keep the salty soy sauce from being too overpowering. Once plated, chopped peanuts are added on top for a touch of crunch to round out the dish. We found the amount of heat from the Sriracha to be border-line on mild to just right - so you could probably add a bit more if you like things spicy.
Saturday, November 11, 2006
Light figgy treat before going to enjoy the day...
What a beautiful day we had out here in Maryland today - the temperature was in the mid 70's and we are in the middle of November! We were going to spend most of our time outside enjoying the warm weather, but I did want to get some baking done first.
When we made our last trip to Trader Joe's about a month ago, I made sure to stock up on black mission figs so I could make the Chocolate, Fig, and Marsala Pastries - but then I couldn't remember what other recipes I was going to use them in! I went and picked a recipe for Fig and Almond Squares since it looked like it would come together pretty quick and it needed to sit around to cool before it was drizzled with a frosting. I also wanted to have a reason to use the amaretto we had in the pantry! Before you pour the sweet brown sugar dough into the pan, be sure to only coat the bottom with nonstick spray - the batter goes down in a thin layer so these need something to cling to as they bake in the oven. These are chewy with chunks of dried figs, toasted sliced almonds and coconut in each bite. The amaretto infused the bars with a light almond background while just a couple drops are added to the firm frosting to dress the bars with a drizzle of sweetness.
Friday, November 10, 2006
Rye bread without the work...
I was looking to make some bread today, but I didn't have a lot of time to mess around waiting on rising times and what not... so I looked through the new King Arthur Flour Whole Grain Baking book and we hit another winner! So this is the third one so far... the first two we picked to make were the Rosemary-Asiago Chop Bread and Sunny Citrus Squares.
Jeff loves rye bread, so when I saw that the recipe for Buttermilk-Rye Bread was actually a quick bread using baking powder and baking soda instead of yeast, I quickly made sure we had everything on hand and went to work.
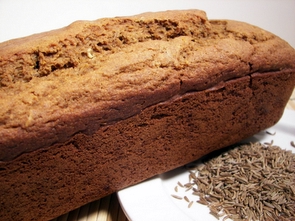
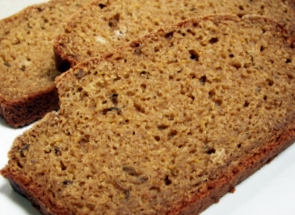
Using just a couple bowls, this was quite fast to throw together this morning. Whole rye flour, bread flour and the leaveners are stirred together and combined with buttermilk, molasses, an egg, orange zest, caraway seeds and melted butter. Once poured into the pan and whisked into the oven, this bread bakes up into a beautiful caramel colored loaf. After sufficiently cooling down and sliced, the flavor of this is dark and robust from the molasses with just a hint of orange lingering in the background. The caraway seeds add that traditional mild anise flavor you find in rye breads with the buttermilk adding moisture, tenderness and a slight tang. This earned Jeff's stamp of approval as far as rye breads go - it gets mine as well because of the little prep time compared to some we have done before.
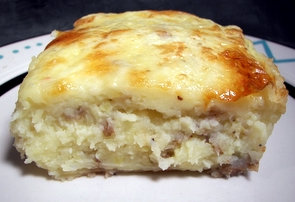
Dinner tonight, Gnocchi Gratin, takes some help from the market with some pre-made gnocchi. Once the gnocchi are cooked, a luscious smooth cheese sauce is started by melting butter and adding a bit of flour. Milk and broth are streamed in and allowed to bubble away until thick - even though I did whisk this in pretty slow, I still ended up with some lumps. To solve that, I just took our immersion blender and buzzed them away. After thickening, earthy Gruyere easily concedes to the heat and melts into the creamy sauce. Chives are added for a mild touch of onion with bacon lending a smoky flavor. The gnocchi are added in and this mixture is poured into a baking dish. Sharp Parmesan is scattered on top and this mixture bakes away until bubbly and the top becomes a light golden. The original recipe did call for a 22 ounce package of gnocchi, but I only found ones that were around 16 ounces. I just used one instead of splitting up two packages. As a result, I think our mixture was a little more creamy - but we both found that as a good thing and would use that amount again. This turned into a more comfort food-like dish than we thought it would be - kind of like a big potato casserole, but with an adult flare. We did find it a little difficult to try and capture this as a picture though!
Jeff loves rye bread, so when I saw that the recipe for Buttermilk-Rye Bread was actually a quick bread using baking powder and baking soda instead of yeast, I quickly made sure we had everything on hand and went to work.
Using just a couple bowls, this was quite fast to throw together this morning. Whole rye flour, bread flour and the leaveners are stirred together and combined with buttermilk, molasses, an egg, orange zest, caraway seeds and melted butter. Once poured into the pan and whisked into the oven, this bread bakes up into a beautiful caramel colored loaf. After sufficiently cooling down and sliced, the flavor of this is dark and robust from the molasses with just a hint of orange lingering in the background. The caraway seeds add that traditional mild anise flavor you find in rye breads with the buttermilk adding moisture, tenderness and a slight tang. This earned Jeff's stamp of approval as far as rye breads go - it gets mine as well because of the little prep time compared to some we have done before.
Dinner tonight, Gnocchi Gratin, takes some help from the market with some pre-made gnocchi. Once the gnocchi are cooked, a luscious smooth cheese sauce is started by melting butter and adding a bit of flour. Milk and broth are streamed in and allowed to bubble away until thick - even though I did whisk this in pretty slow, I still ended up with some lumps. To solve that, I just took our immersion blender and buzzed them away. After thickening, earthy Gruyere easily concedes to the heat and melts into the creamy sauce. Chives are added for a mild touch of onion with bacon lending a smoky flavor. The gnocchi are added in and this mixture is poured into a baking dish. Sharp Parmesan is scattered on top and this mixture bakes away until bubbly and the top becomes a light golden. The original recipe did call for a 22 ounce package of gnocchi, but I only found ones that were around 16 ounces. I just used one instead of splitting up two packages. As a result, I think our mixture was a little more creamy - but we both found that as a good thing and would use that amount again. This turned into a more comfort food-like dish than we thought it would be - kind of like a big potato casserole, but with an adult flare. We did find it a little difficult to try and capture this as a picture though!
Thursday, November 09, 2006
Adding some color to dinner...
We certainly got our fill of greens in both the side and main portion of tonight's dinner. We started off with a Warm Spinach Salad with Apples, Bacon, and Cranberries. The dressing consists of balsamic vinegar, sugar, cranberry juice, Dijon and seasonings that are boiled for just a minute to create enough heat that will ever-so-slightly wilt the tender baby spinach. Before the dressing is drizzled over, sour cream is whisked in for a touch of richness and body. The salad portion is a mixture of tart apples, red onions, dried cranberries along with the spinach. Warm, tangy, smooth and not too acidic, the dressing was light enough to still allow the fresh flavor of the spinach to shine through, but still strong enough to calm the tartness in the apples and cranberries. Instead of croutons, crumbled bacon just before serving adds a salty and crunchy finish.
Dinner tonight, Broccoli and Three-Cheese Casserole kind of reminded me of another dish where we used cooked rice to form a base crust for the dish. Brown basmati rice, Parmesan and seasonings are bound with an egg and egg white, and then patted in the bottom of a baking dish. Shredded fontina forms the next layer which adds an almost sweet and buttery component to the dish. Crisp tender broccoli and sauteed onions are then tossed on top followed by sharp white cheddar for the third cheese in the recipe. After a quick whisk, a custard of eggs, soy milk and black pepper are poured on top - as it cooks, this mixture will help hold the filling together so tidy slices can be cut. Before being baked, a sharp crunchy topping made from panko breadcrumbs and a bit more Parmesan is scattered on top. Once baked and slightly cooled, this cut quite cleanly and was pretty easy to get out of the baking dish. The nutty rice crust with a hint of heat from crushed red pepper was a fun twist to the casserole. The broccoli kept its integrity without becoming mushy while the three cheeses brought just enough flavor to each layer to round out of the dish.