Tuesday, February 23, 2010

Have you tried... Farro?

Have you tried these golden little nuggets before?

That would be farro! I hadn't, but I've seen many recipes that call for the grain and I've kept my eye out in the markets around here to find it. I did finally notice a bag at Whole Foods a few months ago and was tempted to pick it up, but it was a bit spendy for such a little amount. However, while browsing the loaded isles of Costco a couple weeks ago, guess what I found? Yep, a mighty big bag of farro that didn't make my heart skip a beat when looking at the price tag!

Farro is a type of wheat, emmer wheat (though some claim it is the same as spelt), that has a texture reminiscent of barley or wheat berries - when cooked, it is toothsome, chewy and quite nutty with a delicate sweetness. The type we bought and used in the Chicken, Corn, Edamame and Farro Salad with Goat Cheese dish we made is labeled "semi-pearled", which cooks in about half the time of whole farro. However, do note that it is slightly less nutritous as part (or all) of the hull is removed - whole farro would take at least 45 minutes to an hour to cook, if soaked first. So, there is a trade off for a grain that cooks in a fraction of the time. For what it's worth, even though I've only seen farro twice, it has only been in this semi-pearled form.

After cooking the farro in plenty of salted water, we took the plump grains and tossed them with sautéed cubes of chicken breast, brilliant corn kernels (thawed corn we stashed in the freezer from the last fresh batch we bought at the farmers' market last summer), edamame and plenty of sliced green onions. The original recipe did call for blanched green beans, but I can't say that's a bean either of us are all that fond of - edamame has been an honorable stand-in for us. If you do happen to groove on those crisp beans, use about 12 ounces or so, cook them just until crisp-tender and then shock them in icy water.

This vibrant salad now needed a zesty dressing to match, which was created by whisking together good quality extra-virgin olive oil, fresh marjorm (oregano would also work well, maybe with a pinch of tarragon for good measure), white wine vinegar, a scoop of minced shallot and a dollop of Dijon mustard to bring those ingredients together. Just before serving, we topped each portion with crumbles of goat cheese for a rich, tangy finish.

Because I wasn't going to have time this evening, I prepared the salad early in the morning and kept it chilled until dinnertime. I would do that again as found it to have a bit more cohesive flavor after the stint in the refrigerator - saying that, even after tasting right after tossing the salad together, I thought it was worthy of being made again. Jeff mentioned afterward that he thought this would be an excellent salad to bring on a picnic this summer (that is, if it ever warms up again!).

Recipes

Sunday, February 21, 2010

Individual Peanut Butter Cheesecakes...

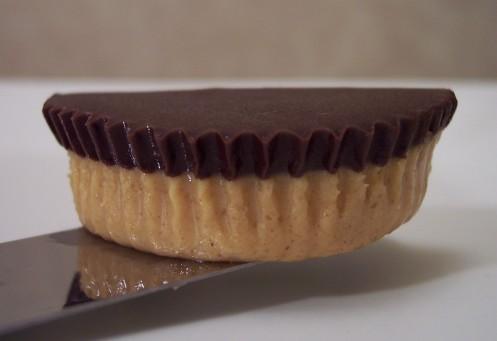
We were going to be having a few guests over tonight and we wanted a dessert that was all set to serve without having to pay much fuss to it when it was time. Bars or cookies would have been good, except for the fact I have made plenty of those lately. Cheesecake was the next sweet that came to mind, though I wanted it to be a bit more tailored and personable. Miniature, yet substantial... and I found that in these Individual Peanut Butter Cheesecakes!

Peanuts make the play in these cheesecakes three ways - in the crust, in the cheesecake itself and as a crunchy spike on top. Instead of using crackers or cookies for the crust, we simply used the cleanest peanut flavor - peanuts themselves! We took the nuts and ground them down with a few scoops of brown sugar in our food processor - with a drizzle of melted butter, the crumbles fused together, creating a mass that held together when pressed down in the baking cups. To set the crust, it needs to bake by itself for a short time and then cooled before being filled.

Speaking of those baking cups, I used silicone muffin cups because I wanted to easily pop the baked cheesecakes right out of their holder without having to fumble around to get them out or deal with any sticking. You can use a regular muffin tin if you don't already have these cups, but I would suggest lining them with paper cups rather than just using cooking spray for the best results.

While the crust was off cooling, an ordinary filling was prepared in a snap by mixing together cream cheese, sugar, the best vanilla you can get your hands on and an egg, plus one extra yolk for richness. Leave the cream cheese out for at least a couple hours before using it - this way the filling will be silky smooth without having to beat it to death. What sets the filling apart from being too plain is what gets buried inside - good 'ol natural peanut butter! You know, where the ingredients are simply peanuts and salt. Half the filling goes onto the crust, a scoop of the nut butter goes in the center, which is then hidden by just enough to cover.

Since this isn't a large cheesecake, we didn't bother with a water bath - however, just like a large cheesecake, checking for doneness is the same. The edges should look set, but if you tap the pan, the centers of each should still have a wiggly jiggle to them. After they have baked and cooled, you'll want to let them hang out in the refrigerator for at least a couple hours - overnight would be best if you can (I made these last night to serve this evening).

That's two ways with peanuts, the third comes in the form of an edible garnish - a crunchy peanut brittle! The brittle is sugar and water, along with a pinch of cream of tartar and salt, that is brought to a rapid boil and allowed to cook until color darkens to a robust dark amber. Peanuts are stirred in and then the mixture is quickly (but carefully!) poured over a baking sheet. If the peanuts tend to settle in one spot, you should have a minute or two to try and even them out before the hot syrup starts to set.

Breaking the solid sheet of brittle into uneven shards, we topped each individual cheesecake with a piece or two as the finishing touch. When assembling the cheesecakes, I thought about swirling the filling the peanut butter together to ribbon the flavor throughout the batter, but I'm glad I didn't. Breaking into what looked like "plain" cheesecake to find that puddle of creamy peanut butter was not only dazzling, but a bit unexpected by our guests! If you are left with any extras, you can freeze them without worry (I snuck a couple in our freezer... I have visions of sticking a popsicle stick in the center and then dipping them in chocolate for an over-the-top cheesecake lollipop) - just keep the brittle off until just before serving.

Friday, February 19, 2010

Ricotta Pie Calzones...

Not only is it a time to party because it's finally Friday, but I'm also back with another "stuffed" dough as we continue with our weekly Pizza Night tradition. I'm not certain yet what we're going to do with this when we travel down to Charlotte (we'll be heading down that way the middle of next week!) as I'm probably not going to have access to a kitchen, let alone an oven, but maybe we'll get a chance to shop around the local pizza haunts and see what they have to offer? Any suggestions from those around that area?

You'll need a pound of dough to throw these Ricotta Pie Calzones together and I'm sure it won't be a shocker that I indeed did use our snazzy whole-wheat pizza dough. But of course, if you have a favorite recipe, or prefer a dough from your favorite pizzeria or local market, so be it!

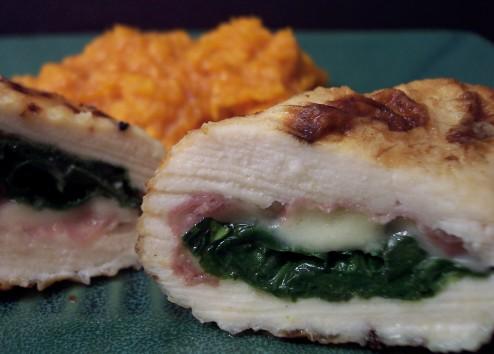
Three cheeses compose the filling we stuffed inside - ricotta, cubes of fresh mozzarella and just-grated Parmigiano Reggiano. One golden egg yolk, a clove's worth of minced garlic and fresh parsley are stirred into the mix, along with two meaty ingredients - diced prosciutto and chopped salami! If those last two are not on your radar, don't automatically give up on trying this recipe out - think about replacing them with ham and pepperoni! I know I'd love to also try using crumbled Italian sausage as another filler instead, or maybe even forgo the meat all together and try using well-seasoned sautéed hearty greens like dino kale or chard!

There was definitely a growl in my stomach as I was making them, which probably led me to parcel this out into four burly portions. If you're not as ravenous, I imagine you could eek out six satisfying servings - you just won't stretch the balls of dough out as large as we did. I would try to keep them around six inches in diameter, rather than the larger seven-and-a-half. If you find the dough starts to spring back or resists being stretched, cover it and leave the dough be for 5 to 10 minutes - this will relax the gluten and make it easier to worth with.

When you're ready to place the ricotta on the dough, spread the filling out on only half of the round, making sure that you leave the edge on that half clean. When you flip the empty side of dough over to hide the ricotta, keeping the filling off the edge will make sure the other side has something to stick to, along with the help of a light egg wash.

After all of the half-moon shaped calzones were ready, each was brushed with a bit more egg wash (sweetened slightly with a spoonful of confectioners' sugar) for color and given a few slits on top to vent, making sure there are not any hot, cheesy blowouts! These larger ones took us about twenty-six minutes to heat the ricotta concoction through and turn the pale crusts golden - if you opt for making smaller calzones, check on them at least five minutes earlier.

Thursday, February 18, 2010

Jamaican Beef Patties...

I would have normally waited for the weekend to make tonight's dinner, Jamaican Beef Patties, because of the total time needed to prepare the dish from start to finish. Luckily enough, I knew I was going to have extra time early this morning, which gave me the ability get the dough combined and chilled.

The turmeric-stained dough for the pastry was interesting - it used cold butter, which isn't all that unusual, but the recipe has you replace some of the butter with canola oil to cut down on the amount of saturated fat. You will need to give the pastry enough time to rest in the refrigerator before working with it, which allows the flour to absorb the liquid, the butter to firm back up and become a cohesive, roll-able mass. If you're ambitious (I wasn't!), you could prepare the dough a couple days in advance and leave it in the refrigerator.

With the dough relaxin' in the cold, we had enough time to get the filling cooked and then cooled - you don't want to top cold pastry with a hot filling. Ground sirloin and mess of scallions with one fiery bite from a minced Scotch bonnet chile pepper created the innards of these patties, but that's not all it contained. When the sirloin had browned, fine breadcrumbs (I used panko, crushed in a mortar and pestle) are stirred in with beef broth, thyme, turmeric and a dash of salt. The crumbs instantly soak up the broth and expand, adding a bit of moisture to the bulked lean beef filling... at least that's what I think the recipe intended. After a scant spoonful to check for seasonings, it felt a bit dry to me, which led me to add a tablespoon or two of extra broth. If you can't find that chile, you might have more luck locating a habanero - they are a little less spicy and don't have the citrus-y background the Scotch bonnet has.

With the chilled pastry divided in half, then each into thirds, each portion was rolled out to be topped with the filling. If you don't mind edges that are a little scruffy, you can top the pastry with a scoop of the beefy filling and work the dough to match up the edges as best as you can to seal them closed. If you want a perfectly shaped half-moon pastry, roll the dough out, top it with a 6" bowl or plate and trim off the rough edges - you can get the job done either way.

As the filling is already cooked, the patties just need to bake until the pastry is firm and golden. I was curious to see how the canola oil affected the texture of the crust and as suspected, it wasn't exactly the most flaky pastry. Jeff and I did think it had promise and was a good compromise though. The filling tasted fine, but still came off a bit dry - I think a small, finely diced onion would have been better than the scallions, along with a splash or two more broth at the end.

Tuesday, February 16, 2010

Homemade Mallowmores...

We've come to what may be the last Wednesday Treat Day for Jeff's current (soon former!) co-workers. I say "may" because we haven't nailed down all of the details about what happens when we are not in North Carolina. If the current plans work out, he may be working in the same building two weeks out of the month until we are officially moved down there, but you never know. If that does happen, I will have to convince him to sneak treats over!

To go out with a bang, we decided to try our hands at making a special goodie - Homemade Mallowmores! Here in the U.S., "Mallowmars" are a graham cracker cookie, topped with marshmallow and then covered in a rich chocolate shell. This take that we attempted on that classic cookie has all those same components, only homemade!

The entire recipe did look little daunting at first, but I broke down the steps and started out by making the marshmallow on Monday. I decided on doing that as they needed to sit for several hours before cutting and it would have been a little overwhelming to cram in all of the steps in one day. Homemade marshmallows are not nearly as hard as you might expect and if you've been reading us for awhile, you know we have posted about them a couple times. This recipe is fairly similar, except for the fact that it uses egg whites, which resulted in a marshmallow that was a bit more fluffy and creamy. Just be sure to beat the marshmallow mixture until the bowl is cool to the touch and once in the pan, give them plenty of time to set.

When they have set, slicing them can get messy - use whatever tool you feel comfortable with to cut the slab. A thin knife works well, as does a well-oiled pizza cutter - the cleaner the marshmallow cubes look, the better the end result. Since I made these ahead of time, to keep them from sticking together, I tossed the cubes with a combination of cornstarch and confectioners' sugar (dust storm!). If you decide to do this all in one day, you could skip this step and just keep the cubes separate until needed.

For a crunchy contrast to the marshmallows, they are set on a graham cracker base. The original recipe didn't call for using any graham flour, but we thought it would be nice to work some in - if you don't have any, just replace the graham with all-purpose flour. To get enough crackers out of one batch, once you have rolled the dough out and cut the crackers, grab any of the scraps and gently work them back together enough to roll out and cut once more. As soon as the crackers have baked, you'll want to work quickly and place a marshmallow on top of each immediately after they come out from the oven. This will seal the marshmallow to the warm cracker, which is what needs to happen to accomplish the final step!

For the final touch, when the two have melded and cooled, they are dunked, marshmallow side down, into a deep, slick pool of melted chocolate. I used a big block of Guittard chocolate that we broke down into small chunks and melted in a bowl over simmering water. If the marshmallows are not placed on the crackers right out of the oven, they won't have enough sticking power to stay on the cracker and will be left behind in the chocolate. Now, it isn't the end of the world if this happens - just place the marshmallow-topped crackers onto a wire rack and spoon the chocolate over the top, using a spoon or spatula to guide the chocolate over the sides of the marshmallow.

If you want the chocolate to look absolutely flawless, feel free to go through the process of tempering it first - by the time I got to dipping though, I was just ready to get them done! Biting into one of these gems, you get the bitter notes of the chocolate, the sweet, melt-in-your-mouth fluffy marshmallow underneath and finally, the crunch of the homemade honey-laced cracker at the bottom. Jeff summed these up in a simple sentence - "It's like heaven all wrapped up in a tidy, edible package!". Lots of time and effort, but definitely worth the result!

Monday, February 15, 2010

Chipotle Cheddar Cauliflower Soup...

Before we jump into tonight's post, I thought we'd post a sneak peek for this week's special Wednesday Treat Day. It has turned into a two-day job to get these done, but I'm excited to see how they turn out. I won't give too much away, but suffice to say that all one and a half pounds of this bad boy will be used!

Back to the original programming... I'm not one who is very fond of cold weather (and yes I realize how that sounds living in Minnesota), but what I do love is how the chill in the air makes you crave food that warms you from the inside out. This means hearty stews, casseroles, chili and the best of all, satisfying soups. If I had to pick a favorite out of those though, we gravitate towards soups because one can go so many directions with it and use up the bits and pieces of leftover ingredients in the refrigerator.

We went with that option tonight, making bowls of this Chipotle Cheddar Cauliflower Soup for dinner. For a lighter onion-y flavor, leeks form the aromatic platform of this soup. If you've never used them before, they can be very gritty if not cleaned well. I like to halve them first, slice them into thin half moons (using only the white and lighter green parts - the dark green section is quite tough) and then clean them by filling a bowl with cold water, setting the sliced leeks into a colander and then dunk them in and out of the water a few times. It may seem fussy and you could always just run the halved stalks under running water, but grit hides well and it only takes one experience to realize how worth cleaning them well is.

When the leeks began to turn soft, the soup comes together by adding in a head's worth of chopped cauliflower florets, milk, broth and a bay leaf. For a luxurious flow on the tongue, I went ahead and instead of using all regular milk, I held back on the amount and replaced it with a steady stream of half-and-half. While the filled pot simmers, give it a few strong stirs - as the cauliflower becomes tender, the roughness of that motion will begin to break the florets apart to disperse them into the soup.

The soup is somewhat thin at this point - to add enough body to allow the soup to cling better to a spoon, a small flour slurry was drizzled. Just be sure to bring the soup back up to a solid bubble to energize the slurry. As soon as you kill the heat, it's time to bring one of the best elements into this soup - cheese! If you don't want any heat or smokiness, by all means increase the amount of sharp cheddar to six ounces - however, as you know we crush on both of those, which led me to cut some of the white cheddar with a favorite chipotle version.

To bring all those subtle notes to the surface and add a spark of freshness, once the cheese had melted in, a strong squeeze from a lemon juiced this soup to life. This dish has a velvety feel in the mouth, but because we didn't puree the pot smooth, the bits of cauliflower retain a welcomed contrasting texture. We portioned this out into four soul-warming main-dish shares, but stretch it into six or eight servings to make for one magnificent starter.

Friday, February 12, 2010

Apple Cheddar Pizza...

You could look at this week's Friday Night Pizza two ways - dessert or, as we did, dinner! When I first thought about making this Apple Cheddar Pizza, I figured Jeff would rather have a slice after dinner, but when I mentioned the idea to him, he said "if you want to call it a dessert, then let's just have dessert for dinner!". Good enough for me!

Because the toppings where going to be plenty moist, I wanted to make sure the crust, made using our homemade whole-wheat pizza dough, would hold up to their weight. Par-baking the stretched-out dough did the trick, which was done by sliding the crust onto a heated baking stone and letting the round bake just until the shine from the raw top had dulled and the bottom began to take on color.

I found three large apples were just enough to entirely cover the base, using a combination of thinly sliced Fuji and Granny Smiths for a sweet-tart bite. Since the pizza wasn't going to be in the oven long enough to soften the apples, the slices were cooked in apple cider for just a few short minutes. You want the apples to be crisp-tender - they should bend without snapping in half, yet not be too soft or mushy. After removing them from their bath, the apples were piled on top of the dough, arranged in tight concentric circles to make sure each slice got in on the action.

As to not waste the cider used to soften the apples, we doctored the dark liquid with cinnamon and a drizzle of amber honey, along with a bit of cornstarch. The cider is still fairly fluid, but a touch of dissolved cornstarch gave the cider body and made it more viscous, allowing it to cling to the apples as we brushed it over them, rather than just running off. For a nutty crunch, toasted pecans were scattered on top, followed by just enough shredded white cheddar to cover. Look at it as a play on cheddar apple pie without the fuss of a pastry crust! The "pizza" just needed to bake long enough to finish browning the dough and melting the sharp cheese on top.

Even though we were pretty generous brushing the cinnamon-laced cider dressing over the apples, we still had a fair amount left over - next time, I think I would spread at least a third of that over the base of the pizza first as the "sauce". Jeff and I thought the tempered combination of apple, pecan and cheese was quite fun and more importantly, not too sweet! This was helped by the fact that the crust isn't so much sweet (or savory) to begin with - just a blank slate to play with creativity!

Thursday, February 11, 2010

Pork-and-Chive Pot Stickers...

Usually when I prepare homemade ravioli or other stuffed wonton dishes like these Pork-and-Chive Pot Stickers I made this evening, I tend to not set aside enough time and end up feeling rushed to get them finished. I don't know if I fell into a solid rhythm tonight or what, but it felt like I was able to crank these out in no time!

Since you don't get much more than a nugget of filling inside each of these, there are a variety of touches added to the ground pork to make it bit more potent. Fresh chives, soy sauce, dry sherry, fresh ginger and toasted sesame oil not only add a zesty punch, but some of those nuances will be echoed in the dipping sauce. I make filling them an assembly-style process, usually using three or four wrappers at a time, then keeping the rest covered, preventing them from drying out.

The recipe called for round wrappers, but since we already had a stack of squares in the freezer, I defrosted those and used them. I guess I could have plunged a biscuit cutter into the stack and have gotten the shape requested, but I admit I was feeling lazy and besides, why waste? It didn't matter to us if they ended up in triangles instead of half-moons! If you have extra time, these would be perfect to freeze in their raw state for quick dinners - just lay them out in a single layer on a parchment-lined baking sheet, freeze them solid and store in zip-loc bags. No need to defrost either - just add an extra minute or so when you boil them.

Once the stuffed wontons were gently slid into the pot of boiling water to cook through, they were drained and then browned in a separate skillet. This is a little more work than how we've made them in the past by searing one side of the pot stickers first, then adding water to the pan and let them steam away. I'm sure you could use either method, but Jeff commented that he liked the golden crust on both sides, which made having to wash an extra pot worth it. We used a simple, but snappy sauce to dunk these in made effortlessly from soy sauce, rice vinegar, fresh ginger, a dash of sugar and a dribble or two from a bottle of toasted sesame oil.

Tuesday, February 09, 2010

Fresh Raspberry Cupcakes...

Even though Valentine's Day falls on Sunday this year, I thought it would be a nice surprise to tie it into this week's Wednesday Treat Day. I was very tempted to make those fancy sugar cookies we made last year because they were fun to make, but we decided to delve into the cake department this time and make these Fresh Raspberry Cupcakes with Pink Buttercream.

With several steps to get these cupcakes together, I needed to set aside a good chunk of time to get them done from start to finish. The fluffy, smooth batter for the cupcakes is a bit of a process, between working in all of the eggs and alternating the dry ingredients with a combo of milk and vanilla, but as tedious as it was, the resulting cupcakes were spot on. Thanks to cutting the all-purpose flour with almost an even amount of cake flour, the crumb of the baked cupcakes was tightly woven together, moist and very tender.

The raspberries are worked into the cupcakes two ways - half of them are coarsely chopped, giving you bits of freshness in each bite. The other half, however, is pureed smooth, adding intensity, moisture and a light pink hue to the batter. The recipe may have stated a yield of 24 cupcakes, but by the time I had half of my 24-cup baking tin (we picked one up at a restaurant supply store a year or so ago) full, my mixing bowl was still darn full of batter! Filling that tin up, I was still able to scoop out 12 more cupcakes-worth of batter for a surprise total of 36.

Our oven isn't nearly that big, so I stashed the smaller 12-cup tin in the refrigerator while the first batch was in the oven. The second batch baked just as well, with maybe an extra minute or two in the oven since the batter was chilled. If you happen to have a large ice cream scoop handy, use that to deliver the batter into the pans - it makes for a fairly mess-free system. When they have baked, set the baking tin on a rack for no more than 5 minutes or so - leaving them in for much longer creates a steamy environment, toughening the bottom of the cupcakes. If you don't want that many cupcakes, you could always try to pare the recipe down for fewer cupcakes or bake the leftover batter in a loaf or cake pan instead.

The silky buttercream used to adorn the tops of the cupcakes is admittedly more fussy than your average confectioners' sugar based frosting as you have to bring the sugar and egg whites together over a pan of simmering water. This brings the egg whites up to a high enough temperature, jumping them into the safe zone without turning the eggs into a scrambled mess. This means there in no concern with "raw" egg whites - you also get the benefit of melting the grainy sugar granules, adding to the luscious texture without being tooth-achingly sweet. To add to the Valentine's theme, a few drops of red gel-paste coloring at the end turns the milky-white frosting a rosy shade of pink (sorry, I realize it doesn't look so pink in the pictures... I don't know why that is!).

If that wasn't enough, we had one more trick up our sleeves to set on the lavish pile of buttercream. We poured melted bittersweet chocolate into one of our pastry bags (fitted with a smaller round tip) and pipped out an array of hearts onto a piece of parchment paper. You can go as light or heavy as you want - just do an outline, make squiggles on the inside (a la filigree) or make a solid chocolate heart. If you have trouble doing this free-hand, turn the paper over and trace hearts on the backside using a heart-shaped cookie cutter as a template. To speed up setting of the chocolate, set them into the freezer for just a few minutes to firm up. Do a few more hearts than the amount of cupcakes you have - think of it as added insurance in case any break as you gussy the cupcakes up with them (and if they don't... I say baker's treat!).

Monday, February 08, 2010

Spinach Pie with Goat Cheese...

Do you shy away from certain ingredients because you think they are too much trouble to bother with? I used to be that way a few years ago with one... phyllo dough! I always seemed to stress out, thinking it would dry out, crumble or just be a pain to control when working with it. I got over that pretty quick once I gave it a few tries and realized it wasn't going to destroy the dish if a sheet here or there tore or if it didn't look perfectly layered.

It comes frozen and just like puff pastry, I much prefer to let it slowly thaw overnight in the refrigerator - I find the layers don't end up with any sticky or gummy spots as they did when I tried the quicker method of leaving them on the counter. In fact, I slipped a package of phyllo dough in the fridge last night to make this Spinach Pie with Goat Cheese, Raisins, and Pine Nuts for dinner.

The pastry needs to be covered while you work with it to prevent it from drying out - the first time I did this, I used a damp kitchen towel. This kind of worked, but the sheets started to absorb the moisture and it wasn't pretty. Since then, I like to cover them with a sheet of saran wrap first, then lay down a damp towel - this way I can take my time with the pastry, yet it stays dry without turning to dust as the air is kept out.

Jeff was taken aback when he saw the ginormous mountain of spinach I bought for the filling - just short of 3 pounds, which could be several smaller bags at the market. Thankfully we made a run to Costco over the weekend and picked up enough there in one shot. I read through the recipe when I picked it out during menu planing, but apparently I missed one spot that had me do a double take before I started tonight - the spinach was to be added to a pot of softened onions (no surprise there), however I didn't see the part where it say to simmer the spinach for 40 minutes. Really? 40 minutes? That seemed like an awful long time for fresh spinach and I thought it would disintegrate into a gooey mess.

When I finally worked all the spinach into the pot though, I saw just how much liquid came out as the greens wilted. I thought about scooping it out and wringing the excess moisture away, but I decided to go with the recipe and let it simmer until most of the liquid was gone. I gave the spinach a quick taste just as the spinach wilted and then later when it was ready per the recipe and I have to say I liked how concentrated and robust it ended up! Before the spinach was completely done, I did toss in the raisins called for and let them plump up slightly instead of adding them at the end.

When the spinach had cooled down, we seasoned it well with crushed red pepper, fresh grated nutmeg, salt and fresh ground black pepper (don't be shy here!), along with tangy crumbles of goat cheese and toasted pine nuts. This mixture was layered between the sheets of phyllo dough and baked until the pastry was crisp and golden. To pull out cleaner slices, you'll want to let this one cool down at least fifteen minutes before slicing in - I did take a taste while it was hot out of the oven and did prefer it closer to room temperature.

I knew I would like the raisins in this, but I wasn't so sure Jeff would. At first he though the sweetness was a little weird, but he came around quickly and decided by the end he thought it was a good contrast to the savory nature of the full-bodied spinach. While we both did like this and think it was surprisingly comforting, I can't say it was remarkable enough that I'd run out and make it again anytime soon.

Saturday, February 06, 2010

Honey-Sesame Biscotti...

I have yet another biscotti to add to the ever-growing list we've made, thanks to the batch I was able to bake this morning. I wish I had a good back story to share on why we made these Honey-Sesame Biscotti, but all I did was open up our favorite cookie companion, flip through the biscotti section and land on this one.

I think what drew my attention right away was the more unique paring of sticky honey and sesame oil in this recipe. Since they are the dominant flavors, chose the best intoxicating honey you can get your fingers on - we used a local buckwheat honey we picked up at the farmer's market this past summer (which also happens to be outrageous drizzled over Greek yogurt). Because you only need a couple tablespoons of the oil, you will want the make sure to use the more robust version that is dark in color - often labeled as toasted sesame oil.

When all the ingredients were combined, I found the dough very slack and sticky - I did add a dusting of extra flour, but even then it was still loose. Rather than risk adding too much, I set the mixture aside for a good ten minutes to rest - this made for a more reasonable dough, but it was still fussy to work with. Once you get the dough onto the baking sheet, you'll want to smooth it out as best you can - the easiest way to do that is to dampen your digits and gently work it to as even a shape as possible.

To reinforce the sesame essence already in the dough, an abundant smattering of sesame seeds was just the ticket to decorate the top. Even though the dough is tacky, to help the seeds take hold, the dough was first brushed with a light egg white glaze before the seeds were poured over. Just to throw a fancy flare to the mix, I did use a combo of white and black seeds, but one or the other would do the job just fine.

Just like other biscotti recipes we've made of late, once the baked loaf came out of the oven and had rested slightly, we used that genius trick of spritzing the top lightly with water before slicing into the individual sticks. The water softens the crust just enough that a knife (serrated) glides through with little or no crumbling that often happens with biscotti. Set up like little soldiers (rather than laid flat, cut side down) on the baking sheet, the cookies went in for their important second bake which gives them that classic crispy texture. Because of the honey in the dough, they will gain a significantly darker tone than most biscotti, so don't be tempted to take them out too early. They won't be ruined by all means, but they also won't be as crisp.

Friday, February 05, 2010

Hot Ricotta Spinach Loaf...

I asked Jeff a few times if he thought the dish we choose for our weekly Friday Pizza Night really qualifies for "pizza". He suggested we could try to wedge it into Stromboli land, but that might even be a stretch. I did use our favorite whole-wheat pizza dough to wrap this Hot Ricotta Spinach Loaf up, which hopefully makes this more legal!

We used frozen spinach for the filling, which was thawed and most importantly, squeezed as dry as we could get it. I used to use a kitchen towel to expel the excess water, which was a bit of a hassle, but for the past few years my favorite way to get this done is to use our potato ricer. It works well and we don't end up with a green-tinged towel to wash!

To loosen and push a splash of excitement into the bowl of squished spinach, a healthy scoop of ricotta was worked in, along with several grates from a block of Asiago we had in the refrigerator. A couple cloves of minced garlic also joined the party and because it adds a novel spark to spinach that is hard to explain, a touch of nutmeg. It's one of those je ne sais quoi moments - hard to put your finger on and while you don't get an overwhelming nutmeg presence, it definitely adds an element that would be missed if left out.

Thick and cheesy, that spinach mixture was then spread over the dough, which we stretched out into a fairly thin rectangle. Rolled up tightly into a thick, sausage-like log, the seam and ends were sealed before moving it over onto a baking sheet. You don't have to line the pan with parchment paper, but it makes clean up a breeze - especially if any of the filling decides to leak out.

To lending a helping golden hand to the dough, allowing it to evenly brown all over, the log was brushed with a couple teaspoons of olive oil just before baking. You'll want to let this loaf cool for a minimum of ten minutes before using a serrated knife to slice off rounds - I rushed this (hungry!) and felt a few extra minutes would have given us better looking portions. I left out any heat from the filling as we served bowls of a garlicky homemade sauce on the side for dipping that already had a spicy bite - you could always add a pinch or two of crushed red or cayenne pepper if you like.

In the end, it mattered more that we went back for seconds, nearly finishing off the whole loaf, than if this legitimately fit with a pizza theme or not! I knew we would be left with extra ricotta and there was just enough to make a snazzy dessert tomorrow night - that Ricotta Cappuccino we first made back in '07! Can't wait!

Thursday, February 04, 2010

Two-Pepper Rigatoni and Cheese...

If you took a look in our pantry, you may think "just how many people live here with all that pasta on the shelf?". I tend to keep a variety in stock, with various sizes, shapes and kinds on hand, be it regular, whole-wheat or multi-grain. It takes any stress away on those busy days knowing we can pull a meal together with pantry staples in a snap, but it's also nice to not have to shop when plans change and you have a little extra time to get dinner together. Which, conveniently enough, was the case when I decided almost last minute to make this Two-Pepper Rigatoni and Cheese tonight.

After cooking a pot of holey rigatoni, draining the liquid away when it was just short of al dente, I used the same pan to start softening a chopped sweet pepper in a slick of butter. Adding the bits of red pepper to the pasta, we made use of the pot again by throwing in another pat of butter and few spoonfuls of flour, followed with a steady stream of milk. When the milk came to a boil, activating the flour, I noticed that it wasn't as thick as I was expecting - however, as soon as we took the milk off the heat and whisked in the cheeses, it started to tighten up more. Even then, the sauce was still thin, but leave it be and you'll see why in a minute.

For a nutty, mild creaminess, fontina was the first cheese of choice, along with slightly lesser amount of white cheddar for a jolt of sharpness. Just before conjoining the sauce and tubes together, a shot of pickled jalapeño and green onions were stirred in as a bonus complexity. As a side note, since this was a last minute deal, I was short on the onion amount - I managed to scrape together a bare quarter cup and thought the full half cup would have lent a more noticeable bite.

Scooped into our baking dish, this needed one more element before it was ready to be baked - buttered breadcrumbs! All this takes is taking a couple slices of bread, blitzing them to coarse crumbs in the food processor and drizzling the nubbins with melted butter. I like to add a pinch of salt too for good measure, but that isn't a deal breaker. Baked until the sauce was bubbly and the breadcrumbs had turned from pale to an inviting golden brown, you can serve this right out of the oven if you like (though it may be fairly messy!), but I let it rest for about ten minutes to pull out somewhat tidy squares. Remember the thinness of the sauce? Because the pasta still had room to move being slightly undercooked, it absorbed some of the excess, thereby thickening the remaining, which was just enough to coat the rigatoni well and keep the dish moist.

If a meal isn't complete to you without meat, I wouldn't hesitate to toss in a crumbled and browned link or two of hot (or sweet) Italian turkey sausage. Saying that, neither of us felt the dish was lacking without meat and were both pleasantly full (without being stuffed) by the time our plates were clear. We made the recipe as a giant casserole, but if you'd like to serve this with a more personal touch behind it, portion the pasta out into individual gratin dishes first, then top and bake as directed.

Tuesday, February 02, 2010

Peanut Butter and Jelly Thumbprints...

I guess it's time to let the proverbial cat out of the bag - Jeff was officially offered, and has subsequently accepted, a new position within the company and we will be relocating to... North Carolina!

Yeah, I heard those gasps - talk about criss-crossing the states! Back to the East Coast once again. While we still have to get our house sold (*grumble* to the housing market!), our plan is to be transitioned down into the Charlotte area no later than June. Crazy, but what's life without some adventure? At least that's what I'll keep telling myself. Between now and June, Jeff will start this new job March 1st, which means he (or we, depending on timing) will be going back and forth for possibly weeks at a time getting familiar with the office and the area. I'm unsure as of yet how exactly this will affect the blog, but we'll do our best to keep it updated with all these new happenings!

This will hamper the Weekly Wednesday Treat day for quite awhile (sorry co-workers!), but we still have 2 more planned. Which, speaking of, brings us to this week's treat - Peanut Butter and Jelly Thumbprints!

Peanut butter, of the creamy variety, was incorporated right with the butter, creating the beige dough for these cookies. I found it to be brilliant to work with - neither too dry nor too sticky, just the consistency you want for rolling into balls. After divvying the batch of dough into plump rounds, each was then jostled around in a shallow dish of sparkly granulated sugar to coat. Just over halfway through baking, the cookies are whisked out of the oven and boldly (but carefully as they are hot!) stabbed in the center to make room for the filling. The handle of a wooden spoon works well for this, as does a small melon baller - sure you could use your thumb as the name implies, but who wants to burn off their fingerprint?

The cookies will then need to go right back into the oven to finish baking through. Now, why not just wait until they are done? This way not only helps flatten and spread the cookies out slightly, but they are more malleable at this point and if you were to let them bake completely through, they will be too set, making them more brittle and harder to press that divot into each. You could make the hole before hand, but it will just fill in as they bake and you'd need to re-do it again anyway.

The options are endless as to what to dollop inside the cookie craters you made - as you can see, I used raspberry jam for half, but how could I resist spooning that hazelnut-rich Nutella into the rest? I couldn't!

Or, if you happen to be a fluffernutter fanatic, how about adding a scoop of the white billowy fluff right in the center? A note on the jam - right out the refrigerator it is fairly gelled and hard to work with - a zap in the microwave or in a small saucepan, set over low heat, will loosen the ruby fruit filling just enough to facilitated moving it into the cookies.

Monday, February 01, 2010

Mongolian Beef...

Bold, a little spicy and most definitely hit the spot - that's one of the best ways we thought to label the dish we made for dinner tonight. This Mongolian Beef recipe did not only hit the mark on taste, but it was exceptionally easy and a snap to prepare.

Saying that, I did make some modifications to the original recipe... when I was going over the ingredient list for the sauce, the amounts, in my opinion, looked a little skimpy. I'm sure there would have been enough to coat the lean sirloin steak we would be using, but I wanted to make sure there was plenty to go around.

One-and-a-half times the amount sounded good at first, but as we thought about how we were going to serve the dish (over rice), I went ahead and added twice the amount. If you happen to not be on the saucy side, cut those ingredients in half. Soy sauce, granulated sugar, cornstarch (which tightens the sauce with a bit of gloss), dry sherry, hoisin, rice vinegar and a dollop of chile paste with garlic form the sauce, which when combined, will give you the important taste elements in this dish - salty, sweet, sour and a definitive punch of heat.

If you have had problems in the past thinly slicing meat for recipes like this (which as we know, always against the grain!), sticking the meat into the freezer is an option to think about. You don't want to freeze it solid - just enough that the meat firms, but still gives slightly if you poke it with your finger. We took those thin, beefy strips and arranged them into one of our largest skillets, along with brilliant fresh ginger and an abundance of minced fresh garlic - four cloves in our case. Cooked just enough to sear the outside, we then brought in green onions (I showed restraint with the amount, but add more if you like - Jeff can be finicky when he sees too many large onion-y pieces), which we followed shortly with the sauce.

With the cornstarch in the dark, glistening sauce, the liquids thickened in just a minute and before I knew it, I had the dishes plated and we were ready to eat! As mentioned, we did serve this over rice (brown basmati), but wide noodles would also be good, especially if you follow what we did and go heavy on the sauce. If you're unsure of the heat factor, tone the chile paste down to a teaspoon, then taste the sauce - if you don't find the heat adequate enough, spoon in a little more. Rather start too little than have it too hot for your taste!