Friday, November 30, 2007

Warming up with a comforting meatball stew before the big storm...

Around this same time last year while we were living back in Maryland, we did our monthly trip (it was a fairly far drive) to Trader Joe's and came across one of their new seasonal products. We only got one box and quickly snacked our way through it - we decided to make an early trip back a couple weeks later only to find they had sold out a week earlier and they just could not keep up with the demand.

Neither of us forgot about the item and when I saw Jeff do a little happy dance (a sight to be seen!) when we went to the Minneapolis (St. Louis Park actually) Trader Joe's this past weekend, I knew exactly what he found!

They make their "house" version of Oreo's called Joe Joe's (fitting if I do say so myself!) in a few different flavors, but these limited candy cane ones are so good! There is just enough filling, somewhere between a regular Oreo and a double stuffed, between the two crisp cookies and that filling is laced with little peppermint crunchies. We bought a couple boxes and I have a feeling we should probably get a couple extra to hide so we can enjoy them throughout the season - I'd love to give these a try in those Oreo Truffle Balls, dipping them in dark chocolate instead, and dusting the tops with a bit of crushed candy canes!

We are expecting a big snow storm this weekend (or so they say...) and the winds are really howling tonight - thankfully I had already planned to have this Hungarian Meatball Stew which warmed us right up.

Lean ground sirloin is bound together with bread crumbs, an egg and garlic - once combined, the meat is divided into 1 1/2" meatballs. The meatballs are browned in two batches to allow each round to get a golden caramelized crust. Carrots, onions and celery are diced up and added to the oil and juices left behind from the meatballs - while allowing the vegetables to soften, this also gives you a chance to get any of those savory little bits off of the bottom of the pan. So the sauce of the stew has some body, a couple tablespoons of flour are added, along with the same amount of sweet paprika, and allowed to briefly cook to lose that flour-y taste.

Beef broth is the liquid of choice as it brings such a rich depth to the sauce - once the broth has been added and comes to a boil, pungent caraway seeds are tossed in, along with the meatballs, to add a flavor very reminiscent of rye bread. After bubbling for a few minutes to warm everything through, we portioned the stew out over buttered egg noodles to round out the meal. Adding the noodles made this so hearty and comforting - with lots of "Mmmm..." sounds coming from Jeff as he ate, this recipe will definitely be made again, especially in the dead of winter.


Thursday, November 29, 2007

Sweet chocolate cupcake with a twist or two...

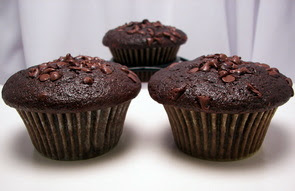
I made a cupcake recipe today that was a little different, fun and quite tasty. These Chocolate Butterscotch Pudding Cupcakes have a little surprise in the middle that is actually added before baking, rather than after.

id="BLOGGER_PHOTO_ID_5138454154073708754"We've made cupcakes before where you scoop out a cone from the middle of the baked cupcake, spoon a filling inside, replace the cone and frost the top. We did it a little differently this time and actually layered a scoop of butterscotch pudding as we were filling up the muffin tin with the chocolate batter. Since we were just playing around, I didn't make a from-scratch pudding - I just used a box of butterscotch Jello cook and serve... you could also use those already prepared pudding cups you find in the market. Before we topped the pudding with the chocolate batter, we tossed a few toffee chips on to emphasize that caramel-like flavor.

Since we were not planning on frosting them, we added a scattering of mini chocolate chips on top of the cupcakes before we placed then in the oven. When we bit into them, we found the chocolate flavor was fairly pronounced, but it had a lingering subtle butterscotch flavor before we even got to the center. Some of the pudding and toffee melted into the dark cupcake, keeping them quite moist, however you are left with a little hidden pool of the two when you reach the center. I was hoping for a little more of the pudding to be visible, but I didn't mind that much as the butterscotch hint it added to the crumb of the chocolate cupcakes turned into a nice combination.

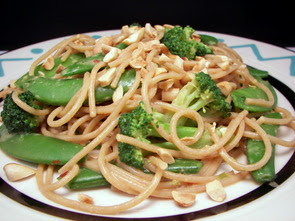
Chocolate Butterscotch Pudding CupcakesJeff has been asking for another recipe for dinner that has a peanut sauce of some sort since he very much enjoyed that Chicken Saté we had earlier in the month. After digging around in my to-try piles, I found a recipe for this Aromatic Noodles With Lime Peanut Sauce dish.

While you wait on some whole wheat noodles to cook, a peanut-y sauce with a tang is made in a food processor by pureeing natural peanut butter, soy sauce, vegetable broth, rice vinegar, fresh lime juice, a touch of brown sugar, minced ginger root, one scallion and a sprinkling of crushed red pepper. A few minutes before the pasta is done, broccoli florets along with snow and sugar snap peas are steamed just until they are crisp-tender. The noodles and vibrant veggies are tossed with the creamy peanut sauce and the dish is finished with a scattering of crunchy toasted peanuts. The fresh lime juice added a tempting bright flavor to the sauce that was not distracting as I thought it might be - the majority of the flavor was the nuttiness from the natural peanut butter. Very good while warm, I'm excited to have this for lunch tomorrow as cold peanut noodles are so tasty!

Aromatic Noodles With Lime Peanut Sauce

Wednesday, November 28, 2007

Buttery biscuits and hash...

Buttermilk biscuits are usually worth the effort of mixing up the dough, rolling them out in a dust storm of flour and using a cutter to get those perfect little circles. However, some days you just don't have the time to deal with the mess and crave those buttery biscuits - that's where these easy Best Drop Biscuits come in!

Now, I didn't name these and I can't say for sure if they are "the best" ever, but they were darn good and came together in a flash! Most of the other drop biscuits we've done have you cut cold butter into the dry ingredients - this recipe works a little different as it has you melt the butter and mix it into cold buttermilk. The butter instantly forms little droplets of fat that will evenly spread throughout the dough, giving the biscuits a little extra puff as they bake.

We used a large disher (about 1/4 cup worth) to divide out the dough - you could just used a greased 1/4 cup dry measuring cup for the same effect. The mounds of dough baked into very light, fluffy and tender biscuits that had a inviting crisp crust on the outside. As soon as they come out of the oven, they are given a generous dousing with melted butter for an extra touch of richness. Did they need that extra brushing of butter? Probably not - we left one by itself to see how they were plain and it was still tasty, if not a touch drier, but I would brush the golden biscuits again for that butter flavor as it doesn't add that many extra calories.

I'll be the first to admit that tonight's dinner, Smoked Ham Hash, is probably not that most attractive dish, however the flavor it had made up for its appearance! In a lump of melted butter, country-style hash browns (little chunky cubes rather than shredded potatoes) are sautéed with chopped onions and red bell peppers to doctor up the frozen potatoes with some fresh veggies. As the above start to brown, a mixture of chicken broth, half-and-half, Worcestershire sauce and ketchup is added and allowed to bubble away until the liquids evaporate to finish the potatoes off. Cubes of smoky chopped ham are stirred in and the drab dish is completed with a sprinkling of color from thinly sliced green onions and fresh parsley. This very homely dish was comforting and surprisingly addiciting - we thought it could use a dash or two of cayenne pepper sauce or maybe a few shakes of crushed red pepper to spice it up a bit. If you don't like ham, how about trying it some cooked chicken or turkey?


Tuesday, November 27, 2007

One way to get those leftover Butterfingers used up!

We still had some of those mini Butterfingers leftover in the Halloween treat bowl and while I do quite like them, they don't seem to be disappearing very fast. We thought we could work them into the weekly Wednesday Treat Day and made a recipe for Butterfinger Crunch Blondies.

Rich with brown sugar, these blondies have a sticky chew to them with bits of the chopped candy scattered throughout the bars. I used about 9 of the mini bars - they are not very easy to cut into chunks as they kind of shatter when you slice through them, but I didn't mind much as I found the shards were able to be dispersed a bit better into the dough. I did find the dough was fairly stiff when it was combined, however with the help of an off-set spatula, it spread easily into the baking pan. I don't really think of blondies as being "fudgy" since that term is usually used with chocolate, but these had that same moist and dense quality to them without being underdone or wet. If you don't have Butterfingers on hand or would rather use something else, how about tossing in some chunky pieces of white chocolate?

Since we have quite the supply of cranberries after stocking up with that killer sale last weekend, I thought I could also throw together a batch of those snazzy Sugared Cranberries with their frosted crunchy coatings for Jeff to take in tomorrow. We've made them several times for past co-workers, but we had not made them yet for the Minneapolis crew!

Tonight's dinner, Sesame Chicken with Broccoli and Brown Rice, had a couple things going for it to lighten the more classic deep fried recipe. First, instead of deep frying the chopped pieces of chicken, they are sautéed in a skillet with just a little oil. To give the chicken pieces texture, they are coated in a mixture of egg whites and cornstarch which gives them a sort of ethereal crunch when they are cooked.

To make sure the chicken browns evenly and cooks thoroughly without steaming, the pieces are cooked in two batches. When both are done, all of the chicken is added back into the pan and drizzled in a mixture of honey, toasted sesame seeds, soy sauce and garlic. As soon as this mixture hits the pan, it thickens and coats the chicken in a glossy sweet sauce. Rounding out the dish is a bed of brown jasmine rice and crisp-tender steamed broccoli. Light, yet still filling, Jeff and I thought this chicken dish was quite delicious for being fairly quick to prepare (most of the time required is downtime waiting for the rice to cook!) and is one I'll keep handy for those days we want something healthy and speedy that uses pantry staples.


Monday, November 26, 2007

Dried black mission figs and blue cheese - pungent and sweet never tasted so good...

Tonight's Macerated Winter Fruit dish that we had as a side was a very refreshing and clean way to change up an ordinary fruit salad. Since we only needed a cup of fresh pineapple, I did go ahead and grab a few pieces from the salad bar area of the market instead of buying the whole fruit.

The tangy diced pineapple is combined with apple cider, sticky honey and a whole cinnamon stick - the mixture is heated just until the honey has a chance to melt and dissolve into the cider. This is then tossed with chopped sweet apples (I used a crisp Fuji), sour pink grapefruit, halved red grapes and chewy dried cranberries. A splash of Grand Marnier adds an orange note with a drizzle of fresh lemon juice brightening up the fruit's flavor. Be sure to give this at least an hour in the refrigerator to chill before serving - this gives the cinnamon stick a chance to permeate the dish and the cranberries some time to plump up. You could even make this a full day ahead of time - I think the fruit would hold up just fine and the flavor would only get better.

Since we were on a "roll" with that turkey roulade from Thanksgiving, I wanted to do another stuffed meat dish and went with a recipe for a Fig and Blue Cheese-Stuffed Pork Tenderloin tonight. While we've had figs in a few savory recipes, I don't think we have ever paired it before with a pungent ingredient like blue cheese.

Inside the pounded tenderloin is a scattering of dried black mission figs and crumbled blue cheese. Once the tenderloin has been rolled up and tied, it is simply seasoned with salt and pepper and baked in the oven. When it is almost done, the tenderloin is brushed with apricot jam and put back in the oven for a couple minutes to finish it off. The jam adds a faint sweetness and gives the finished tenderloin a bit of sheen. Once you let the pork rest, it is best to slice the tender meat fairly thick - we cut ours about 3/4" to 1" thick to help keep the oozing cheese in the pork slices and not all squished out. If figs and blue cheese don't float your boat, how about changing it up and using Gorgonzola and dried cranberries? I think that is what we'll try when we make this again.


Sunday, November 25, 2007

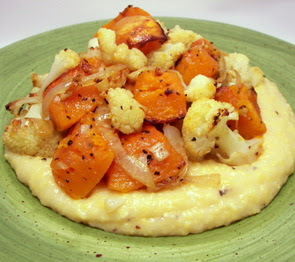
A bed of cheesy polenta for sweet roasted winter vegetables to rest upon...

This year really seems to be flying by with December fast approaching in less than a week! We had a total of 13 recipes this week, however a couple of them were repeats at Thanksgiving. We quite enjoyed the Thanksgiving feast, but I don't think I want to count those in our weekly round up of favorites... so making our end of the week list for this round was the incredible Crunchy Milk Chocolate–Peanut Butter Layer Cake, Beef, Black Bean and Chorizo Chili and the Frozen Pumpkin Mousse Pie (okay... Jeff made me include this last one even though I just said we were not going to include the Thanksgiving recipes!). Oh, and can you believe it? Over the holiday we crossed the 2 millionth visitor mark - wow!

The chilly weather has begun to settle in and we are expecting a wicked cold snap to blow in during the middle of the week (highs in the teens anyone?!). With polenta being one of our new favorite comfort dishes, I thought this Roasted Winter Vegetables with Cheesy Polenta would be a good choice to warm up our stomachs tonight for dinner.

The veggies are prepared first - chunky cream-colored cauliflower florets and cubed pieces of butternut squash are tossed with sliced onions and minced garlic. The veggies are lightly seasoned and drizzled with extra-virgin olive oil - the original recipe called for using garlic powder as a seasoning at this point, but opted to toss in a few chopped fresh cloves instead.

Roasted Winter Vegetables with Cheesy PolentaWhile they roast in a fiery hot oven, the polenta is prepared by cooking cornmeal in flavorful vegetable broth, a bit of water and fresh rosemary. The length of time it will take will vary depending on how coarse your cornmeal is - it took us about the full 25 minutes to get it to the consistency we like. Since it is a cheesy polenta after all, a good handful of fresh grated Parmigiano-Reggiano cheese is stirred in at the end for a sharp salty punch. To serve, the soft polenta is plated with the tender and golden browned vegetables strewn on top. Roasting the veggies at such a high heat brought out their light natural sweetness and made them the glistening highlight of the dish - however, the savory polenta with that nutty cheese did not fall into the background either and made this dish very filling.

Saturday, November 24, 2007

More biscotti with some new additions...

With all of the cooking and baking we've been doing the last week, the last thing I needed to do was bake some more, but when has that ever stopped us? I had a handful of dried cherries from a bag that we have been snacking from and made one of our all-time favorite treats - biscotti!

We've made quite a few different varieties if you've ever looked in the biscotti section of our recipe area on the left hand side of the blog, but the Orange-Infused Cherry-Almond Biscotti I made today was a new-to-us flavor combination for these crisp cookies.

Orange-Infused Cherry-Almond BiscottiThe dough was a little drier and crumbly than I'm used to at first - most of the other biscotti we've made have been fairly sticky when you get to the point of moving the logs to the baking sheets. It may not look like it will be cohesive when all the ingredients are added, but the dough does come together once you scoop it out of the mixing bowl and knead it a couple times. The texture of these cookies was in between those rock hard biscotti that need to be dunked to be enjoyed and the softer type that has a few tablespoons of butter.

Orange-Infused Cherry-Almond BiscottiI found that the logs did not spread nearly as much either, so if you like a shorter biscotti, you may want to pat the dough down a bit. Almond extract, fresh orange juice and orange zest add a bright note with the cherries adding a bit of sweetness and chew. The recipe called for slivered almonds, but I chopped whole almonds instead for added crunch. These would be good to give away as gifts drizzled or dipped in a bit of melted white chocolate.

Friday, November 23, 2007

Another year, another un-traditional pumpkin pie...

I alluded to a dessert we had in yesterday's post after we enjoyed our Thanksgiving feast - I had asked Jeff what he might want and he suggested anything with pumpkin, but something a little different. Here's a look at a couple past Thanksgiving desserts we made - the first was a Cinnamon Streusel-Topped Pumpkin Pie we made couple years ago.

Last year we did the Pumpkin Pie Cake.


While this years dessert was not nearly as much work as the other two, we both thought this easy Frozen Pumpkin Mousse Pie ranked quite high on the pumpkin dessert list.

Frozen Pumpkin Mousse PieThe original recipe has you prepare this treat in a pie plate, but I wanted to make serving go a little easier and assembled it in a springform pan. The crust was so good and only had 3 ingredients - crunchy gingersnaps, canola oil and a surprise ingredient - raisins! The raisins add just a little sweetness and since they are buzzed with the spicy gingersnaps, their stickiness helps hold the crust together.

Frozen Pumpkin Mousse PieThe filling is a smooth combination of mashed pumpkin sweetened with moist brown sugar and spiced up with cinnamon, ginger, fresh grated nutmeg and a pinch of cardamom. This mixture is then stirred together with silky softened vanilla bean ice cream until the color changes from that milky white to a darker creamsicle. We put the ice cream pie into the refrigerator for about 15 minutes before we sliced it - it was just soft enough to cut through without a problem, yet had not begun to melt or make a mess. We've tried a couple pumpkin-flavored ice creams before that you would find in the freezer section, but adding our own mashed pumpkin and spices to good-quality vanilla bean ice cream made a tremendous difference!

Frozen Pumpkin Mousse PieTo break up the ritual leftover buffet, I thought I could make some Chile-Rubbed Steak Tacos to have for dinner tonight. We rubbed a big ol' piece of flank steak with a spice mixture consisting of chili powder, garlic powder, salt, crushed red pepper, black pepper and an intriguing addition of cinnamon. We used The Griddler to cook the steak, but fire up the grill if you are so inclined. Once the steak had rested, we sliced it into thin strips (always against the grain!) and piled the pieces on warmed white corn tortillas.

With the spice rub, the tender steak has a robust flavor that can stand up to a variety of additions on top. We added shredded crisp romaine and sharp white cheddar cheese - use whatever toppings your heart desires as this recipe is just a base. While you don't really taste a pungent cinnamon flavor, it added a subtle sweetness that heightened the steak's flavor. Not one to waste any chance to add flavor, we drizzled the assembled tacos with a little bit of the juice that was left after slicing up the steak.

Chile-Rubbed Steak Tacos

Thursday, November 22, 2007

Happy Thanksgiving 2007!

Jeff and I hope everyone had a Happy Thanksgiving and were able to spend some time with your loved ones today! Don't forget to take some time to rest and relax!

We made a few past favorites and added a couple new recipes to our menu this year. The new recipe titles are in bold throughout the post and you will find links to them at the bottom as always. Since we first tried these Roasted Garlic and Fresh Rosemary Cloverleaf Rolls a few years ago, Jeff always makes sure that these hit the table on Thanksgiving. Last year we varied the flavor with thyme and Asiago, but today I made them as I always did and now I remember why we love them so much! So hard to stop nibbling at 2, 3... or 4 of these tender golden brown rolls flecked with fresh minced rosemary!

We made the same Sausage, Apple, and Fennel Corn Bread Dressing as last year and again did them as muffins - the extras freeze well and I love I can do most of the work ahead of time.

Nothing fancy for the potatoes - just buttery Yukon Golds that we pressed through a potato ricer and stirred together with warmed milk and butter. Using the potato ricer makes the fluffiest mashed potatoes!

I made an All-Purpose Gravy yesterday so there was one less thing to do this morning - while we were going to end up with some drippings from the turkey, as you will see later on, they would have been too strongly flavored to use and make the gravy from. This was an excellent recipe - it uses a combination of beef broth and turkey stock to give you a wonderful depth to the gravy. I also liked how it calls for browning the vegetables and having you cook them with the liquids and strain them out later to get the best flavor possible. Of course, it is not quite the same as using drippings, but we both agreed it served its purpose and was a good stand-in.

This year we decided to go the turkey tenderloin route instead of a breast or full bird, but that doesn't mean we didn't prepare enough for a feast of leftovers tomorrow! I gave Jeff a few options and he chose this Turkey Roulade with Cranberries and Chipotle as it packed the most heat!

You can make the filling that stuffs these flattened turkey tenderloins a day ahead of time - it is a cooked down mixture of onions, dried cranberries, white wine, fresh oregano, garlic and a spicy dose of chipotle chiles in adobo. We used a full minced tablespoon worth of the chile and it was just hot enough to satisfy the heat level we like, yet not so much that you couldn't taste anything else. To back up the smoky flavor from the chiles, the tenderloins are seasoned on the inside with cumin and chipotle chile powder. The tenderloins are rolled up, secured with twine and given a sear on all sides in a hot skillet. Rather than trying to cook them completely on the stove, they are then slid into the oven to finish cooking. The smoky tenderloins were very tender as the filling let go of some of its moisture to help keep the inside juicy (and staining it lightly pink!). While the filling is hot, the spice is counteracted somewhat by the sweetness in the dried cranberries and softened onions.

Yes, we did make a dessert, but we'll have to save that for tomorrow as we are about to slice into it now! I'll give a clue - it is a pie and has pumpkin in it, but it is not very traditional!

Jeff made sure we at least took one picture of his first plate before it was quickly cleaned - can you tell he really liked the gravy??


Wednesday, November 21, 2007

Smoky, spicy, meaty and thick - get your spoon ready!

This afternoon, the kitchen had a fantastic aroma that drifted through the rest of the house while a big pot of this Beef, Black Bean and Chorizo Chili was simmering away for tonight's dinner. I would normally make half a recipe this size, but chili only gets better with age and freezes so well. This will take care of our lunches next week since the next couple of days will be filled with Thanksgiving goodies and leftovers!

Thick and very hearty, this chili is infused with a smoky heat and filled with chunky pieces of beef and sliced chorizo sausage. The heat comes from a few chopped chipotles in adobo - besides adding depth, this also brings quite a spicy punch. We used four, but you may want to drop it down to 2 or 3 if you are after a little heat. You could also scrape out the seeds from them before chopping to tone down the heat level.

Beef, Black Bean and Chorizo ChiliWhen you begin browning the meat, be sure that you do this in batches - if you add too much at once, the juices that come out will take over the pan and the meat will begin to steam and not get the caramelization you are after. The original recipe did not call for this next step, but I believe it is pretty important - I like to add the tomato paste, once the onions and garlic have softened, and give it a chance to toast for a minute or two before continuing on. Doing this intensifies the paste and adds another layer of flavor. Bringing a slight tang and freshness are red wine and fresh lime juice added with the rich beef broth and fire-roasted crushed tomatoes. While this chili is not very soupy to start with, the addition of masa harina (corn flour) adds body and a viscous quality - you can use fine cornmeal though if you don't have a bag in your pantry already. If you like a chili that is on the thinner side, during the first hour of cooking, cover it completely or half way to keep some of the liquid from evaporating.

We did use a mixture of pinto, red kidney and black beans - feel free to use your favorite combination of beans for chili. Top as you see fit - add some cheddar, a dollop sour cream (good for cooling down the spice) or green onions - however, it is flavorful enjoy to be completely enjoyed all by itself.

Beef, Black Bean and Chorizo Chili

Tuesday, November 20, 2007

Chocolate coma... otherwise known as Crunchy Milk Chocolate–Peanut Butter Layer Cake

Since this is a short work week at Jeff's office due to Thanksgiving, we thought we better move up the weekly Wednesday Treat Day to today as we thought more people would be working. And since this is a holiday week, I thought we could do a more elaborate treat and chose this Crunchy Milk Chocolate–Peanut Butter Layer Cake.

Looking at the recipe, this stunning cake might seem fairly intimidating, but when you break it down to the individual sections, it really was not that bad. Fair warning though, it does take a bit of time to complete from start to finish! The cake was pretty massive so it was hard to get a good shot of it whole.

A rich, extremely moist and chocolate-y cake is the first order of business. This cake is easier than most as there is no creaming of butter and sugar - it just comes down to adding a bunch of liquid ingredients into the dry. You could even probably make this a one-bowl cake by making a well in the center of the dry ingredients, add all the wet and quickly whisk them together before pulling in the flour mixture from the sides. The recipe didn't specify between natural or Dutch-process for the cocoa powder, so I used a combination of both for an added depth. The addition of boiling water does make the cake batter fairly thin and runny, but don't worry as that is how it is suppose to be.
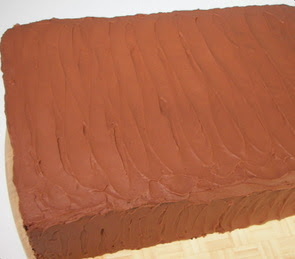
Crunchy Milk Chocolate–Peanut Butter Layer CakeWhile the cake is cooling, the next part to work on is a crunchy meringue layer - this is just egg whites, whipped with a little sugar, then mixed with ground almonds and confectioners' sugar. Here's a tip - you will get the best volume if you make sure the egg whites are at room temperature and your mixing bowl and beaters are very clean. There are a couple important textural contrasts that are added - while the meringue gets crispy, some chopped salted peanuts are scattered on top of the meringue for more crunch. After this layer is baked and cooled, a mixture of creamy peanut butter, milk chocolate and butter is melted and combined with a special addition - yes you are reading this right - Rice Krispies! This decadent mixture is slathered over the peanut-topped almond meringue and placed in the freezer to firm up.

Crunchy Milk Chocolate–Peanut Butter Layer CakeNow comes the fun part - assembly! The dark cake needs to be sliced in half to fill it - if you've never attempted this before, you can make life easier and place a few toothpicks all around the sides of the cake to help guide your knife to make the layers even. The bottom cake layer is smeared with a milk chocolate ganache (this is milk chocolate combined with cream to form a luscious frosting) and then topped with that crunchy meringue layer. Another helping of ganache is smoothed on top, followed by the top layer of the cake. At this point, chances are the sides of the cake are not even due to the meringue layer and how well the cake fit together. Since you want a nice surface to frost the cake, the edges are trimmed just enough to make the sides level. Don't look at this as waste... think of it as nibbles for the baker! You should have just enough ganache leftover now to encase the entire cake in a sweet, delicious and thin coating.

Crunchy Milk Chocolate–Peanut Butter Layer CakeAs you might imagine, the cake is quite sweet using milk chocolate. However, when you slide your fork into the dark cake and pierce the crisp layer inside to take a bite, you tastbuds are whisked away into chocolate overload with the salty peanuts and peanut butter helping to cut through that milky sweetness. This not-to-be-missed cake was a complete hit today - we even got a few "best treat ever!" comments. If you enjoy the combination of milk chocolate and peanut butter, don't deprive yourself - get the ingredients into your kitchen and make this soon!

Crunchy Milk Chocolate–Peanut Butter Layer CakeI think we may also have to just make the cake part again, replacing the water with coffee, and frosting it in a mocha buttercream - oh my!

Since I knew I was going to be fussing with the cake, I kept dinner very easy and laid back with a recipe for New Orleans-Style Shrimp. Now, let me say that I didn't name this and we've never eaten shrimp in New Orleans, so I can't say either way if this is anywhere close to being authentic!

A couple pounds of shrimp are tossed in a pungent lemony marinade consisting of Worcestershire sauce, lemon juice, melted butter, fresh rosemary, minced garlic, thyme, cayenne pepper sauce and a couple lemons thinly sliced. For less clean up and easy cooking, the shrimp are baked in foil packets - the key to keeping them tender throughout this process is to leave them in their shells. You can remove the shells before you serve them if you don't want your guests picking at them when they eat - but who says they can't do a little work to get at their dinner? The same flavorful liquid they were marinaded in is also drizzled into the packets before they cook - this leaves you with an aromatic and intensely flavored "broth" that practically begs to be soaked up with some crusty toasted bread.

New Orleans-Style ShrimpBe rustic and cut a couple slits into the foil and serve them right in the packets or un-crimp one edge and slide the contents into a shallow dish. Fresh, very light and a fairly hands-off dinner to end a busy day.

New Orleans-Style Shrimp

Monday, November 19, 2007

Let the cranberry hoarding begin!

It's that time of the year when the cranberries are bountiful in the markets and one can usually score a good deal. This weekend was our time to stock up for the next few months as they were under $1 per bag! Woo!

We decided to incorporate those fresh cranberries in both dishes for our dinner tonight - I started with this Carrot-Cranberry Gratin we had as a side. Haul out your food processor for this recipe - a bunch of carrots and an apple need to be coarsely grated, so the prep time will be greatly reduced if you have one. Once those ingredients are prepped, the dish takes no time to throw together and can be left to bake unattended while you work on the rest of dinner. The skinny threads of bright orange carrots and the milky-white Fuji apple are tossed with tart ruby-red cranberries, apple cider and honey. This mixture is then packed into a large baking dish - be sure to push the firm cranberries down so the top is somewhat level as this will make smearing the top with a light layer of soft butter much easier.

There are a lot of sweet elements swirling about here, but between the butter on top and the cranberries strewn about, the two leveled the playing field and it certainly did not feel like eating dessert. While the baking process brought out the carrot's natural sweetness, they did bring a needed savory element to the dish. There is nothing to bind the ingredients together, so it won't really come out in one neat and tidy piece - however, it was also not too tough to scoop out with a flexible spatula without it falling apart.

The next use for those bouncy cranberries tonight was a recipe for Pork Medallions with Cranberry Chutney. With only a couple tablespoons of brown sugar and a bit of apple cider to tame the cranberries, this chutney is given a slightly sweeter flavor by the addition of chopped black mission figs into the mix. Chopped fresh rosemary is also added while the chutney thickens, bringing a fragrant floral note.

As the jewel-toned chutney bubbles away, thin slices of pork tenderloin are simply seasoned with salt and pepper and quickly cooked in a large skillet. Since the tenderloin is so lean and is only about an inch thick, cooking them takes just a matter of minutes - be sure to leave them in the skillet just long enough so that the center is still slightly pink to keep them juicy and tender. Cranberry and pork is a favorite combination and this did not disappoint. If you want a more starchy side than the recipe we made, this would be fantastic served over a scoop of brown jasmine rice.


Sunday, November 18, 2007

Pasta, peas and prosciutto with a side of ricotta dumplings...

We managed to push out 10 new recipes this past week - it was a little tough to pick out favorites, but we selected the Pistachio Moments, Top and Bottom Crust Pizza and the Spiced Apple Cider Muffins as our three favorites.

Every once in awhile we grab an import food magazine to browse through and get ideas - tonight's dinner, Ricotta Dumplings with Orecchiette, Peas and Prosciutto, came from a UK magazine called Delicious and this recipe certainly fits in with the magazines title.

Right off the bat, the dumpling batter is prepared and chilled in the refrigerator until it is cooked - I'm not sure how long you could hold the mixture, but it was probably a couple hours before we used it. I thought this mixture was a little fickle - it will depend on how liquid-y your ricotta is. I made sure to test 1 dumpling first as the batter looked a little thin - it didn't seem to cook up right, so I added about 2 to 4 tablespoons of flour, until the batter looked a little thicker, and this time the dumpling cooked up about right.

Before you start cooking the dumplings though, the pasta mixture is made - however, get your pot of salted water ready to cook the dumplings. Small ear-shaped pasta called orecchiette is cooked until al dente, drained and lightly tossed with a bit of olive oil to help prevent any sticking issues. You could just rinse until cold water, but I find this pasta tends to nestle into each other and may cause issues. After some chopped onions are softened, a bit of white wine, followed by sliced salty prosciutto, peas and the cooked pasta are added and left just long enough to heat the combination through.

While the above is happening, the ricotta is dropped by teaspoonfuls into the salted water that you already brought to a boil - it takes just a minute or two to fully cook each batch. You don't want to add too many at once, so keep that in mind when you pick of the size of the pot you want to cook them in. The meal is complete with a couple tablespoons of mint for a fresh finish - we also added a touch of grated Parmesan on top. This dish could also handle a drizzle of olive oil right before serving to add an extra dose of flavor. The shape of pasta was a good choice - the pockets helped to grab a hold of the tiny peas and sliced prosciutto. We thought the cheesy dumplings were the highlight though - I loved how that little pinch of nutmeg heightened their flavor. The dumplings were not "pillow-y" light in texture, but they were not too heavy either. There was a downside to this recipe... it filled the sink with quite a few bowls, skillets and pots!


Recipes

Saturday, November 17, 2007

Elegant butter cookies with a pistachio twist...

Jeff went through that Holiday magazine that we have been plowing through recently and decided to mark specific recipes he thought that he would really like just in case I wanted to bake anything. I didn't notice what he did until this morning, so I flipped through a few pages and figured I could make the Pistachio Moments since he added a few !!! to the tag he used.

Pistachio MomentsThese are really just those basic butter cookies, commonly twice-rolled in confectioners' sugar, except these have the more unusual addition of chopped pistachios added to the dough. The recipe doesn't call for refrigerating the dough, but I found it a little sticky when I was trying to roll the dough into balls. To keep them from making my hands a mess, every two or three balls I would re-dust my hands with just a little bit of flour and that made a big difference.

Pistachio MomentsThe cookies are baked until the centers are set, yet the only color on them should be a light golden just around the edges. You have a couple options when the cookies are done - if you want to stay traditional, gently toss the warm cookies in confectioners' sugar and then let cool on a rack. The confectioners' sugar will melt a little since the cookies are warm, so you will need to re-coat them once more when they have completely cooked for that complete snowy appearance.

Pistachio MomentsFor option number two, you can let the cookies cool completely naked and then drizzle a bit of melted white chocolate on top. Before the chocolate sets, you can sprinkle the tops with chopped pistachios to let people know what nut is inside the cookies. These tender cookies literally melt in your mouth - the chopped pistachios inside add a slight crunch without interfering with that rich buttery flavor.

Pistachio MomentsI did decorate half with the confectioners' sugar and the other half with the white chocolate and chopped pistachios. For a finishing touch, I placed them in small candy cups as we are giving away some of them as part of a gift (yes, Jeff has already hoarded more than his fair share for himself as the recipe makes a lot of cookies!). I asked Jeff which coating he liked better and he couldn't decide - I couldn't either as they were both equally good!


Friday, November 16, 2007

Double-crusted pizza night!

We don't make pizza nearly enough, but when we do, we like to have fun and not make your ordinary pie. The recipe for the Top and Bottom Crust Pizza we had for dinner tonight called for a pound of prepared pizza dough, but I buzzed together our trusty and favorite Whole Wheat Pizza Dough. All of the work is done in the food processor and it literally comes together in a flash!

The whole wheat dough will need to be divided in half as one piece will form the bottom crust and the other will be rolled out to hide the filling and form a crust on top. The filling inside starts out by sautéing chopped onions and red bell peppers until the two have softened - a couple cloves of minced garlic are then added and it is left to cook just until you can start to smell the sweet garlic aroma drift out from the skillet. You could use green peppers if you wish - we find them a bit too harsh though and will usually replace them with reds.

Be sure to allow enough time for the above veggie mixture to cool down before you mix in the other ingredients. When it comes time to add the filling, it is combined with a generous mixture of mozzarella and cheddar cheeses along with diced ham and fresh parsley. This mixture is fairly heavy, so to counteract that and help bind it together, the ingredients are mixed with a couple of whisked eggs. I was worried it would make the filling too "egg-y" or omelet-like, but we both agreed that it didn't turn out that way - it just added some lightness to the inside. To help the crust achieve a beautiful golden brown color, the double-crusted pizza is brushed with an egg wash.

Our pizza was completely cooked in about 35 minutes, but it may take a little more or less depending - I cooked ours on a pizza stone, but you can use a pizza pan or sheet pan if needed. We especially enjoyed the duo of cheeses - the mozzarella added that gooey stringy texture while the cheddar brought a sharp bite. Play around with the protein - we used ham, but you could use smoked turkey, pepperoni or go crazy and fill it with some chopped salami. The crust is rolled thin enough so it isn't too thick, yet it is still sturdy enough that it doesn't flop around when you lift it off the plate. We also quite liked the fact how clean it was to eat - the eggs bound the filling just enough so it didn't fall out at all and you could easily pick up the slice to take a bite.


Thursday, November 15, 2007

Break out those fresh cranberries and make a cheesecake!

With several steps to the recipe, I actually had to get this Swirled Cranberry Cheesecake that we had for dessert tonight started yesterday. As with most cheesecakes, it is best when it has plenty of time to chill in the refrigerator before serving.

Swirled Cranberry CheesecakeStarting at the bottom of this cheesecake is a very dark-colored chocolate graham cracker crust. To intensify the chocolate flavor, a bit of Dutch-process cocoa powder is added when you grind up the crackers in a food processor. The crust is then pre-baked and set aside while you prepare the rest of the ingredients.

Next to be made is a brilliant cranberry sauce. The cranberries are cooked in a mixture of granulated sugar along with fresh squeezed orange and lemon juice. You want to cook this mixture until the cranberries pop and soften - once this happens, keep an eye on it as the sauce will thicken up fairly quick. The citrus-y flavor from the juices is then highlighted by the lemon and orange zest that is added when you puree the mixture smooth.

Swirled Cranberry CheesecakeNow comes the creamy part - the filling! To put more emphasis on and show off that sweet-tart topping, the cheesecake base is left fairly plain and is just simply sweetened with granulated sugar. Be sure that the filling ingredients are at room temperature - the cream cheese will beat up much more smooth and will continue to stay that way when the eggs and milk are added if they are not cold. Once the light velvety-smooth filling is added, the cranberry puree is dolloped on top and the two are swirled together.

Even though I did bake this in a water bath, I found that because the consistency of the filling and topping was different, I still ended up with a few cracks where the two were swirled together. That doesn't bother me much, but if you feel like you need to hide it, you could top the cheesecake with lightly sweetened whipped cream. You could also make another batch of the topping and not puree it, leaving you with a chunky topping to drizzle over. You could also just double the topping ingredients when you first make it and set half of it aside before pureeing.

Swirled Cranberry CheesecakeI had to slightly modify tonight's recipe we had for dinner, Red Curry with Vegetables, as neither of us care for green beans that much. It's not that we hate them, but I'd rather substitute another veggie if we are able to, so I used some broccoli instead tonight.

This dish is almost saucy enough to be classified as a stew - I think that might be pushing it though, as it was just liquid-y enough to yearn to be served with rice so you can eat every last savory drop. We used fragrant brown jasmine rice, but cook up whichever kind you have on hand if you make this. Extra-firm tofu stands in for the protein - to get the best texture and help it color as it cooked, I sliced the block into steaks and then weighed them down in between paper towels to press out as much water as I could before cutting them into cubes. To add an extra touch to the sweet potatoes, the chunky pieces are first caramelized in a bit of oil before adding coconut milk, vegetable broth and a couple teaspoons of red Thai curry paste to finish cooking them through. For just a touch of sweetness, a single tablespoon of brown sugar is tossed in when the browned tofu cubes and broccoli florets are added.

Red Curry with VegetablesCooked just long enough to allow the broccoli to become tender, yet remain crisp, the dish is finished with splash of lime juice and chopped fresh cilantro. I bought a new bottle of the red curry paste to use tonight, but I think we may have a dud or we have just become too accustomed to spicy flavors as it didn't seemed to pack all that much heat to us. I stated 2 teaspoons in the recipe, but you may want to start with one and add more, if needed, to pick up the heat a bit. I think I liked this dish more than Jeff - he thought it was good, but noted that the coconut milk was a bit too tangy for him.