Thanks for all of the encouragement on the house selling - we've done a lot of work on the inside and not nearly enough time to enjoy it! My main concern is that it is not always easy to keep the house in show condition - with my luck, I'll be in the middle of some messy baking project and a realtor will call to say they are outside waiting to show it!
We spent a lot of time trying to get things organized and put away tonight - I needed dinner to be effortless and quick so I could concentrate on other matters. Pasta is usually a go-to for us on days like this, so I went ahead and threw this Farfalle with Feta and Chipotle dish together. While we waited for the the bow ties to cook, we whisked together a bright dressing made from minced garlic, chipotle powder, fresh cilantro, lime juice, zest and oil. Crumbly feta is also folded into the dressing for a bit of saltiness and rich flavor. The hot tender pasta is then tossed with the fresh tasting sauce to create a smoky pasta dish that is still light, yet substantial enough to be satisfying. Even though the chipotle amount is quite small, it lends just enough punch with the lime juice to give the dressing a southwestern flair. Right before serving, toasted pepitas are tossed on top to add a crunchy contrast to the smooth textures in this dish.
Thursday, May 31, 2007
Wednesday, May 30, 2007
Say what??
I guess it is time to share the news we alluded to a couple weeks ago and let you in on why we have been so busy. I honestly can't believe that I am saying this given how much effort and work we have put into this house since we moved in just last year, but we are actually putting it up for sale within the next week or two as Jeff was offered, and has officially accepted, a new job. We will be heading back to the state that we left when we moved out to Phoenix where I started this blog... I also just happened to grow up there - that's right, Minnesota!
Huh? What? Are you crazy? I know... I know! The job is of course with the same company and he will even be working with a few of his former co-workers when we lived back in Minneapolis. Unlike the move from Phoenix however, we will be staying out here in Maryland until this house sells (ugh... we can't even wrap our minds around having to deal with showings and all that stuff that goes with selling again - scary!) We've been peeking through a few realtor sites to get a glimpse of what the market has to offer out there - but we will be waiting until we get an offer out here to get more serious about looking for the new house. We are trying to narrow down the area that we want to search in - so far we are thinking of areas south or south west of downtown Minneapolis, but we won't know until we have time to fly out there and see what has changed in the few years since we've been there.
We have a couple more projects to finish up on the inside to get this house listed, but once it hits the market we are really hoping that it won't take months and months to sell. I do have a sneaking suspicion that we will be out here for quite some time.... though I'll try to stay positive about it. We are excited to be moving back - it will be nice to be closer to a big city again that has so much culture and things constantly going on. So... anyone need a house? Come on... how could you say no when you have these cute four legged friends right behind your backyard!
Well, now that we have dropped that bomb, let's move on to tonight's dinner! We knew this Toasted Quinoa, Snow Peas, Tomatoes, and Mozzarella Salad was going to be good before we even took a bite when I rattled off the list of ingredients to Jeff. Do be sure to take the few extra minutes in the beginning to toast the quinoa - it really lures out the natural nuttiness in the grain. As we've mentioned before, you do need to make sure to rinse the quinoa before you use it - even if your package says it was pre-rinsed, I would still advise that you rinse it just to be sure you remove any lingering bitterness.
Once the quinoa has cooked and cooled a bit, the spiral grains are tossed with a medley of colorful veggies and herbs - they include crunchy snow peas, red onions, cool chopped cucumbers, fresh mint, chopped basil and juicy grape tomatoes. We also threw in some delicate pearl-sized mozzarella balls - you could also just dice up some fresh mozzarella if these are not easily accessible.
To get a fresh and tart counterpoint to the salad, the mixture is dressed with a combination of lemon zest, lemon juice, olive oil, Dijon mustard, salt, pepper and a couple dashes of cayenne pepper sauce. The cayenne pepper sauce does not make this salad spicy at all, but it just adds a little "oopmh" to the final dish. We both think that this would be great to make ahead and have ready for a couple tasty lunches throughout the week.
Tuesday, May 29, 2007
This chocolate treat should come with a warning label!
We are back again with another edition of baking for the Weekly Wednesday Treat Day that Jeff brings in to share with his co-workers. It will be hard to let go of today's treat in the morning though... these devilish squares are difficult to keep our paws off of!
If you ever feel the urge to over-indulge, these Essence of Chocolate Squares are completely worth the time and effort it took to put them together. The dark base of these candy-like squares is a decadent fudgy brownie that has an alluring addition of vanilla sugar to make them a bit more special. With a large dose of unsweetened chocolate and Dutch-processed cocoa, the thick moist layer fills your palate with an intense chocolate flavor that walks the line on almost being obscene. As if this treat was not rich enough, the base is smothered with a generous, dense chocolate frosting.
This luscious covering is made from confectioners' sugar, butter, unsweetened chocolate, milk, cream and vanilla extract - don't forget to add the pinch of salt called for, this will help to cut the sweetness a touch. Be sure to have all the ingredients ready to assemble the frosting as soon as the brownie is done baking - you want to frost the brownies while they are still hot, but the frosting will begin to set up quickly so it needs to be combined at the last minute. You will also want to have a gentle hand when you spread the frosting on top - the brownies are still a little fragile since they are warm and you don't want to crush them.
The recipe suggests a yield of 16, but these are just so intense that we sliced them into 30 very clean pieces instead so we wouldn't end up in a coma or something!
With just a little chopping and prep work, tonight's dinner of Curried Couscous with Broccoli and Feta came together in a flash. Really, it probably took me less than 15 minutes to prepare this... perfect for a busy weekday! Nutty whole wheat couscous, which takes just minutes to cook, is mixed with crisp-tender broccoli florets, red onion, shredded carrots, plump golden raisins and crunchy roasted cashews. The dressing for this mixture is a combination of sharp white wine vinegar, olive oil, sugar, fresh ginger and salt. Also included are two types of curry powder - I used a regular curry that I picked up in the bulk herb section and also used some hot madras curry powder for more depth and heat. To add some protein to this colorful mound of couscous, chickpeas are tossed into the dish along with a sprinkling of feta cheese to finish it off with a salty edge. If you want to stretch this out a bit or are serving a person who must have some meat for dinner, I think the addition of some chopped or shredded cooked chicken would be a nice fit here.
Monday, May 28, 2007
Could it get any better? BBQ sandwiches, watermelon salad and cookies!
Since Jeff had the day off, we were able to get a lot of stuff done around the house and I thought it would be nice to have a little mini picnic for dinner. We started out tonight with a side dish of Watermelon-Feta Salad with Fresh Herbs.
There were lots of flavors and textures involved in this dish... crunchy, juicy, sweet and salty. Exploding with color, this salad consists of chunky ruby red pieces of watermelon, peppery watercress, salty feta cheese, sliced red onions, fresh basil and mint. For a tart counterpart, we squeezed a fresh lemon over the salad before gently tossing everything together. Finished with just a sprinkle of salt to lure out the hidden flavors, this crisp salad was so refreshing and really hit the spot on this warm day.
Unlike the past couple of days when we should have used it, we were actually able to use the grill for tonight's dinner to cook the meat for these easy Barbecue Pork-and-Coleslaw Hoagies. Nothing fancy here, just pork coated with a spicy barbecue sauce (I didn't even make it!) and grilled until it is still pink in the center. While you wait for the pork to cook, a crunchy topping for the sandwich is combined by tossing broccoli slaw, sour cream, mayonnaise, a couple dollops of horseradish for heat and a dash of sugar to balance the flavors. Now, the original recipe did call for packaged "cabbage and carrot coleslaw" mix, but we already had the broccoli slaw on hand so we just used that. Once the pork is done and has a chance to rest, the tenderloin is thinly sliced and tossed with a bit more barbecue sauce.
To impart a little flavor into the rolls, they are first brushed with more of the spicy sauce before assembling the sandwich. We both thought these sandwiches were excellent... especially with the ease of preparation! The coleslaw topping was light, just creamy enough and had a pleasurable kick from the horseradish. If you don't have a grill or if the weather is not cooperating, you could also prepare the pork under the broiler if desired - just be sure to use a thermometer so it doesn't over cook.
What better way to round out a picnic like this than with some freshly baked chocolate chip cookies! This is actually a light recipe for chocolate chip cookies as it only calls for 8 tablespoons of butter, rather than the usual 16. As such, the dough when fully combined is not as creamy as a regular batch - though, it was still moist enough to hold together. The golden cookies with their cracks and crevices have an interesting texture - not super crispy, yet not soft or cake-like at all. They are firm to the touch and have a rich chewiness to them. With only 3/4 cup of chocolate for the whole recipe, the cookies are kind of skimpy on the chip to dough ratio though, but it was still satisfying enough. It was nice that I did not need to refrigerate the dough at all to keep the cookies from spreading too much - they were not flat at all and had a decent thickness.
Overall, a great light cookie as the texture didn't suffer as much as I thought - not dry or crumby and still buttery enough to pacify a cookie craving... though I would toss in a few more chips next time!
Sunday, May 27, 2007
That's one large hunk of bread!
9 new recipes for us this week - our top picks were the Chocolate Chip Rugelach, Toasted Millet with Parmesan and the Salted Cashew-Crunch Cookies. We have a fairly busy few days ahead of us, so I think I was a little ambitious when I planned this upcoming week's menu this morning. Though, since we did most of the grocery shopping this morning, I'm just going to have to find time to get it all done! I also need to get some of that Peanut Butter Granola made again - Jeff is especially fond of this mix, I think this will be the 4th batch!
One of the things on my to-do list at some point this week was get a loaf of bread made. However, I was looking for one that would be a bit sweeter than recipes we have done in the past... I had just enough time today, so I wound up making this spectacular Sugar-Frosted Cardamom Braid.
In the dough, I used a mixture of white whole wheat and all-purpose flour - though you will be perfectly fine if you only use all-purpose. I just like sneaking in whole-grains where ever I can if it won't interfere with the texture. As the liquid in this recipe is milk, the dough was so soft and a pleasure to knead. There are two stand-out flavors in this bread - a bright lemon flavor from a couple tablespoons of lemon zest and a unique, warm and very aromatic flavor from ground cardamom. Rather than baking this in pans, this dough is divided into three portions and then intertwined together in a braiding fashion to create a stunning loaf of bread. After its final rise, the dough is dressed with a light coating of an egg wash and then a scattering of large, coarse crystal sugar for crunch and sparkle. The braid started out at about 15 inches long, but when I went to pull it out from the oven, I couldn't believe how much it grew - it was just over 21 inches fulled baked!
We waited as long as we possibly could before we sliced into this intensely fragrant loaf, maybe 40 minutes or so... we just couldn't wait anymore! The baked loaf was so soft, light and tender without being overly sweet. There was just enough cardamom flavor in each slice so you know it is in there, but not so much that is overpowers the delicate lemon. We have already sampled it plain, toasted and toasted with a bit of jam... we can't even decide how we like it best! I have a feeling this will certainly be made again, especially around the fall holidays! You could even gussy it up with colored sugar around Christmas time for an even more festive appearance.
Recipes
Sugar-Frosted Cardamom Braid
Saturday, May 26, 2007
No flour needed in these crunchy cookies...
You know by now that we are fans of the salty and sweet combination, especially in cookies. We have made some Sweet and Salty Peanut Chocolate Chunk Cookies and Salty Oat Cookies in the past and today's treat of Salted Cashew-Crunch Cookies is right up there as a new favorite.
You can probably guess where this recipe is from... yes, another one out of my new (or well-used by now) go-to King Arthur Flour Whole Grain Baking cookbook. What sets these cookies apart is the fact that there is no added flour in the recipe - the main dry ingredient is old-fashion rolled oats that have been ground in a food processor. The ingredients here are very basic - butter, sugar, an egg and a touch of vanilla as you want the prominent punch of flavor from the cashews to shine through. A few of the recipes in this book call for an overnight sit in the refrigerator, but it is not needed for this recipe and that is one of the reasons I choose to make it today. Once the dough is made and scooped out, we sprinkled the tops with extra-fine salt before we flattened them out - I used the Diamond Crystal brand for this.
With an almost crumbly crunch to them when you take a bite, the first hit you get on your tongue is a touch of salt, followed by the sweet buttery base holding the cookie together - then the richness of the cashews grabs a hold of your taste buds for a nutty finish. Though, now I have a problem... while I could make dinner as planned... I think I like Jeff's idea of just filling up a plate of these cookies and calling it done!
Recipes
Salted Cashew-Crunch Cookies
Friday, May 25, 2007
Be sure to make enough for leftovers!
We are big fans of leftovers so we have something easy and ready-to-go for lunch the next day. Even though I am usually just making dinner for the two of us, I don't often halve recipes (though, I will if it is a dish of flavors we have not had before) and we usually have enough to either freeze or finish the extra within a day or two. I've even been known to double recipes like this Italian-Style Meat Loaf that we had tonight just TO have leftovers!
We would usually cut the ground sirloin with ground chicken or turkey in a recipe like this to make it a little lighter, but we had just the right amount of beef already in the freezer. While the marinara sauce and onions add flavor, they also keep this loaf moist, with Italian breadcrumbs and an egg acting as the binder to hold it together. Fresh grated Parmesan cheese and a variety of herbs are also tossed in to season the mixture. When you go to combine all of the ingredients, I like to mix everything together first, except the beef, and then gently fold in the ground meat so there is less of a chance to overwork the mixture. The original directions call for forming the loaf free-form on a broiler pan, however I have found it is easier to first line a loaf pan with plastic wrap and then gently press the meat in. I then use the plastic wrap to lift the formed loaf out and turn it onto the broiler pan - I just find it helps hold its shape better and is a little less messy. Before it goes into the oven, the meat loaf gets a generous coating of the marinara sauce on top. Lots of flavor and quite moist, this loaf was easy to slice and did not fall apart at all when we served it. And my earlier remark about the leftovers and this dish? Easy... We need to make sure to have enough so we can make meat loaf sandwiches for lunch tomorrow! Woo!
Thursday, May 24, 2007
Expanding the pantry with another new grain...
We tried out another new-to-us whole grain in tonight's side of Toasted Millet with Parmesan. Millet are tiny little pearls and can come in a variety of colors - we got ours from a bulk bin and it had a golden hue to it. It is rich in protein, fiber and magnesium - it also has the benefit of being gluten-free and is not an acid forming food so it is easily digestible.
To intensify its natural nutty and mildly sweet flavor, the golden spheres are first toasted until the grains begin to turn lightly brown. They are then cooked in vegetable broth and water for about 15 minutes - this will leave the grain with some bite to it, however you could let it go for another 5 minutes or so and the texture will be more soft and a little reminiscent of grits. Parmesan cheese, fresh lemon juice, a lump of butter and a bit of fresh thyme are added after a brief 10 minute rest. The lemon juice brings a bright flavor to the dish while the butter and cheese add a creamy richness. This dish was completely satisfying and had my mind working overtime thinking of other dishes we could use this tasty grain in.
Grilled Herb Chicken with Roma Tomato Sauce was the main dish for our dinner tonight. While the chicken was not too extraordinary, this quick tomato sauce certainly made up for it and added a unique touch. Chopped tomatoes are added to onions and garlic that were softened in a bit of olive oil, followed by the addition of dry red wine and balsamic vinegar. As you wait for the sauce to thicken, the chicken is coated with fresh chopped basil and thyme along with salt and pepper. The chicken is quickly grilled (again, we used The Griddler) and topped with the savory tomato sauce. Once the tomato mixture thickens, it is refreshed with a dose of chopped fresh basil before serving. A slight tang from the wine, paired with the enticing balsamic vinegar, brought life into the lightly flavored chicken breast and made this dish. The sauce is quite juicy, so you could even serve this over some cooked pasta to make it a full meal.
Wednesday, May 23, 2007
Simple seafood kebabs done inside or out...
We don't often make recipes that involve seafood and when we do, it is more likely to use shrimp as Jeff seems to like them the most. I don't really have a reason why we do not use them more often... we do usually like the few recipes we try - but we just don't tend to gravitate towards that realm of food.
I wish I could say there was a ton of effort put into tonight's dinner, but these Grilled Teriyaki Shrimp Kebabs could possibly be one of the easiest recipes we've done. While you could do these kebabs on the grill, we have not yet had a chance to get the propane tanks filled - instead, I just used The Griddler and it worked just as well. Large shrimp, golden sweet pineapple and chunky pieces of red onion are threaded onto skewers and drenched in a salty mixture of teriyaki sauce and toasted sesame seeds. I'm sure they would be even better with the extra special kick they would get from just being on a grill, however we really enjoyed these juicy kebabs even being cooked indoors. The chunky pineapple pieces were still able to get that caramelized finish which allowed its natural sweetness to bloom. If you or anyone you may be cooking for don't groove on shrimp, I would certainly think about using this same method with diced chicken breast instead.
Tuesday, May 22, 2007
The treat may have taken awhile to complete, but at least dinner was done in a snap!
Oh yes... more baking for the Weekly Wednesday Treat Day was done in the kitchen today. Although, it was hard to want to be inside this morning as it was such a gorgeous day outside - sunny, mid 70's and a light breeze blowing! I opened up all the windows and let the fresh spring air flow through the kitchen and made sure to take a minute to enjoy it before the humidity and heat kicks in.
I love to bake (as if you didn't know already) but I've never made this type of recipe before and quite frankly, I've never had an opportunity to try one and see what they taste like. So, I have nothing to compare these Chocolate Chip Rugelach to - but now that I've tried one (okay... way more than one) I can't wait to see what other variations of this recipe are out there to see how they stack up. You know, quality control and all (wink wink)!
These rolled cookies are basically a rich cream cheese-based dough filled with a delicious combination of apricot jelly, toasted walnut, a pinch of cinnamon and a mess of sweet mini chocolate chips. The dough is fairly soft, so it does need at least a good hour or two in the refrigerator before you begin to roll it out - plan accordingly if you want to give this recipe a try.
Because the dough has fair amount of butter and cream cheese, I placed a bag of ice cubes on the granite counter top for about 20 minutes before I began rolling it out - I thought this really helped the dough stay firm and not get too soft. After I spread the melted jelly on top of the dough, I also placed a small round cap (maybe 2" across) in the center and then scattered the filling over the dough. I did this so when I began to roll up the crescent-shaped pieces, the tail at the end would have just a bit of jelly on it giving it some sticking power. Before the cookies went into the oven, they were given a bath with a beaten egg and a shower of raw sugar. The cookies are very tender and somewhat moist on the inside, while the golden crust has a contrasting crunch from the sparkling raw sugar. The walnuts bring a wondrous nutty flavor that helped keep the chocolate from being the dominant flavor. If you're not keen on all of those chocolate chips, you could take away half and pair 'em with some small currants instead.
We had another "in a snap" type of dinner tonight with this recipe for Sesame Noodles with Broccoli. After just a few minutes of chopping and flexing of those whisking muscles, this colorful dinner was ready to be plated and enjoyed. The sesame in the title comes into play with three ingredients - it is worked into the dressing with tahini paste and toasted sesame oil; it is also used in the noodles with toasted sesame seeds. The dressing is a bit sweet from honey but is balanced by the tangy rice wine vinegar and salty soy sauce. Even though the garlic is raw in the dressing, it didn't keep that harsh bite it can have and melded right into the dish. To save on time and pots to clean, the fresh broccoli and carrots are added right into the same pot that is cooking the whole wheat noodles. The veggies are added in when there is about 2 minutes left so they have just enough time to remove their raw edge, but still stay bright and crisp-tender. The sauce and noodles are tossed with sliced green onions, fresh cilantro and a smattering of the toasted sesame seeds for a nutty crunch. If you wanted, you could even add some sliced chicken breast or grilled marinated tofu to stretch this light dish or make it a little more filling - I'm betting this will be even better cold for lunch tomorrow!
Monday, May 21, 2007
Bringing the southwest to us...
It was just one week ago today that we posted the pictures about the just-born baby birds right outside the front door. We peaked in the bush again yesterday and take a gander at just how fast these little guys develop!
We often make side dishes that are hearty enough to be a main if you just increase the portion size a bit. Tonight's dinner, Fiesta Rice, happened to be one of those recipes - I'm sure it would be a knock-out side dish for a Mexican entrée, but it was filling enough for us as a main dish dividing it out into 4 servings instead.
To bring out the sweetness in the corn, the kernels are first pan-roasted in olive oil until they begin to caramelize. Fresh green onions are then cooked in a pat of butter, followed by brown basmati rice, cumin and minced garlic to give the rice a chance to quickly toast. Instead of using water to cook the rice, chicken broth and fire-roasted diced tomatoes with chiles are added to infuse the dish with a southwestern flare. After the rice has cooked, black beans and a big handful of chopped cilantro are tossed in with a splash of fresh lime juice to brighten the flavors. You can use regular chunky diced tomatoes if you already have them in the pantry, but I do like the extra depth that the fire-roasted tomatoes give. A hearty dish that packs a deep smoky flavor, combined with the golden corn, black beans and nutty basmati rice was a filling blend that transported us back to the time we were living out west in Arizona! You could probably get away with adding some chipotle chilies if you wanted to kick up the heat, but even we liked this dish without the added heat since it had such a bold flavor already.
Recipes
Fiesta Rice
Fiesta Rice
Sunday, May 20, 2007
The wonderful world of cheesecakes...
Wee! 11 new recipes this past week - the standouts for us were the Northwest Waldorf Salad, Sausage and Pepper Calzones, and the Tropical Banana Cream Muffins. I can't believe how fast summer is approaching... just a couple more weeks and it will be June already! The bigger farmer's market opened last weekend, but we've just been too busy to check it out - we hope to make a visit next weekend though if time allows!
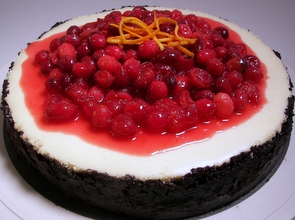
I've mentioned before that I have a fairly large stash of wild blueberries in the freezer as I have some everyday with yogurt. I'm trying to make a dent in my supply, so I've been searching through my endless (it seems anyways!) piles of recipes and found this Blueberry Cheesecake that I set aside some time ago to make. I always wonder why I don't make large cheesecakes more often when I finally get around to putting one together, but I think it seems like more of a hassle than it really is. We've done several cheesecake bars or individual ones, but I think I've only posted two large cheesecakes we've made. I went through the archives to see which two they were and fondly remembered the Cranberry-Orange Cheesecake with Oreo Crust
and of course the Caramel Swirl-and-Apple Cheesecake.
Now that I've veered off course, let's get back to this recipe! Instead of a full graham cracker base, this one uses half graham cracker and half vanilla wafers to add of punch of flavor to the crust. The filling is just a basic cream cheese batter, but what makes this one very special is a homemade smooth blueberry sauce that is swirled into the top of the very pale yellow batter. I opted to bake this cheesecake in a water bath to ensure a smooth top, but you don't have to be as fussy as there is a topping that gets applied and will cover any cracks that may happen. When the cheesecake is firm, but still has lovely jiggle in the center when the pan is touched, a mixture of vanilla-scented sweetened sour cream is spread over the hot cheesecake. It is placed back in the oven just long enough so the two meld together. I made this yesterday, for dessert tonight, because the cheesecake needs to cool to room temperature and then must be chilled for at least 8 hours - don't skimp as the flavors need that time to develop.
Remember that homemade blueberry sauce? A portion of that thick dark blue mixture is reheated, sweetened and thinned out with just a bit of water to make a mouthwatering blueberry drizzle for each individual slice. For some juicy texture, whole blueberries are gently folded into the sauce once it has thickened back up. The cheesecake itself has a dense, just luscious creamy filling that is set on a buttery, crisp vanilla crust. Besides adding a charming color to the plain cheesecake, the blueberry swirls added a fruity sweetness that held up against the tangy sour cream topping.
Can I tempt you into sharing a slice with me?
Recipes
Blueberry Cheesecake
Saturday, May 19, 2007
I'll close my eyes and pretend I'm on an island while I eat these...
If you've looked in the baked goods section to the left, you have probably noticed we tend to make a lot of muffins. I've said it before, but muffins usually freeze well and they are great to have on hand in the freezer for an on-the-go snack. Jeff ravaged through the freezer the other day to find we had no more... so when I woke up extra early this morning, I figured I might as well throw together a fresh batch for breakfast and stash the rest in the freezer.
These Tropical Banana Cream Muffins have a slightly different method to them as the eggs are beaten until frothy and they are then mixed with brown sugar, sour cream and mashed riped bananas. To add a taste of the tropics, fresh lime zest and lime juice are also added into the mixture. Once the wet ingredients are folded into the dry and the batter is portioned out, each muffin is topped with sweet shredded coconut. With the use of sour cream, the muffins are moist, tender and have a mild twang to them. As they were baking, the smell of the white coconut toasting to a golden brown drifted into the kitchen and through the upstairs, waking Jeff up enough to come see what was coming from the oven! When I slowly opened the oven door to peak in and check for doneness, I was very happy to see how well they swelled into beautifully crowned muffins. While the lime flavor was subtle, it clearly matched well with the sweetness from the ripe bananas on first bite.
Friday, May 18, 2007
Soup night...
There are some big changes happening around here (however, it has nothing to do with the website!) and we are finding that we have less and less time in the day because of it. I know that is very vague, but you will see some news that may be a little surprising soon! So with more days like this in our future, I'm looking for dinners that can be finished in a snap, but still feel like I am doing something.
Tonight's dinner, Italian Turkey Sausage and Escarole Soup, was quick, flavorful and especially nice on this dreary chilly evening. A mix of hot Italian turkey sausage, chopped onions and minced garlic form the base flavors and add a little spice to the soup. Broth, water, Italian seasoning, chopped tomatoes and campanelle pasta are added and once the liquid comes to a boil, torn pieces of escarole are added. Escarole is a member of the endive family - it has broad green leaves and brings a slight bitter edge to the soup... though it is less bitter than the other members of the endive group. Cooked until the pasta is tender and the greens wilt down, this soup came together in less than 25 minutes. I used campanelle pasta as had just enough in the pantry and well, because, I really like how it looks - however you could just as well use a small seashell pasta or even orzo. For a nutty finish, a shower of fresh grated Asiago cheese tops each serving. You could use also use Pamesan, but we like to use Asiago when we use the spicier turkey sausage.
Thursday, May 17, 2007
Spicy Asian Noodles with Chicken
Spicy Asian Noodles with Chicken (Adapted from CL)
6.75 ounce package thin rice sticks
1 tablespoon toasted sesame oil, divided
1 tablespoon minced fresh ginger
2 garlic cloves, minced
2 cups shredded cooked chicken breast
1/2 cup chopped scallions
1/4 cup chopped fresh cilantro
3 tablespoons soy sauce
2 tablespoons hoisin sauce
2 tablespoons rice vinegar
2 teaspoons sambal oelek (or to taste)
1/4 cup chopped dry-roasted peanuts
Cook noodles according to package directions, which is typically done by soaking them in very hot water until tender. Drain and rinse under cold water - drain well.
Meanwhile, in a small skillet, heat 2 teaspoons oil over medium-high. Stir in ginger and garlic - cook until fragrant, about 1 minute. Scoop mixture into a large bowl and stir in remaining teaspoon of oil, cooked chicken, scallions, cilantro, soy sauce, hoisin, vinegar and sambal oelek.
Slice noodles into smaller pieces to allow them to mix well with the ingredients. Add noodles to the large bowl and toss well to coat. Serve with a sprinkling of the chopped peanuts.
Makes about 4 servings.
Just found the recipe? Click here to see where we talked about it!
Working with corn in two ways...
I know it isn't quite into the season yet, but I couldn't pass up the fresh white corn at the market this afternoon. It may not be at its peak just yet, but it has seemed like forever since we have seen fresh corn that even looked remotely decent.
Since we were not going to enjoy the corn by itself on the cob, I actually bought the ears to use for tonight's side dish of Maque Choux (pronounced "mock shoe"). This spicy dish is a combination of corn, onion and poblano peppers that are cooked in a pat of butter. Be sure to use a large skillet if you try this recipe; you want to give the corn kernels a chance to caramelize and begin to brown. Once the corn has gotten some color, fire-roasted diced tomatoes, a homemade Cajun Spice Mix and a little chicken broth are added and the mixture simmers until the flavors concentrate and most of the liquid has evaporated. The dish has a smoky, rustic and roasted flavor with a nice kick to it - you will have a bit of the Cajun Spice Mix leftover as it makes a lot, but you could use the leftovers for a Dirty Rice recipe that we made awhile ago or you could just halve the ingredients and use some of it as a blackening spice for fish.
Tonight's dinner is an interesting twist on sloppy joes with a recipe for Spiced Beef Corn Bread Cobbler. The original recipe calls for all ground beef, but I wanted to lighten it up a touch so we cut it with some ground turkey breast. What attracted me most to this recipe was the unusual combination of sweet and savory spices used to season the meat mixture. A dash of sugar, ginger, cinnamon, cayenne, allspice, black pepper and salt create a complex flavor that kept Jeff trying to guess what spices he was tasting. Besides adding moisture, fire-roasted diced tomatoes bring a rich depth of flavor to the beef and turkey mixture. Once thoroughly heated through, the cooked base is placed in a pie dish and topped with dollops of a cheesy corn bread based batter.
The dish is then baked just long enough to cook the corn bread. The dollops of batter bake up into beautiful mounds of savory moist corn bread and made for easy portioning of the dish. It was somewhat reminiscent of chili, so I may think about adding a can of beans into the mixture next time just to bulk up the dish a bit more.
Wednesday, May 16, 2007
From ordinary to extraordinary...
It was a meat and potatoes type of meal for dinner tonight, however this was nowhere near ordinary as each dish had a lot going for it.
We'll start off tonight with a non-fussy recipe for Roasted Potatoes with Herb Vinaigrette. Not too much to talk about here really - quartered red potatoes are tossed with olive oil, salt and pepper and roasted until they are tender. A fair amount of minced garlic is added to the hot potatoes and they are placed back in the oven to cook just a few more minutes so the flavor can distribute. During that time, a dressing made from olive oil, chives, white wine vinegar, Dijon mustard and tarragon is whisked together. Right as the potatoes are taken out and are still piping hot, the potatoes are gently tossed with the dressing so they immediately begin to drink it up. It's hard to go wrong with roasted potatoes, but between the minced garlic and the dressing, these tender babies are delicious with just a different twang to them to keep 'em interesting.
The meat half of tonight's dinner was a sweet, yet quite spicy recipe for Pork Medallions with Chili-Maple Sauce. A lean pork tenderloin is first divided into 6 pieces with each one being flattened until it is about 1/2" thick. Seasoned with salt and fresh ground pepper, the pork is also sprinkled with Chinese five-spice powder to tantalize the taste buds. Quickly cooked in a hot skillet, the pork is allowed to brown on each side, yet still keep a light pink hue in the center so each medallion stays tender and juicy. Now, the real sweet and spicy combo comes into play with a sauce created with chicken broth, pure maple syrup and chili-garlic sauce. Prepared in the same skillet as the pork, the sauce picks up any caramelized bits left behind and reduces to intensify its flavor. If you're serving the pork as-is, there is just enough of the sauce to coat the medallions - if you would like to serve this over rice, I would suggest doubling the sauce so there would be plenty to go around. The sweet maple syrup slightly offsets the heat, but feel free to adjust the chili-garlic sauce as with 1 tablespoon the sauce is still very spicy (just right for us though!).
Tuesday, May 15, 2007
When rhubarb and fresh strawberries collide...
One of the ingredients I always look forward to this time of year is fresh rhubarb! I don't make nearly enough baked goods with it though - however, we've used it in the past in a pudding cake and muffins! When we were at the market on Sunday, I noticed the price had finally came down on the crimson stalks and I decided that I had to find a way use them in our baking for the weekly Wednesday Treat Day treat.
One ingredient that I love to use with rhubarb is fresh strawberries, which are so sweet and juicy right now, so we made sure to get both to make these Strawberry-Rhubarb Oatmeal Bars. Chunky pieces of rhubarb and sliced strawberries are cooked down with just a squeeze of fresh lemon juice until the rhubarb is tender. Since they give off so much liquid when cooked and the rhubarb is quite tart, a mixture of granulated sugar and cornstarch sweetens the pot and thickens the jam-like mixture. While this cools off, a crumbly mixture of flour, oats, brown sugar, soft butter, baking soda and a dash of salt are mixed together with about half of it being pressed into a baking dish to form the base.
The ruby jam is then spread over the uncooked base, followed by a scattering of the crumbles from the base mixture, to form the golden bumpy canopy. Once baked and cooled, we finished these bars with a creamy drizzle of confectioners' sugar thinned out with milk. Very buttery and a little tart, each nibble from these delicate bars was was like taking a big bite out of a refreshing summertime day.
We took a spin on pizza tonight and made these individual Sausage and Pepper Calzones for dinner. Because you are preparing your own dough, be sure to budget enough time for the dough to rise, rolling it out and the filling the calzones... it ended up taking a bit longer that I planned on so dinner was a little late tonight. I was pleased with the dough though - it was very easy to work with and stretched out nice without breaking. Once the dough has been divided and rolled out, a mixture of sautéed sweet red bell peppers, onions, garlic and sliced chicken sausage that has been tossed with mozzarella cheese, tomato sauce, cottage cheese, fresh grated Parmesan, oregano and crushed red pepper are added on top of each rolled out circle for the filling. After the calzones are formed and crimped, they are baked in a hot oven until the crust is a rich golden brown.
Dividing the dough into eight pieces allows it to still be rolled thin enough so the crust is crisp, but it also has a pleasant chew to it. Since this recipes does make quite a few, the calzones will be great to freeze, fully cooked, and then reheated at a later time for lunch or a quick dinner!
Monday, May 14, 2007
These eggs are not for your omelete...
While we've been working on cleaning up the landscape around the house these past couple of weeks, we spied a little something hiding in one of the bushes right next to the front door.
We've been checking them every couple of days to see if there had been any development, but when I was out trimming yesterday, I heard some faint noises coming from said bush. I carefully pulled one of the limbs back and peaked in to see that our little friends had burst from their azure enclosures and were quite hungry! What a majestic event as they arrived on Mother's Day of all days. Spring is certainly full of little surprises around here!
We go through quite a bit of chicken and are always looking for new ways to enhance it with new flavors. We added a little heat and crunch to a few chicken breasts with tonight's dinner of Spicy Pecan-Crusted Chicken. Coating the chicken is a ground mixture of pecans, panko breadcrumbs, orange zest, salt and chipotle pepper - using a combination of nuts and breadcrumbs added substance and texture with a light citrus scent from the bright orange zest. For this recipe, the chicken is pounded fairly thin which allows for a very quick cook and it gives more area for the nutty coating to adhere. Juicy with a golden brown shell, the ground chipotle added a hint of spice and a mild smoky background - we both thought this would be a nice way to prepare chicken breasts to slice and add to a fresh and crisp green salad. That will be our lunch tomorrow though, as tonight we eagerly finished up the leftover Northwest Waldorf Salad from last night!
Recipes
Spicy Pecan-Crusted Chicken
Sunday, May 13, 2007
Cool and crisp salad along side a fancy stuffed tenderloin...
8 new recipes for us this past week... the standouts this time were the Soft Barley-Sugar Cookies, Frozen Blackberry-Lemon Chiffon Pie and the Cumin Orange Glazed Carrots. For those that have been asking about the jury duty, I was never selected to sit on any of the trials, but at least it was a chance to peak in to see how the system works!
Tonight's dinner began by making a quick side that had just a few ingredients and turned into a surprisingly additive dish. With an appealing texture combination of creamy and crunchy, this Northwest Waldorf Salad had us going back for extra helpings before we finished with dinner. Crisp celery, chewy dried cherries and crunchy hazelnuts are tossed in a dressing consisting of smooth yogurt, tangy sour cream and lemon juice. While this type of recipe would normally call for apples, this one uses chunky pieces of juicy Bartlett pears to be added for a fresh change - the only difficult part of this recipe was waiting for it to chill down for an hour! I adore hazelnuts and this was a new way for us to enjoy the rich flavor they add. If your hazelnuts are still coated in the slightly bitter skins, a simple way to remove them is to toast them at 350 for about 10-15 minutes, or until they smell very nutty and the skins blister. As soon as you remove them from the oven, place them in a clean towel and rub them together vigorously. A little messy yes, but this gets most of the skins off - don't worry about any stubborn bits of skin that remain though, as it shouldn't impact the flavor.
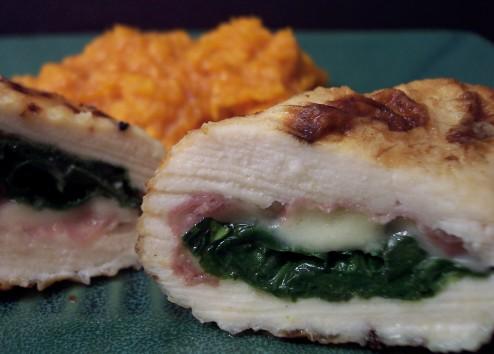
We went a little fancy with tonight's main dish of Pork Tenderloin Rosa di Parma. Big name I know, but all it really comes down to is a pork tenderloin stuffed with prosciutto and Parmigiano-Reggiano cheese. The directions are fairly lengthy, but we went into detail on how you want to prepare the tenderloin - you will need to double butterfly it so it will be easier to work with. It is not hard at all - just be sure to read through the instructions before you begin. Because you will be moving the tenderloin around a lot, it is worth the extra step to use some kitchen string and tie the meat 3 or 4 times - this way it has no chance to unravel while cooking. Once it has been stuffed, rolled and tied, the tenderloin is given a quick massage with olive oil followed by a fresh herb coating consisting of sage, rosemary, garlic, salt and pepper. The pork is then seared on all sides and goes for a trip into the oven to finish cooking.
Do yourself a favor and use the best quality Prosciutto di Parma and Parmigiano-Reggiano cheese that you can afford. Because the pork is fairly mild in flavor, it allows the sharp, salty and nutty flavors in the stuffing to stand out and be known! Juicy with a light pink hue, the pork slices beautifully and would be a great addition to a dinner party. Next time, I would do two tenderloins to have more for leftovers as this dish was way to good!
Saturday, May 12, 2007
We're not turning on the air conditioner yet, instead we just made a pie!
The heat and humidity has been on full force the past few days and we have been yearning for something chilly to cool us off at night. A couple days ago at the market, they had some fresh blackberries that looked irresistible - they called to me and would not let me leave the store without a couple packages in my basket. I didn't have a plan for them... until I came across a recipe last night for this Frozen Blackberry-Lemon Chiffon Pie. The best part? You don't have to turn on the oven!
On the bottom of this luscious pie, a buttery graham cracker mixture is pressed down to form a thick crust. Since this sweet treat is frozen, the directions don't call to bake the crust to crisp it up. So even though I followed the directions, I think it could benefit from a quick trip through the oven next time just to give it some texture (but then you would have to turn the oven on!) The pie is simply fresh blackberries and lemon juice that are pureed until smooth and then pressed through a sieve for an ultra silky texture. To add volume and body to the blackberry puree, egg whites are whisked to firm peaks, with the puree being folded in afterwards. Again, since this is not baked, the egg whites are beaten with a slow stream of boiling sugar syrup to gently cook them - this way there is no concern with using raw egg whites. Many times, these types of pies use gelatin to hold this mixture together - however, this pie does not which is why it must remain frozen.
With a light lavender color, each bite has a burst of fruity flavors that dance on the tongue - it is very light in texture and a perfect way to end a warm spring day. Since I made this last night, Jeff actually cut a piece this afternoon for "quality control"... we were suppose to try it after dinner tonight, but I ran to get my own slice after I took a bite from his! Keep in mind, this pie will soften if left out very long and almost begin to melt - it is best served right from the freezer. Oh and the grooves/indents around the edges? I was trying to be fancy and line the sides of the springform pan with wax paper to get a smooth finish - I guess it buckled when I was filling the pan... oh well!
Friday, May 11, 2007
Forget the pancakes... I'll just enjoy the compote with a spoon!
We've been known to do "breakfast for dinner" fairly often in the past, but it seems that it has been way too long since the last time. Jeff had been asking for pancakes or waffles sometime this week, so I obliged with tonight's dinner for Coconut Pancakes with Orange-Mango Compote with a side of crisp salty bacon.
The chunky compote is a mixture of sweet red apples, mangoes, orange zest, chopped orange segments, brown sugar and a dash of cinnamon. Tossed with a bit of water, the mixture simmers until the fruit is tender... then a touch of cornstarch, dissolved in water and lime juice, is mixed in to tighten up the extra juices in the compote. The pancakes are up next - in the dry ingredients, you will notice the use of coconut flour. This stuff is fairly expensive and honestly, it does not add much in the way of coconut flavor - I used it because I had it on hand, but I would just as well use whole wheat pastry flour or even all-purpose instead. What does give the pancakes a boost of coconut flavor comes from the use of coconut milk as the bulk of the liquid ingredients. While the taste is still fairly mild, you can tell they are coconut pancakes upon first bite. The golden round cakes are light, fluffy and not too sweet, which makes them a great background to show off the delicious compote. However, they are also not very remarkable and just kind of disappear as they have no gusto to them. I may not make the pancakes again, but the compote, on the other hand, was scrumptious and will be made again to top French toast or waffles!
Subscribe to:
Posts (Atom)