Tuesday, March 30, 2010

Peanut Butter Sandwich Cookies...

When I go for a bar of chocolate to nibble on, it will most likely be the darker, bitter variety, rather than the lighter, more sweet chocolates. There are exceptions though, like Reese's peanut butter cups (weakness!) and the wicked Almond Roca we make every year for our holiday baking spree. I bought more milk chocolate bars than I ended up using making the roca this time and neither Jeff nor I have felt the urge to rip into them. I did, however, find an outrageously good use for them today in these Peanut Butter Sandwich Cookies with Milk Chocolate Filling that we made for the Weekly Wednesday Treat Day.

When I had the peanut butter dough prepared for the cookies, the first thought that came to mind was how much the consistency reminded me of those Buckeye candies - supple, yet firm enough to hold its shape. Initially it did look like the dough was going to be quite wet and sticky to work with, but once I started scooping it out with our handy tablespoon cookie scoop, the shiny dough fell into place. The dough was soft, but I found I was able to pick up the balls of dough and roll them between my palms without any issues.

Baked in three batches (I found 16 dough balls fit just right on a regular sheet pan), I took the cookies out when they were golden and the centers were set, yet the color in the center was still a bit lighter than the edges. Warm, the cookies are faintly fragile, but a two minute rest on the baking sheet allows them to firm up enough to transfer them to a wire rack to finish cooling without any breakage.

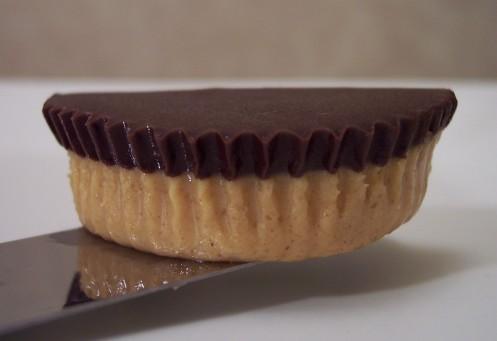
The smooth, decadent filling is made with, of course, milk chocolate, but since we're pushing a peanut butter theme here, there's also a large dollop of peanut butter added as well. Salt and a bit of confectioners' sugar are added to the bowl with those two ingredients and to bring them together to form the filling, we poured over bubbling hot cream, which almost instantly melts the chopped chocolate. It will be fairly liquid-y right off the bat, but as soon as you cool it down with a stint in the refrigerator, it will thicken to a delectable, creamy spreadable filling that was hard to keep my spoon out of! If you want to speed this process, you could set the bowl in a larger bowl filled with icy water, but just be sure to stir it fairly often so it cools evenly.

The cookies themselves are thick, crisp and a little crumbly with a distinct peanut butter flare. Sandwiched with the filling, we found them to be fairly sweet and rich made as is, but it wasn't so much that we couldn't have easily downed two or three in a short time, especially with a tall glass of cold milk on the side (and as much as we wanted to, we were good and stuck to one so Jeff had plenty to share tomorrow). Being just over 2 1/2" across, if you want to make them a more reasonable bite-sized treat, you could try reducing the amount of the dough per cookie to around a teaspoon or so and shave a couple minutes off the bake time. If you are a peanut fanatic and would like one more nutty imprint, chop up a handful of peanuts and roll the edge of cookies in them, letting the nuts attach to the filling.

Monday, March 29, 2010

Potato-Onion Frittata...

Rounds of baby potatoes, slices of sweet onion, a plethora of eggs and a few husky dollops of sour cream - sounds like an impeccable, all-in-one way to bring together a meal to me! At least that's what was running through my mind as I gathered the ingredients for this Potato-Onion Frittata!

The potatoes won't have nearly enough time to cook on their own - to get them ready, we cooked the small tots whole in plenty of salted water. The timing will depend on just how large the potatoes you use are - you want them to be tender, yet not so much that they would fall apart. When testing to see if they are ready, a sharp knife should barely give you any resistance. Since the potatoes need to be sliced, it is best to let them cool down first - not only will your fingers thank you, they are more apt to slice cleanly.

We left the skin on for the boost in nutrition, but you can certainly peel or rub them clean if you like. To take some of the bite out of the onion, the thin slices are softened in a liberal slick of extra-virgin olive oil. Three tablespoons may seem excessive for two small onions'? worth, but once they have done their business, all of those potatoes that had been thinly sliced are slid into the skillet and the oil gives them a chance to crisp and brown.

Generously seasoning the potatoes and onion with salt and fresh ground black pepper ready the skillet for the mass of beaten eggs and sharp white cheddar that were about to be poured in. I tend to mix whole eggs with egg whites to level the playing field, but I do prefer the texture where the ratio favors whole eggs. With two egg whites replacing one whole egg, we went with four extra whites and dropping the whole eggs to eight. You could probably narrow the whole egg amount to around 5 or so, but we've found the texture starts to suffer once you pass the half and half point.

As soon as the eggs were added, scant spoonfuls of sour cream were dropped all over the top and swirled in using the tip of a table knife. You could probably just whisk this right into the eggs, but what fun is that? This way you experience the tangy contrast more in the creamy puddles! With the amount of eggs, it wouldn't work so well to try and cook this through on a burner - as soon as the edge begins to set, the skillet is transferred to the oven to gently finish cooking the eggs through.

Served whole, inverted on a platter for the bonus visual bang of seeing the sliced potatoes and onions scattered around the top, let this rest for at least a few minutes to let the eggs relax before taking out wedges. I'm sure this would be a commanding dish for a hearty breakfast or brunch, but as we found out when we prepared this, the frittata also makes for a substantial meat-free dinner as well!


Saturday, March 27, 2010

Peanut Butter Carob Biscuits...

We were a little worried how Gus would handle all the traveling we have been doing lately, but he has been a real trooper. I had planned on making those Crunchy BBQ Biscuits that we've done several times, but I figured he deserved a special treat that we could take along for the recent (and again upcoming) Charlotte trip. With some scrounging around in the pantry to figure out what was on hand, we ended up with these Peanut Butter Carob Biscuits!

We have used carob before, like in those Banana-Carob "Pup"scotti (though that form was in solid chips) - this time, however, we used carob powder. Don't confuse that with cocoa powder, which is not safe for dogs - carob doesn't taste quite the same, but it doesn't have caffeine and has only traces of theobromine, making it safe for dogs. We picked up ours from the bulk bin of our local natural foods co-op, but if you don't have one of those or a health food store nearby, I have started to see it more often in larger grocery stores.

We used a variety of dry ingredients to form the base of these biscuits, including whole-wheat flour, carob powder (which can be fairly clumping - send it through a sifter to fix that), oat bran, old-fashioned rolled oats, rye flour, nonfat dry milk and a touch of baking powder for lift. To saturate the flour mixture and begin to form a dough, we whisked together a mixture of warm water, creamy peanut butter, canola oil and for a hint of sweetness, a drizzle of golden honey.

Using a sturdy wooden spoon to form a fairly stiff dough, you will notice that it'll still be a bit too shaggy and sticky to work with. To smooth out the roughness and get it ready to roll, a few push and pulls with your hands, adding enough extra whole-wheat flour to keep it from sticking, will finish bringing it together. With a short rest to the the dough relax, it was rolled out to a decent thickness and cut into a variety of shapes using a few favorite small cookie cutters. You won't need to by shy working with the dough as I found it to be pretty forgiving - re-roll it as necessary to cut out as many biscuits as you can.

The dough is on the darker side, making it difficult to know when exactly to take them out - look for them to brown a bit, puff up and if you gave them a press, they should be firm to the touch. They won't be crunchy just yet, but they do crisp up well as they cool. If your pup is a fan of very crunchy biscuits, turn the oven off, leave the door ajar and let them cool inside for a few hours or overnight.

Gus is usually pretty patient, but he plopped his butt right in front of the oven and didn't move until we pulled them pulled out... at which point he made his new home right underneath the table where they were cooling! He devoured the half of one I gave him, but I think someone may have sneaked him a couple extra (yes, you know who you are) as I saw some crumbs by his bed an hour later! We froze half for when we came back, but took the rest with us - Gus was even kind enough to share some with new friends he met at the dog-friendly hotel we stayed at!

Thursday, March 25, 2010

Dijon Croque Monsieur...

Every so often when we're not busy tryin' out new recipes, we fall back to the good old gold standards that you don't even need to think twice about, like your everyday grilled cheese. However, then there are times that a simple sandwich doesn't quite satisfy the urge, leaving you craving a dish that has a bit of potency and vigor.

This won't happen to us next time we're itchin' for a sandwich with some bite to it, now that we've found this fast-to-make Dijon Croque Monsieur! Think savory French toast, laced with a tangy spread, layered with paper thin slices of ham (Black Forest in this case) and topped off with aggressive Gruyère cheese - yeah, now that's what we're talking about!

Italian bread gave us a soft, yet sturdy base, with each slice being smeared with a light coating of a spread made from grainy Dijon and mayonnaise. Stacked with the ham and cheese between the slices, the assembled sandwiches then go for a dunk in a pool of beaten eggs and milk - be sure to use a dish that is just deep enough to contain the liquid with and splashes, but is wide and shallow enough that you won't have to fumble around getting both sides dipped.

A skillet would work well enough to cook them through, but since we wanted all of the sandwiches done at the same time, we used a large griddle, rubbed with a knob of butter. Not only does the butter allow the bread to release with ease when you flip each, but that touch of fat gives you crispness and an eye-candy golden tone this sandwich deserves. While Jeff and I both love the rich nuttiness Gruyère has to offer, if you want to temper that complexity, replace half (or even all for more mildness) with shredded Swiss cheese.

Since this came together so fast, I have a feeling the next time a (savory) snack attack happens, this may just end up first in line to throw together!

Recipes

Tuesday, March 23, 2010

Brown Sugar-Nut Bundt Cake...

I was going through all the kitchen supplies this past weekend trying to figure out what we could get packed now and what I should leave out. When I got to the baking pan area, I figured we could go without most of the cake pans and muffin tins... but then I came upon my favorite bundt cake pan! I looked back to the last time we used the pan and when I saw it was back in fall '09, I knew I had to use it at least once more before packing it away.

Since we are in town for another Wednesday Treat Day, it sounded like a good excuse to go hunting around to find a cake recipe to use - after setting out three to choose from, Jeff thought this Brown Sugar-Nut Bundt Cake would be the best of the bunch.

This cake bakes with a deep golden crust thanks to the generous amount of moist brown sugar used in the batter. Made in the traditional fashion of smashing together creamy butter and sugar until the duo has lightened in color and the texture is fluffy, three whole eggs are gradually worked in. Being added one at time helps prevent the batter from curdling - however, that's not the only reason for this process. The batter is also mixed for a solid minute after each, which adds a bit of air and lift to the base, making for a voluptuous batter.

Along with the classic fragrant notes of vanilla, because this is a "nut" cake, we did add a few drops of almond extract. Unlike vanilla, where a little extra is rarely a bad thing, almond extract is fairly pungent and can overwhelm quickly - we used just a quarter of a teaspoon here. To keep the smoothness of the batter going, we alternately added the dry ingredients with the tangy uttermilk - if you don't happen to use buttermilk often enough to buy a carton (the extra does last for quite a long time and it even freezes well), you could use an easy substitution of adding a tablespoon of lemon juice or vinegar to your measuring cup, then pouring in enough milk to reach the full cup needed. Just let the mixture sit for five to ten minutes to let the juice/vinegar do its magic.

Walnuts, hazelnuts or pecans would all do well inside this cake, but we went with almonds for one reason - I just bought a 5 pound bag (homemade almond butter is the best!). Well, that and I didn't have any of the others - walnuts don't last long here as we snack on them too quickly! The nuts are added twice - finely ground with the flour, then once again as the last addition, which I toasted first then chopped. Ground nuts can be fairly pricey, but I make them as needed for recipes with a food processor. Two hints to keep them from going from ground nuts to nut butter - freeze them first, then borrow a scoop or two of the sugar from the recipe and use the pulse butter. Freezing them just keeps them colder longer (as heat from the friction is what makes nut butter so easy to make), while the sugar absorbs any of their natural oils that start to come out.

As mentioned, all that brown sugar creates a wicked crust, but it also tends to make the top of the cake brown a bit too fast - if you notice this happening, tent it very loosely with a piece of foil to use as a shield. When it tests done, let the cake rest for only ten minutes, then turn it out onto a wire rack and remove the pan to let it cool completely. A bit more work than your average cake for sure, but believe in the fact that you'll be well rewarded in the end. Between the buttermilk and brown sugar, the crumb of this cake is soft, tender and quite moist, yet it doesn't feel heavy or wet on the tongue. I did start to wonder if the cake would sway too sweet for a morning snack (Jeff usually sets out treats right away in the morning) before I had a chance to try a piece, but I found with the double dose of nuts, the balance fell into harmony.

And for those thinking that everything comes out our kitchen perfect, believe me, it doesn't - see this?

Yeah, that was the first try. I wasn't paying attention and used regular cooking spray (without flour added) and was saddened as I pulled the cake pan away to reveal only half a cake. The rest felt almost cemented to the grooved bottom! I was about ready to call it a day, but since I had enough of everything to make it again, I did, though there may have been a few choice words along the way. Don't worry, the cake won't go to waste... I see a trifle or several parfaits in our future!

Sunday, March 21, 2010

Almond-Honey Power Bars

I mentioned that we made those Vintage Butterscotch Bars before the trip out east a few weeks ago, but that wasn't the only snack I made! I figured that since we were going to be gone for awhile I better make enough to last and would take kindly to hanging out in the freezer until we needed them. I made a couple different cookies that we've done before, but I also made sure to make one that was new to us - these Almond-Honey Power Bars.

Think granola bars, packed with all sorts of goodies that not only bring a jolt of complimenting flavors, but plenty of texture and chew. To exaggerate and heighten the natural essence of the bulk ingredients, the old-fashioned rolled oats, almonds, sunflower seeds and sesame seeds were first toasted in the oven until they were fragrant and golden. If you don't want to turn on the oven just for this, you can do this in a large skillet - just be sure to keep them moving in the pan and don't have the heat too high.

Puffed cereal, preferably whole-grain and unsweetened (I used Kashi 7-grain puff cereal) was then added to the mix once the nuts and seeds had cooled down, along with a bit of milled flaxseed and a variety of dried fruit. I went with currants, plump golden raisins and chopped dates, but use what you like - cherries, blueberries, pineapple, apple or apricots would fit in well.

To add sweetness and bind all those loose bits together, creamy natural almond butter, golden sticky honey, brown sugar, our favorite Vietnamese cinnamon and a touch of salt are all brought together in a saucepan, then heated to a low bubble to smooth them out. Taking the pan off the stove, a splash of fragrant vanilla was the last added ingredient to be stirred in. The directions stated to add the vanilla right away, but I don't agree with that - vanilla tends to dissipate and not have as much of an impact when added over a flame.

When you pour this syrupy concoction over the nut and oat mixture, you'll want to work quickly while it is still warm to make sure the pieces get as coated as possible - as it cools, it will begin to set and not mix as well. Scooped into a square pan, use your hands to firmly press the ingredients down to an even thickness - if you find it is a touch sticky, lightly coating your hands with cooking spray will help keep them clean. If the mixture is still too warm for your fingers (I think I have asbestos hands!), a silicone spatula might be the way to go.

I left the mass to cool at room temperature and it was solid enough to cut within an hour or so - if you can't wait, toss the pan in the fridge and it should be good to go in less than thirty minutes. The texture of these was just what we were hoping for - firm, definitely chewy (without sticking to your teeth) and there was plenty of crunch from the nuts and seeds. Between the dried fruits and sugars, the bars do lean on the sweeter side, even though I reduced the amount of brown sugar slightly, but we found that to be a benefit rather than a hindrance. If you like your granola-type bars with a hint of chocolate, melt a couple chunks of quality bittersweet chocolate and add a generous drizzle over the top before slicing the oat-y slab into individual bars.

Friday, March 19, 2010

Artichoke, Tomato and Spinach Pizza...

I very much missed our homemade Friday Pizza Nights! We didn't find any spectacular pizza this last trip in Charlotte, but we may have not searched around as much as we should have. We'll have to do better next time! Jumping right back into routine, for this week's pie, I tried out a recipe for this Artichoke, Tomato and Spinach Pizza.

Using the pound version of our go-to whole-wheat pizza dough (surprise!), once it had rested from being hammered in the food processor, we stretched the smooth dough into a rough rectangle rather than the traditional round. Instead of a tomato-y sauce, we smeared the rectangle with a light combination of extra-virgin olive oil, several cloves of minced garlic and a bit of fresh parsley. I know the amounts may look absurd to just put down over the dough, but we won't use all of it there - you'll see where the rest goes shortly!

Ragged strips of just-shredded mozzarella cheese get scattered over the slick now-garlicky dough, along with a couple tablespoons worth of Parmesan cheese. Quartered artichoke hearts (which were given the "evil eyebrow raise" by Jeff...), halved grape tomatoes and tender leaves of chopped baby spinach were then strewn over the top, but just before that, they were thrashed around the bowl holding the rest of the oil mixture. Be a little fussy here as you want the ingredients fairly evenly distributed - you don't want to get a square with all artichokes and none of the sweet tomato rounds or earthy spinach bites.

A bit more sharp Parmesan was scattered over, readying the pizza for the oven. Because we shaped this pizza into a large rectangle, and our pizza stone happens to be round, to try and get the same effect, when we turned the oven on to a fiery five hundred degrees, we set an inverted sturdy baking sheet on the wire rack. It won't be the end of the world if you don't do this, but it does help the bottom crust crisp.

While Jeff was a little uncertain about the artichokes (he convinced himself they would end up slimy or spongy - you know, his excuse for not enjoying mushrooms and whatnot), he surprised me with just how many pieces he ate! I think he enjoyed how they seemed to bring a meatier weight to the pizza - both of us found this medley addicting and had a hard time stopping when our bellies told us to! I didn't add any this time, but I may add a smattering of crushed red pepper flakes for a poignant kick when we make this again!

Tuesday, March 16, 2010

Pistachio Shortbread Wedges...

When Jeff accepted the new position, we were unsure what he was going to do for a workspace during the times we are back in Minneapolis. Thankfully, he was able to secure a spot in the same building very near where he used to sit before. Which meant, to me anyway, that I'd be able to continue our Wednesday Treat Day tradition when we are in town - at least, until things get crazy around here again!

Since this Wednesday is St. Patrick's Day, how could I make anything that didn't involve green in some form? I didn't even have to think about what to make as these Pistachio Shortbread Wedges that PJ posted recently fit the bill!

These tender cookies get their green color from not only the chopped pistachios scattered on top, but a secret ingredient - instant pistachio pudding mix! Mixed with creamy butter, a touch of sugar, salt and a dribble of vanilla, the pudding mix quickly stains the mixture a vibrant green without having to add any extra coloring. Bound with enough flour to form the dough, the mixture is pliable and soft, yet not so sticky that it clings to you while handling it, making for a dough that was a dream to work with.

Shortbread dough can be rolled out and cut into cookies if desired, but this version simplifies the whole process by splitting the dough in half and pressing each over the bottom of a couple cake pans to form tidy, contained rounds instead. The pudding mix adds a hint of pistachio flavor, but to reinforce that, finely chopped pistachios are then scattered over each piece of dough - to ensure the nuts adhere, be sure to lightly press them down into the dough. The best way to tell when the shortbreads are done is by watching the sides of the dough - when they start to pull away from the sides and the edges are richly golden, it's time to take them out.

Instead of waiting for them to cool down at all, immediately (but carefully, they are quite hot!) after you take them out of the oven, you'll want to turn them out of the pans and slice them into wedges. While still warm, the shortbread is soft enough that you will be able to slice the rounds into solid wedges. If you wait until they have cooled completely, they won't cut well and will tend to crumble.

We used 9" pans to bake this shortbread in, but if you only have the more common 8" size, go ahead and use those. Everything stays the same, but you may just need an extra minute or two to bake them through. With just enough sweetness, we didn't find these buttery wedges to be overly complex with pistachio flavor. That isn't necessarily a bad thing though as that melt-in-your-mouth texture was brilliant and the nuts on top did help a bit. I think we just expected a little more pistachio punch - you could add "pistachio flavoring" if you happen to have it, but I didn't and just went with vanilla.

Recipes

Monday, March 15, 2010

Chicken and Wild Rice Salad...

Just as I was talking about having plenty of wild rice in the pantry, after the Chicken and Wild Rice Salad with Almonds dish I made for dinner tonight, we don't have any more left! Ironic that I've had that bag for awhile and never made use of it, yet now I'm thinking it's on the list to pick up during our next trip to the market!

I know this dish may seem fairly similar to the one linked above, but when you get down to the nitty gritty, there are quite a few differences! This time, the dark grains of rice are cooked in a pot of boiling broth, along with a knob of butter to slip in a touch of richness. You may or may not have excess cooking liquid left behind - if you do, go ahead and drain it away before continuing on.

I had extra cooked chicken breast in the refrigerator from dinner last night that I cubed up to toss in - however, if you don't, pick up a rotisserie chicken from the market or either poach, grill or sauté about a pound's worth of meat to use. If you do opt for poaching, try using chicken broth, then use a portion of that as the cooking liquid for the rice. I do suggest going simple with the seasoning on the chicken, using just salt and fresh ground black pepper as the salad will have plenty of spark added later on.

Crisp sliced celery, glowing shreds of carrots, sweet cranberries and sliced toasted almonds are mixed with the rice and chicken to create the base of salad, along with minced red onion for a snappy bite. If you find raw red onion too harsh for comfort, try placing them in a fine mesh strainer and take them for a dunk in icy water for five minutes. I didn't find the need to do that this time, but Jeff prefers I do that when the amount is greater as it can sometimes be overwhelming for him.

What sets this apart from the last wild rice dish we made is the fact it is coated with a dressing made with a fun ingredient... fig vinegar! This unique vinegar is a little thicker, very smooth and has an almost raisin-y essence to it. It is also faintly sweet - while we thought this made the salad, if you couldn't locate it or don't need yet another vinegar in the pantry, try using a white balsamic or white wine vinegar instead. This salad would also benefit if you could make it ahead of time and let it stew in the refrigerator. If this is an option you'd like to try, wait on adding the almonds until just before serving - this way they will retain their delightful crunchy texture.

Thursday, March 11, 2010

Carrot Cake Pancakes...

We leave tomorrow for the 20+ hour drive back home to Minneapolis - woo! I think Gus will be the happiest... he isn't used to being cooped up in a small hotel room for this long. Gus isn't the biggest car-ride fan either, but he loves to bury himself in heaps of blankets and just hang out in his bed right behind us.

It will be nice to be "home", but I am certainly going to miss the warmth down here! While it did start as a cold, snowy mess when we initially arrived, it quickly warmed up to the 60's and 70's, with brilliant blue skies that stretched as far as the eye can see - we will both be missing that! It will probably take us a couple days to get settled in and get the house stocked back up... for the first time in a long time, I think the refrigerator will be quite bare! In the mean time, I have a snazzy pancake recipe to share!

We probably don't have breakfast-for-dinner nights nearly as often as I (or Jeff) would like, but since I also don't want to ruin the treat factor by doing them too often, I spread them out as long as I can stand it. Being that we were about to leave for Charlotte, I didn't know when the next time we'd be able to dish up homemade pancakes, which was enough cause for me to try out these Carrot Cake Pancakes recently!

For a solid starting point to the batter, we used a combination all-purpose flour, lighter whole-wheat pastry flour and crunchy toasted walnuts. Cinnamon is the first spice that comes to mind when I think of carrot cake, which is certainly included in these pancakes, but we've also tried other cakes that had an appealing complexity to them, thanks to a variety of spices used. If that draws you in, you'll find that same robustness here by also tossing freshly grated nutmeg, cloves and ginger right in with the dry ingredients.

You'll find the usual suspects to moisten the above mixture - tangy buttermilk, brown sugar, a couple eggs, a splash of your best vanilla and to round the ingredients out, just a bit of canola oil. These wouldn't be carrot cake pancakes without the carrots, but how you prepare them, in my opinion, will be the key to how these turn out. Since the batter takes just minutes to cook through, the carrot pieces cannot be very large or you'll be left with uninviting raw carrot bits. I tried using the shredding blade of the food processor to make short work of them, but after doing half a carrot, I thought the pieces were still a bit too bulky.

I almost reached for the box grater, which probably would have worked, but then remembered I had a microplane-like hand grater in the drawer. Using that gave us shreds that were fine, yet not wet or mushy - the one I have is a bit coarser than one you'd use to zest a lemon with. Once the carrots were folded in, the batter was fairly thick and gooey - when you start spooning the batter onto the buttered griddle, be sure to give the mounts a gentle nudge to help them spread out a bit. Because there was only two of us eating, we served our portions directly from the final batch out from the pan. However, if you need to keep them warm until you can get all of the batter used, set the pancakes on a wire rack as they come off and place them in the oven, heated as low as it can go until you are ready to eat.

You could go all out and take these over-the-top by whipping up a lightly sweetened cream cheese spread to smear over each golden flapjack, but because I didn't want to go too crazy for dinner, a dollop of honey butter worked out to be an enticing compromise! I knew these were a winner for us when Jeff said "I can't believe there are carrots in these! I mean, I can taste the sweetness of them in there, but if I was a kid who didn't like carrots, I would still love these!". We did have a few leftover, but those were quickly devoured the next morning - a quick stint in the toaster oven was just enough to warm them back up.

Monday, March 08, 2010

Vintage Butterscotch Bars...

When I asked Jeff if there was anything he would like made to take with for the long drive ahead of us, his first reply was peanut butter cookies. He quickly followed that up with "Wait, nevermind... how about some sort of bar cookie? Maybe brownies, or how about some sort of blondie - it's been awhile since we've had those!".

Ding ding ding! Sounded perfect to me! Nothing seemed to catch my eye though when I was going through saved recipes I have on the computer, but flipping through a favorite cookie book led me to these Vintage Butterscotch Bars that I kept going back to.

Besides reading incredible, with an ingredient list kept to a short ten items, there is very little effort required to prepare the batter. Out of habit, I like to whisk the dry ingredients all together in a separate bowl, which has the benefit of making sure the leavning and salt is evenly spread throughout. If you don't want the extra dish to wash, you could easily make these a one-bowl wonder by thoroughly stirring in the baking powder and salt just before you work in the flour.

Nuts are often an accompaniment in brownies/blondies, though I could go either way when it comes to nuts in baked goods (I wasn't a fan though growing up). Pecans, toasted first, would be a good choice to stir into the glistening batter, but walnuts won out this time as that was Jeff's request. He also suggested shreds of coconut, which was an intriguing recommendation, but sadly I didn't have any in the house and neither of us wanted to wait! You'll want to keep a keen eye on these as they bake - look for them to be done when the top looks set and the edges are just beginning to pull away from the sides of the pan. If you are a toothpick tester, you are not looking for the toothpick to come out clean - what you do want it moist crumbs clinging, but not any raw batter.

While these shiny bars are dense and quite moist like a decadent brownie, they also held together well (great for travel!) and were not too gooey to cut cleanly. With two cups of brown sugar, I was wondering if the sweetness would end up leaning towards the side of being cloying, but with Jeff's request of walnuts, their nuttiness cut through the sugar and kept them in check. They didn't rise as high as I thought they would - however, since we found them to be fairly rich, that made me appreciate their thinness more than I thought I would. You could always try a smaller pan, adding extra minutes to the bake time, for a thicker bar.

Thursday, March 04, 2010

Chili con Carne...

You know how well we keep our freezer(s) stocked and with this impending move coming up, I've been trying to be diligent on whittling down on all those ingredients. A week or so before we left for this two week stint in North Carolina, I pulled out a beefy chuck roast to make a smaller batch of Chili con Carne.

This is a take on traditional Texas chili, meaning it's all meat with no beans to get in the way. Don't get me wrong, I'm all for beans in chili and while I was tempted to add them here, we wanted to stay close to the recipe just to see how it does without them. Using that roast we thawed, we cut the hunk of meat into bite-sized cubes, dusted them with flour and showed plenty of love by searing the cubes off, browning all sides. Even if you think your pot is big enough to hold all the meat at once, I do suggest doing this in two batches, ensuring a good crust without steaming the cubes.

Into the intense browned bits left behind once the meat had been taken out, plenty of onion was added to sweat out, followed by a tiny hill of freshly minced garlic. When the pungent garlic had been tamed, the beef was added back (don't forget to scoop any accumulated juices in as well!), along with fire-roasted tomatoes, ancho chile powder, oregano and cumin. The original recipe called for fresh tomatoes, peeled, seeded and chopped - however, staying in tune with trying to cull the pantry, I used what we already had on hand. If fresh tomatoes appeal more to you, you'll need about 1 1/2 cups worth.

As the beef simmered for a good hour, we used that time to broil a handful of poblano chiles. When the skins on the chiles had blistered and blacked, the chiles were placed in a bowl, covered and left to steam from the residual heat. Not only does this make peeling the tougher skin away a breeze, but the roasted flesh left behind is more assertive and robust. Don't worry if all the blackened bits don't come off and whatever you do, don't rinse the roasted peppers - you'd be washing all that flavor right down the drain!

The poblanos, after being chopped, were stirred into the pot after the first hour, with a minced chipotle chile thrown in for a punch of smoky heat. If you're not a fan of much heat, try using half of the chipotle (seeded for even less heat) to start - you could always add extra later if you find it too mild. After one more long stint of simmering, we stirred in a handful of cilantro for a ray of brightness and scooped the thick mixture into bowls. For a snazzy finish, we sprinkled each bowl with a bit of sharp white cheddar and more cilantro. Thick, rich and packing a punch, I have to admit that I didn't miss the beans, especially with those remarkably tender chunks of beef!

If you don't like your chili on the extra-thick side, you may want to think about adding a cup or so of beef broth (or your favorite beer!) when you add the tomatoes. Because we would be leaving soon for Charlotte, I didn't need many servings so I cut down the original recipe by half. If you would like to serve a small army or have extra portions for the freezer, simply double the listed ingredients (making sure the pot will be big enough) and keep the cooking times the same.

Monday, March 01, 2010

Mao Pao Tofu...

Several states later with no internet access, and a four day layover in PA to work on estate dealings after Jeff's Mom's passing, we arrived in Charlotte late last night! We'll be in the area for roughly two weeks so Jeff can meet his new co-workers and we can get a feel for the area, then work our way back home for two or three weeks before we do it all over again. Hopefully with the recent price drop on our house (we're practically giving it away! Ok, maybe not, but it feels like it!), we can get our house sold quickly and we can get working on physically moving here before the June deadline!

I'm writing posts as I can, working from recipes we made just before we left. Let's jump right in and get to it!

After all these years, we've finally gotten to a point where while shopping at the market, I can set a package of tofu into the basket without much grumbling from Jeff! That's not to say he's jumping up and down in excitement, but he has become much more open to giving all sorts of different foods a pass. I needed that tofu to try out a lighter recipe for the Mao Pao Tofu dish we prepared for dinner a few days before we left for the trip.

Even though the original recipe didn't call for it, I took the extra time and step to wrap the tofu in several layers of paper towels and weigh it down with a couple heavy plates to draw out as much of the excess moisture as we reasonably could. Ten or fifteen minutes is usually enough, but if you have a good half hour, all the better! This firms the tofu cube and takes away some of that spongy texture Jeff doesn't care for - we've also found it helps the tofu brown a bit more easily in the pan.

When you drop the pressed tofu into the skillet (or wok, if you happen to be lucky enough to have one), leave it be for at least a couple minutes to get a crust started, then do the same when you stir them around, letting the other flat sides gain a golden tone for the best texture. Once that happens, a marinated mixture of ground pork, sherry and salty soy sauce was added and crumbled as it cooked along. What I did so the tofu wouldn't be smashed during this process was to push them all along the edge of the skillet, sliding the pork right into the bare center, rather than taking the cubes out of the pan.

For a fragrant punch to this dish, the pork was livened up with green onions, fresh ginger, chile paste and a plethora of minced fresh garlic. After a few seconds of contact with the heat, the zesty aroma of those ingredients hit my nose, letting me know it was time to add a bit more soy sauce, sherry and the broth called for, creating a saucy, moist glaze. Well, it'll be glaze-y once a touch of cornstarch is mixed in!

A mound of rice was the perfect fluffy bed to serve this over - use what you like, but we went with brown basmati, cooked using our favorite off-hands no-fuss method. This had a welcomed spice to it, yet it wasn't so dramatic that I had to grab a Kleenex to stop my sinuses from running - good, but Jeff would have liked more heat. He did clean his plate though, which means tofu got one more plus in his book! I did wish I had enough extra green onion to scatter on top - not only would it have been a hint of freshness, the pop of color would have been nice!