Tuesday, July 31, 2007

One sweet and one savory recipe to use up those bountiful fresh summer veggies...

We were the lucky recipients of a basket full of fresh zucchini from a friend this weekend - you know, put in a couple plants thinking it would be just enough for you and then they flourish and you can't give them away fast enough! I've already shredded some to freeze, but I thought we could work some into the Weekly Wednesday Treat Day this week.

While my first inkling was to make a quick bread, we decided to make them a little more individual and make a few cupcakes instead! These Zucchini Cupcakes with Cream Cheese Frosting had so much going for them when I glanced over the recipe that I knew this was the one recipe I had to try. There are a few steps that need to be done before the batter can be made - first, a generous amount of walnuts have to be chopped and toasted. As you wait for the nuts to finish, chewy golden raisins are heated with brandy to give them a chance to plump up.

Zucchini Cupcakes with Cream Cheese FrostingFor a sweet and slightly spicy bite, cinnamon and fresh ground pepper season the combination of all-purpose and whole wheat pastry flour. To ensure these are sweet and moist enough to be labeled a cupcake, rich dark brown sugar and pure maple syrup are whisked together with neutral canola oil, vanilla and a couple eggs to form the base of the liquid ingredients. To keep the zucchini from making the muffins gummy or too moist, the four cups of shredded vegetable are squeezed in a towel so it can release some of its excess liquid. The last ingredient to take these cupcakes up another level is the addition of sweet crystallized ginger. Once baked and fully cooled, a luscious combination of cream cheese, softened butter, powdery confectioners' sugar is whipped together with pure vanilla, a dash of cinnamon and just enough fresh grated orange zest to brighten the flavor and to create a light speckled frosting to slather over the tops. You could make 18 large cupcakes, but we opted to make 12 large and a mess of small mini ones so we had enough to go around (or if by chance the the zucchini scared them and they just wanted to try a bite!).

Zucchini Cupcakes with Cream Cheese FrostingAnd yes, those are Scooby Doo and Spongebob cupcake liners... I didn't realize that I had no plain ones in the cupboard! Jeff bought them awhile ago and was certainly excited to see them finally come out and play!

Fresh sweet corn is still in abundance out here, so we took full advantage of a few ears to make this Fresh Corn Tart with Chipotle Cream for our dinner tonight. There is an interesting component to this dish - it called for a meatless product called Soyrizo. It has a slightly spicy background, but is not "in your face" and more earthy than anything. While the flavor was in the realm of real chorizo, the texture was not - it never really got dry enough to crisp up and it never really crumbled. It did disperse just fine into the ingredients, but it was more pasty than crumbly - however, we thought that texture was actually desirable in this recipe as it helped to hold things together. The Soyrizo is sautéed with onions and poblano chilies, with a few cups of fresh corn kernels added at the end to warm through. The recipe calls for a 10" cast iron skillet to cook this mixture - ours was extremely full and difficult to stir once everything was in the pan , so you may want to opt for a slightly larger one to avoid any spillovers onto the stove.

Fresh Corn Tart with Chipotle CreamOnce the corn mixture is ready, a scant cup of dry polenta is cooked for a few minutes until it has a chance to thicken up. Just under half of the corn mixture is then combined with the creamy polenta to form a base "crust" for this savory tart in the same cast iron skillet you originally started out with. A layer of mozzarella cheese is scattered over the top, followed by the remaining corn mixture. Just a little more cheese on is placed on top and the skillet goes into the oven to finish cooking the polenta, allowing it to firm up enough to easily hold together and thoroughly heat the corn mixture back up. To serve, a slightly spicy, yet creamy and cool mixture of tangy sour cream, tart lime juice and smoky chipotle chile is combined and dolloped on each wedge. Jeff and I both thought that this was a fantastic way to showcase fresh local sweet corn in an unusual and very tasty manner.

Fresh Corn Tart with Chipotle CreamNow I just need to figure out what to do with the other half of that Soyrizo... I wonder if it would be good worked into a frittata or maybe just added to some scrambled eggs for breakfast!
Monday, July 30, 2007

Spicy shrimp dish in minutes...

Keeping with the theme of speedy cooking out of necessity like last night, I went with another stir-fry to get dinner on the table in a snap tonight. A little sweet and a touch sour, this Stir-Fried Shrimp with Spicy Orange Sauce quickly brought a smile to Jeff's face when he took his first bite.

To cook the shrimp for this dish, they are first given a shower in cornstarch - this gives the shrimp an ethereal coating keeping them light, yet helps to later thicken the fruity sauce. Fresh ginger and garlic are first added into the skillet with a bit of oil until their fragrant aroma exhales into the air - as that happens, the dusted shrimp can then be tossed in. The bright sauce mixture of sweet fresh orange juice, salty soy sauce, golden honey, rice wine vinegar and spicy sambal oelek is added with the shrimp as they cook, coating them in a shiny viscous glaze. Since the shrimp take just minutes to cook, this simple dish was ready from start to finish in less than 15 minutes! You could serve this over rice if you wanted, but we opted to go with a thicker udon noodle for more texture against the tender shrimp.

Stir-Fried Shrimp with Spicy Orange Sauce

Sunday, July 29, 2007

Quick pork stir-fry with a tropical flare...

Not much to recap this week, however the Maple Butterscotch Macadamia Nut Blondies and Swedish Gingersnaps both received high praise! I know that we certainly enjoyed our fair share of each!

I often look for stir-fry recipes when I don't have much time to prepare dinner - tonight happened to be one of those nights, so I threw together this Coconut Curried Pork, Snow Pea, and Mango Stir-Fry for us. The one thing you want to do with a stir-fry is have everything prepared and ready to go before cookin' - things tend to move very fast, especially with this lean pork tenderloin that was cut into small cubes. The pork is only seasoned with red curry powder before it hits the hot pan - I find the blend we use is not too spicy, but be sure to take that into account as you sprinkle it on to the meat; you can use less if needed. The spiced pork is added with some crisp snow peas and cooks in just about 3 minutes - cool coconut milk, salty fish sauce and red curry paste are then stirred in and the mixture sits until it simmers. For a fun tropical flare, fresh chunks of mango are placed in the skillet for just a minute to heat through. Served over fragrant brown jasmine rice, this quick, filling and delicious stir-fry is finished with snow-like flakes of shredded coconut to tie in with the coconut milk "sauce". If you wanted to bring out more of that flavor, try toasting the coconut before sprinkling it on each serving.


Coconut Curried Pork, Snow Pea, and Mango Stir-Fry Picture

Friday, July 27, 2007

Savory muffins filled with cheese and bacon!

We've made quite a lot of sweet muffins in the past, but we thought it would be nice to bake up a batch of savory ones as a side for dinner. Instead of making plain ol' cornbread muffins, we decided to spice things up with these Bacon-Cheddar Corn Muffins.

Because cornmeal can sometimes weigh muffins down, the recipe calls for a higher ratio of flour in the batter which allows them to have a lighter texture. We did replace a half cup of the all-purpose flour with whole wheat pastry flour, but you could go ahead and use entirely AP flour if you wish. For the best flavor to these well-crowned muffins, you will want to use a good-quality extrasharp cheddar - if you used a cheese that is fairly mild, I could easily see how the flavor would get lost here. The original recipe did call for only 4 strips of bacon, but we decided to add 6 to really pack in that salty/smoky flavor into the muffins. With only 2 tablespoons of melted butter in the batter, they were not too moist, but I wouldn't say that they were extra dry either. I think they would be great muffins to dip into a tomato soup or split and toasted with a smear of creamy butter.

Bacon-Cheddar Corn Muffins Picture
If you wanted to be a little naughty and add more flavor and moisture to the muffins, I would certainly think about adding a tablespoon or so of the bacon drippings when you add the melted butter. I am so writing this down on my notes so I can try that when I make these guys again!

Bacon-Cheddar Corn Muffins Picture

Thursday, July 26, 2007

Recipe to use up those extra tortillas you may have around!

When I was sifting through the freezer to figure out what we needed from the market, I came across a bag of corn tortillas that I had forgotten about. When I was menu planning for the week, I made sure to keep an eye out for any recipes that would have used a good amount of them. I came across a few that used maybe 4 or 6, but then I found a recipe that called for 12 - Chicken Chilaquiles!

I was excited to try this recipe as I wanted to see how it compared to the version I had out at Border Grill when we took a trip to Vegas this past April. One of the ingredients called for is a can of tomatillos - I actually had a fairly hard time finding these at one of our markets. I finally came across them at a local Latin market since we came up empty at the grocery stores. If you can find them, great... if you can't and would still like to make the recipe, I am sure you could use salsa verde instead - you will probably need roughly a cup and quarters worth.

This lighter take on chilaquiles has a filling made from a mixture of tender shredded chicken, green onions, zesty Monterey Jack cheese flecked with jalapeños, Parmesan cheese and chili powder for a bit of a smoky background. The sauce to coat the tortillas is a pureed mixture of tomatillos, milk, cilantro and mild green chiles. This dish is not very spicy - so if you want to punch up the heat a bit, you may want to add 1/4 to 1/2 teaspoon of ground red pepper to the sauce mixture. Once the layers are complete, a scattering of Monterey Jack is the finishing touch before the pan goes into the oven for a quick bake. I actually think that I like this version a bit better than the one we had in Vegas. This version seemed to be less "wet" and the flavor we thought was much cleaner and not as busy. If we made this again, I may think about adding a bit of cumin to the filling just to reinforce the smoky aspect coming from the chili powder.

Chicken Chilaquiles Picture

Wednesday, July 25, 2007

The aroma of fall swept through the house as we baked these Swedish Gingersnaps...

I mentioned yesterday that we made two items this week for the Weekly Wednesday Treat Day - the blondies we already talked about which means this post is dedicated to these crackly and spicy Swedish Gingersnaps.

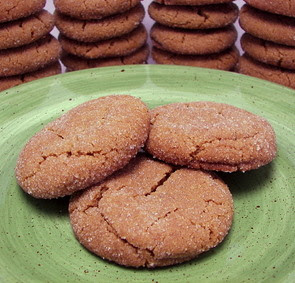
If you are looking for flavorful, sturdy and crisp (but not dry) cookie, then you owe it yourself to give these a chance. Ground ginger, cinnamon (I used the fierce Vietnamese cinnamon from Penzeys, cloves and a special "secret" addition of fresh ground pepper season the flour with such a sweet enticing fragrance. Augmenting the dough to a dark tan color with a snappy depth of flavor is a cup worth of thick molasses - this is added along with the granulated sugar when you are creaming the wet ingredients.

The non-sticky dough is then formed into large golf ball sized pieces and rolled in granulated sugar before baking to give the cookies sparkle and a bit of crunch to the outside. You may be tempted to flatten the dough balls, but resist that urge - they spread out just fine on their own and leaving them in this shape allows them to stay extra thick. Since the dough is already dark, baking until "golden" is not a good way to check for doneness. I found the texture to be best when the cookies have baked enough to form beautiful cracks and crevices, but not so long that those cracks look dry. You want them to glisten and look a little underdone still. After we finished trying a couple of cookies, we both quickly agreed that these just might take over one of the coveted spots in our Christmas gift baking bonanza we do each year!

Swedish Gingersnap Cookie Picture

Tuesday, July 24, 2007

The bar has been raised with these intense blondies... can any other recipe compete?

It is that time of the week again where we talk about the Weekly Wednesday Treat Day baking spree. I decided to make two baked goods this week and need to split them into two posts as I am already running out of time today!

Both treats were so good this week, but I think we'll start off by talking about these sweet Maple Butterscotch Macadamia Nut Blondies. We have had our fair share of brownies and blondies before, but I have to say these little gems knocked our socks off! This bar cookie is studded with chunky bits of buttery toasted macadamia nuts that are paired with a generous pile of creamy butterscotch chips. Lingering in the background is a mild glimmer of maple that really held its own against those already intense rich flavors. They are decidedly moist, soft and chewy - you will want to cut these thick blondies small as a little goes a long way here, but just use that as an excuse to have more than one piece!

Maple Butterscotch Macadamia Nut Blondies PicturePlease do yourself a favor and make these as as soon as you can - however, I would highly suggest you try them as written first before making any changes. The combination of toasted macadamia, butterscotch and maple extract turned into such a winning fusion of flavors that any other additions or changes may not hold up against such high standards! I am already planning on making another batch as soon as I can get my hands on some more macadamias and stashing these bars in the freezer for future snacks.

Recipes

Monday, July 23, 2007

Salads don't have to be wimpy...

We love salads, but sometimes you want something light, yet still hearty enough to fill up a hungry stomach. Sometimes just adding a few pieces of protein (whatever that may be...) will do, but this vivid Steak and Purple-Potato Salad turned into just the right combination of ingredients to satisfy our craving.

The first building block to develop the flavor in this salad is a zesty rub made from fresh lime juice, pungent chili powder, a bit of salt and a clove of mashed garlic. This is then spread over a big chunk of lean sirloin steak and allowed to chill while the rest of the salad is made. One ingredient that gives this salad a fun and creative look is small purple potatoes that are cooked whole and then quartered once they are cool enough to handle. I know that these can be somewhat hard to find and are usually fairly expensive... you could go ahead and use fingerling potatoes if they are easier to find or even some baby red taters would do just fine. As you wait for the potatoes to cook and cool, the steak is cooked to medium or medium-rare and thinly sliced once it has rested. Sharp sherry vinegar, oil and smoky cumin are combined to create the dressing that coats the tender potatoes and steak along with the flavor packed juices that escaped from the steak as it rested. Thinly sliced radishes are tossed in for a crisp peppery bite to the salad while some scallions and cilantro bring a fresh bright flavor. A succulent bed of baby salad greens is all that is needed to round out this dish - this recipe serves two, but could easily be doubled or tripled if needed for additional servings or if you simply wanted some delicious leftovers for lunch.

Steak and Purple Potato Salad Picture

Saturday, July 21, 2007

I think I live with a cookie monster...

Jeff had been asking for some cookies this past week, but I have been trying to limit the use of the oven since the temperatures were so warm outside. Since it has finally cooled down, I cracked open the King Arthur Flour Whole Grain Baking book as it has been a few weeks since we last used it. After looking through the cookie section, I choose these Crunchy Cinnamon-Oat Drops as the recipe didn't call for an overnight stint in the refrigerator as some of them do and I knew that Jeff really enjoys cinnamon chips.

These light and crisp cookies are a little unique - there is no flour in the recipe and the bulk of the dry ingredients are old-fashion rolled oats that have been ground in a food processor. While they are not quite thin enough to be considered a lace-type cookie, they are not very thick and spread out quite a bit as they bake. I did try refrigerating and freezing portions of the dough to see if that made a difference in the end result, but they all spread out to the same degree. Between the ground oats and a generous scoop of toasted walnuts, these cookies are true to their name - crunchy! Don't let that make you think they are hard like a biscotti though, there is a little bend to them in the middle. We liked the texture best when the outer ring of these nutty cookies were a rich golden brown, but the center was still fairly blonde. With smooth cinnamon chips and ground cinnamon in the dough, the cookies will certainly satisfy anyone who enjoys this captivating spice.

Crunchy Cinnamon-Oat Drops Cookie Picture

Friday, July 20, 2007

Quick Thai chicken dinner...

Our former house back in Phoenix had very high ceilings and tile floors throughout much of it, so even though it was 110+ in the summer outside, the inside was still relatively comfortable. Having the AC on helped of course, but we didn't have to use it 24/7. The kitchen was very open to the rest of the house and was also fairly large... this meant I could use the oven whenever I needed and the house did not heat up because of it.

Well, things are not quite the same in this house! With it being so warm and muggy outside lately, every time I use the oven here it tends to feel like the furnace is on instead of the AC inside. So I've not been doing as much baking as I want to, but a front came through last night and broke the sticky humidity and allowed the temperature to fall into a more comfortable range. While I didn't actually bake a new recipe today, I did get another batch of our favorite Peanut Butter Granola recipe made. I also have plans to get some cookies baked tomorrow!

While we were at the farmer's market the other day, I spotted a beautiful head of freshly picked Bibb lettuce and snatched it up without knowing what I was going to end up doing with it. Since the leaves were so crisp, yet tender, we thought we could use them as the vessel for tonight's dinner rather than just tossing them into a salad.

Thai Chicken Lettuce Cups PictureThe recipe we used with the lettuce, Thai Chicken Lettuce Cups, also called for an ample amount of ground chicken. I like to make my own in the food processor - this way I can control what goes in it, the final texture and it is way cheaper than buying it at the market. While I do use mostly breast meat, I like to throw in a bit of dark meat for a more juicy and flavorful end result. Once cooked, the chunky pieces of chicken are mixed with crisp water chestnuts, sweet red onions, green onions, fresh cilantro, lime juice, a dash of sugar and a few splashes of fish sauce. The lime in the dressing adds a brilliant tang to the mixture with the fish sauce coming back with a salty bite. The Bibb lettuce leaves are then used as little boats and stuffed with the chicken. Crunchy chopped peanuts are scattered on top of each serving with a bit of sliced serrano chilies for a spicy background. While they are fun to pick up and eat, they are also a little messy as they tend to drip a bit from excess dressing - if you wanted to keep clean, you could always just tear up the lettuce and layer the mixture in a bowl to serve.

Thai Chicken Lettuce Cups Picture

Thursday, July 19, 2007

Veggie-stuffed calzones with two cheeses...

After grilling a couple whole ears of that fantastic fresh corn for lunch, we still had a couple left over. I actually had some Corn and Broccoli Calzones on the menu for Friday this week, but I was planning on just using some kernels we had in the freezer. I bumped the recipe up a day so we could take full advantage of the corn's sweet flavor.

Corn and Broccoli Calzone PictureIf you are short on time, you could always buy a prepared pizza dough, but our favorite recipe for a Whole-Wheat Pizza Dough is so quick to throw together in a food processor and always turns out a great crust. The original calzone recipes says it makes 6 servings, but I divided the dough into 4 portions so they would be a little more substantial and filling. Once the dough has been rolled out into circles, one half of each piece is stuffed with a mixture of broccoli, corn kernels, mozzarella cheese, creamy ricotta, green onions and chopped fresh basil. The unfilled half is then folded over and the edges are sealed tightly together with a fork to ensure no leakage - however, each piece does get a few vents on top from a sharp knife so they do not blow up. For an extra golden and crisp crust, a light smear of oil is brushed over the calzones before they go into the fiery hot oven. Since there is no actual sauce inside of these veggie-stuffed calzones, you could always heat up your favorite marinara sauce for dipping, but we both agreed it didn't need anything else as we quickly cleaned our plates.

Corn and Broccoli Calzone Picture

Wednesday, July 18, 2007

Being flexable with dinner plans allowed for a satisfying reward...

On the way home from doing some errands yesterday afternoon, I drove past a local farm that had a couple kids sitting behind a small card table practically overflowing with ears of freshly picked white sweet corn. I quickly did a u-turn and got in line to grab a few ears for us - while I had another recipe planned for dinner last night, once I got my hands on the corn, I made a bee-line for my ever-growing recipe piles as I had just the recipe in mind.

The rest of the ingredients for this Fresh Corn Risotto used pantry staples for us, so I didn't even need to make a run to the market after changing plans. Simple fresh ingredients are the key that move this risotto into must make again category.

Fresh White Corn RisottoMade in typical risotto fashion, short-grain arborio rice is stirred and stirred with scoops of warm chicken stock to leach the rice's natural starchy quality out, resulting in an ultra-creamy dish. A little more than halfway through the cooking time, a couple ears worth of the fresh white corn kernels are stirred into the bubbling rice to gently cook until the rice achieves that toothsome al dente texture. A heaping mound of fresh grated Parmigiano-Reggiano cheese and a couple nobs of butter are the finishing touch, adding a mouthwatering salty richness along with pushing the creaminess of the dish one step further. Jeff, with a scowling look on his face, wanted to make sure I plugged his only comment - "Do not ever lose this recipe!".

Fresh White Corn Risotto

Tuesday, July 17, 2007

Have a special occasion coming up? Check out this fantastic bundt cake!

Okay... so next time I better be more specific when I talk about needing rain! Last night we had a wicked storm come through right as we sat down for dinner and when we went to take our first bite, the lights went out and stayed off until 4:30 this morning! We ended up with a few branches down, but nothing too serious - there was a reported tornado a couple counties away though! Our storm was more wind than rain, but at least the grass got wet!

I was a little worried that the power was not going to come back and we would have not been able to bake this Marble Bundt Cake for the weekly Wednesday Treat Day, but thankfully we were good to go!

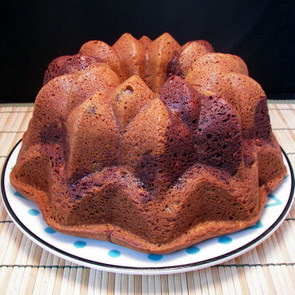
This fairly basic cake gets a couple upgrades to pack the most flavor - the first comes from using a few generous spoonfuls of sour cream to give the cake an extremely moist and tender crumb. To push the cake out of the plain category, a portion of the batter is mixed with melted bittersweet chocolate to turn it a contrasting dark brown color - it is then mixed with a handful of white chocolate chips. The off-white batter is given some color with chunks of bittersweet chocolate - the two batters are then alternately placed in the bundt pan to give a stunning marble effect once cut. This very tall cake gets a rich golden crust on the outside once is it unveiled from the baking pan.

Marble Chocolate Vanilla Bundt CakeIt has a very tantalizing chocolate and vanilla type flavor that is heightened by the studded spots of white and bittersweet pieces inside. I thought about taking it over the top with a glaze, but when I took a nibble from an inconspicuous spot, I decided it would probably be a bit too much and would mask the already delicious taste it had.

Marble Chocolate Vanilla Bundt CakeMaybe a simple dusting of confectioners' sugar would do if you felt it would be too naked to serve alone. Bundt cakes are usually a little stress-causing... you just never know if the cake will pop out in one piece like it is supposed to or if it sadly comes out in chunky pieces. Luckily I've only had that happen once ages ago, but I still worry when it is time to flip the cake out!

Marble Chocolate Vanilla Bundt CakeSince we actually had this Broccoli Mac and Cheese Gratin last night, we'll be a day or so behind on dinner recipes this week.

While your basic everyday mac and cheese can certainly be comforting and tasty, it can also become a little boring if you make it the same way every time. To add some zip to tonight's dinner, fresh green broccoli with shredded fontina and Asiago cheeses brought a breath of fresh air into this creamy baked pasta dish.

To simplify the whole process and make for less dishes, we only used one pot and one baking dish for the recipe. Once a healthy dose of shell-shaped pasta and broccoli are cooked, a touch of olive oil and garlic are quickly heated to take the raw edge off. Since this is actually used at the end, it is scooped out and set aside. Next, onions are cooked in a bit more oil in the same pan - a combination of milk and flour are then added and brought to a boil to thicken the mixture. The sauce is then seasoned with fresh black pepper, salt, a touch of ground red pepper and a dash of fresh grated nutmeg for that little something special in the background. To add to the luscious and creamy texture, shredded fontina and Asiago cheeses are finally stirred in to melt into the sauce. The broccoli and shells go for a dip in the cheese sauce and are then placed in a large baking dish. Adding a little pizazz to an ordinary breadcrumb topping, crunchy panko breadcrumbs are whizzed in a food processor with the garlic and oil first to evenly incorporate the mixture. It is then scattered over the pasta and the dish is baked until the sauce is bubbly and the panko turns a splendid golden brown. You can serve it as soon as it comes out, however if you leave it be for 10 minutes, it can easily be cut into neat rectangles to portion out.

Broccoli Mac and Cheese Gratin

Sunday, July 15, 2007

Hmm... what is that I spy out the window?

Just 8 new recipes for us this week - as I was looking through the posts, our favorites this round were the KC-Style Potato Salad, Vegan Blueberry Buckle and the Chicken and Bacon Roll-Ups.

I was standing at the sink the other day and look who happened to be outside sunning themselves on our patio off the deck?

I think he was after the bacon I just got done cooking for those wraps on Friday! Jeff tried to feed the bunny a carrot, but it ran away - apparently he is working on a plan to name him (or her...) and is currently trying to lure it back with my precious blueberries and lettuce. He was going to try to bribe it with grass, but ours is currently very brown and crunchy... we so need a few days worth of rain around here!

Since I'm always on the hunt for homemade snacks, I set aside a recipe for some Chewy Granola Squares and got around to making them this afternoon. Dense, extremely chewy and just sweet enough, this snack was a snap to throw together and used ingredients I always keep around in the pantry. Loaded with rolled oats, the squares are enhanced by the addition of sweet dried apricots, crunchy toasted almonds and studded with just enough mini chips to add a hint of chocolate throughout. Binding these together is a mixture of rich brown sugar, pure maple syrup, canola oil, egg whites and a generous scoop of homemade almond butter. If you don't already have almond butter on hand, you could probably use peanut butter instead - the almond adds a different nutty note than you may find in your average granola bar.

picture oat snack par You can kind of see a sparkle on top of the bars in the picture - before baking, a sprinkling of salt on top brings that salty/sweet element into play and worked to heighten the flavor of the bars. You can cut them into whatever shape you want, if you prefer a longer bar shape than a square, just do the majority of the cuts on the short side. I'm already planning the next batch - I'm thinking chopped white chocolate, cranberries and maybe pecans, walnuts or even some sunflower seeds!


Saturday, July 14, 2007

Blueberry season... one of my favorite times of the year!

The first thing that caught my eye this morning as we wandered into the local farmers market was a bounty of fresh beautiful blueberries. I told Jeff there was no way we were leaving without a basket or 5 of these plump dark cobalt spheres. Even though our freezer still has a good supply of wild blueberries, there is just nothing like that sweet burst of juice when you eat a fresh blueberry.

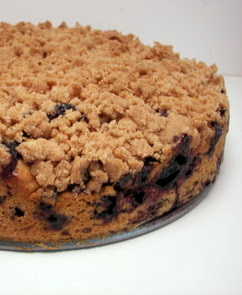
Fresh BlueberriesI knew I had better get working on at least one recipe today, otherwise my supply would be gone in a heartbeat as they are way too tempting to just snack on. I chose this Vegan Blueberry Buckle (buckle is just a fancy name for coffeecake) to make mainly because it used about double the amount of blueberries than other recipes I came across this morning. Besides getting a ton of nutrition from the berries, this buckle also incorporates whole grains into the dry ingredients. Today we used spelt flour, but you will notice that I've also given the option to use whole-wheat pastry flour instead - if you don't have either, you could go ahead and use all-purpose. Don't be scared to use either of the spelt or whole wheat pastry flours if you can find them though, they make for a wonderful tender cake without the weight of regular whole wheat flour.

Vegan Blueberry BuckleNot counting the crumbly streusel on top, the only sweetener called for in the cake is pure delicious maple syrup. With a generous four cups of fresh blueberries in the cake batter, each bite I took from my slice erupted with sweet blueberry flavor - Jeff got more impatient as he watched my eyes rolled back enjoying my piece. I gave in and finally cut him a slice... I think he finished his in record time! I did wait until he was done eating to tell him it was actually a vegan recipe and he was quite surprised! I do have to say that the cake was a tiny bit dense without any lift from eggs, but it was not that noticeable. I also kind of missed that buttery flavor in the golden cinnamon-scented crumbles on top - the fat used to make them is canola oil, but I wonder if you could get some of that flavor back by using a vegan stick-butter (I've used those from Earth Balance before and it worked well).

Vegan Blueberry Buckle Sliced Picture

Friday, July 13, 2007

BLT + Chicken and Flatbread...

Tonight's dinner would have been a perfect choice when it was so hot and steamy the other day - especially if you already had some cooked chicken on hand! The only real work with these Chicken and Bacon Roll-Ups was cooking the bacon... which I could do every day with as much as we like bacon!

What's encasing these roll-ups is a certain ingredient we have been seeing a lot lately, but have never used - it is a flatbread called Flatout. We found it in most of our local markets and it was always in the deli section, rather than the bread aisle. It has an oblong shape, rather than round like a tortilla, and is quite soft and pliable - they didn't need to be warmed up at all and rolled easily without any cracking. I was happy to come across a recipe calling for it as we kept saying we should buy it once to see if it would be something we would like or not - the flatbread also packs quite a bonus with 8 grams of fiber (this isn't an advertisement or anything, we were just surprised how much we liked it!).

Chicken Bacon Wrap or Roll UpThe glue to help hold the flatbread together is a lemony mayonnaise mixed with a touch of fresh tarragon for a slight anise flavor - a little goes a long way here, so I would be fairly careful when measuring this herb out. Crisp romaine lettuce and juicy sweet chopped tomatoes are scattered on top for the next layers. For a salty and smoky bite, we cooked a few slices of applewood smoked bacon until it was crisp so we could easily crumble them over the veggies. To complete the dish, a generous handful of tender shredded chicken is placed on top - the flatbread is then rolled up and sliced in half to serve. Since I made the entire recipe and it makes enough for four servings, I wrapped the other portion's ingredients individually in saran wrap to keep them separate. This way, I'll have a quick and delicious lunch all ready to go tomorrow - all we will have to do is assemble and dig in!

Chicken Bacon Wrap or Roll UpWe will also be left with 2 of the flatbreads since the bag has 6 in it - I'm thinkin' we will have to use up the last two pieces with something sweet - peanut butter, bananas and honey sound like a good start to us (who knows... maybe some of that bacon will somehow sneak its way in?!).

Thursday, July 12, 2007

Hey potato salad... meet barbeque and make some magic happen!

One of tonight's dishes, KC-Style Potato Salad, infused barbeque type flavors into a classic summertime side to take it to a new height.

There are a couple of things that you need to prepare before you start this recipe - a dry rub and barbecue sauce. The dry rub is pretty basic, but there are a couple of ingredients that make it stand out - celery salt and smoked paprika. Using a combo of smoked paprika and paprika adds such a depth to the sweet and rich rub that makes the smoked worth seeking out as it can be a little hard to find. If, however, you cannot find this version of paprika, you may want to replace some of it with cumin so you don't miss out on the smoky edge. The barbeque sauce is thick, tomato-y and pretty sweet for a sauce by itself, but the vinegar and savory spices help to keep it balanced. Both recipes will make more than you will end up using - you could halve the two recipes, but I wanted the extra to keep around and see what else we could use them with.

Now that those two are done, the potato salad can begin. You might be wondering where the rub comes in with the potatoes - rather than using plain water, the cooking water is seasoned with the rub so it can slowly penetrate the potatoes as they cook just like how you would season a crab boil. You want to simmer the potatoes just until they are tender enough to be easily pierced with a knife, but still retain some integrity - if they cook too much, they will just turn to mush when you toss them with the snazzy dressing. Adding some crunchy texture against the soft potatoes are crisp celery and finely chopped onion. I don't know if this type of salad is a standard in Kansas City, but I don't think I would have ever thought to mingle barbeque sauce and potato salad together.

We just had to make this dish as it sounded way too interesting to pass up. With its twangy flavor, this potato salad quickly shot up to the top of our favorite summer recipes so far - just different enough to bring excitement to our taste buds while still having a familiar comfort feeling to it. Another plus for this salad is that it needs resting time once it is completed - it tasted best at room temperature, so being able to make this ahead of time is a pleasant bonus. I'm sure this will be making more than a few appearances at picnics and parties in the future!

Barbeque Potato Salad

Wednesday, July 11, 2007

An underutilized grain...

I've had an unopened package of wild rice in the pantry for what seems like forever... I bought it for a specific recipe awhile ago and never ended up making it. I notice it every time I'm browsing the pantry to see what we need at the market, but I guess I just don't see it called for often enough or I forget to specifically look for a recipe that uses the dark grain. When I was menu planning this past weekend, I finally buckled down and found this Wild Rice and Summer Succotash Salad to make.

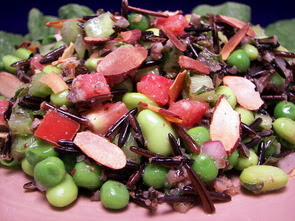
You could stretch this into 6 servings if you want to use it as a light side, but we portioned it out into 4 for a main dish. Since you need to wait around as the wild rice takes a good 40 to 45 minutes to cook, you are left with plenty of downtime to get the rest of the prep work for the dish done. A piquant combination of red wine vinegar, fresh parsley, Dijon mustard, fresh basil, green onions, fresh thyme, garlic and olive oil coats this salad with a fiercely tangy dressing. I changed a couple of the mix-ins around in the salad - it originally called for green beans and frozen lima beans, but I used fresh green peas and some edamame we already had in the freezer. The rest of the salad gets a bit of crunch from diced red bell peppers, celery and red onion with vibrant plum tomatoes lending a spark of color. Served on a bed of crisp romaine lettuce with a smattering of toasted almonds on top, the wild rice brings a delicious toothsome texture with a rich nutty flavor. This dish reminded me just how much I like this grain and I will have to keep my eye out for more ways to use the rest of my stash up.

Wild Rice Succotash Salad

Tuesday, July 10, 2007

Brownies worth turning the oven on for....

With a very hot and sticky day outside, I probably should have pushed baking for the weekly Wednesday Treat Day to the end of the week, but I forged ahead because I had a feeling this treat would be worth it.

We've done quite a few fancy or over-the-top brownies in the past, but this time I wanted to make a basic, but very decadent brownie. After I went through my stacks of untried recipes, I found one where I would be able to make a couple of changes to come up with what I was looking for. These Minty West Tenth Street Brownies have that classic shiny crust on top that shatters as you plunge your knife through the surface. Instead of just melting the butter, I took it a step further and left the pot on the burner until the butter had lightly browned and gave off an intense nutty aroma.

Not straying too far off for the rest of the recipe, the only other change that was made was to add Andes mint baking pieces instead of chocolate chips. When you go to add these, do make sure that the brownie batter has cooled to room temperature so the chips will have some staying power. However, I doubt it would ruin the recipe if they melted a bit into a warm batter.

Minty BrowniesAs hard as it might be to do with the dreamy chocolate scent wafting through the house, once these brownie have baked, you will want to let them cool and refrigerate them for at least 4 hours before serving. Because these brownies are of the fudgy variety, they need to be chilled to get clean cuts; this process also allows the flavor to enhance as they rest. While not being so fudgy that they ooze or you need a fork when they warm up, the squares are very moist and dense. The melted spots of Andes chips spotted throughout add a sweet pleasing mint flavor, but the pungent chocolate flavor you want in a brownie is still the star here. If you are of the club that believes a brownie is not a brownie without nuts, feel free to toss in some toasted chopped pecans or walnuts when you add in the chips.

Minty BrowniesThere was no way I was turning on the oven tonight, which I anticipated, so tonight's dinner was a snappy Cherry Tomato Spaghetti with Toasted Pine Nuts that could be quickly tossed together without preheating the oven. Because there are limited flavors happening, you will want to make sure that the ingredients are very fresh and at their prime. The mini bubble-like tomatoes are key here and the dish may become a little bland if they are not sweet enough. Tossed in a bit of olive oil, the red orbs are heated until their skins begin to wrinkle and then they are seasoned with thinly sliced garlic and a dash of garlic powder. To form the sauce, the skillet is then covered and left over low heat while you cook the nutty whole wheat pasta. By the time the pasta is al dente, the juicy gems have burst, releasing their sweet juices.

Along with the cooked pasta, fresh green basil, a bit more olive oil and buttery toasted pine nuts are tossed with the tomatoes in the skillet to finish off the dish. The original recipe has you add toasted breadcrumbs at the end, but we opted to add a sharp bite with some fresh grated Parmesan cheese instead. This beautiful pasta dish was just the right choice to bring a close to this steamy day as it was quite light, yet just filling enough to quell any rumbles coming from our stomachs.

Cherry Tomato Spaghetti

Monday, July 09, 2007

Taking the beef out of the burger...

Even though Jeff and I enjoy a good beefy burger or even one made from poultry (as long as it is seasoned well!), it is fun to branch out and try different recipes that pack a lot of flavor, but don't include any meat. In fact, made as is, these Hot Tamale Burgers could even be classified as vegan!

A savory mixture of onions, sweet red bell peppers, fresh yellow corn kernels, chipotle chilies and garlic are the substantial base flavors in these burgers. Instead of using an egg to help bind the veggie mixture together, masa harina that has been mixed with vegetable broth, is added and cooked along with the veggies until it has the consistency of a thick polenta. When the veggies are ready, the burgers are bulked up with nutty hot cooked brown rice - you will want to use the short-grain rice as it tends to be a bit stickier than the long grain. When you go to shape the patties, be sure to wet your hands - the mixture is quite sticky and doing this will make life a lot easier and less messy.

You can cook these outdoor on a grill, but we opted to use The Griddler to move things along a little faster. I found these to hold together much better than I thought they would - none of them fell apart at all when I moved them during the cooking process. Along with the cumin, the chipotles backed up the smokiness with a bit of heat, while fresh cilantro, lime juice and lime zest help bring a refreshing bright flavor. The recipe suggested serving these crispy-on-the-outside burgers on a warmed tortilla, which we did, but it felt awkward to try and eat them like this - we ended up just getting a fork and going that route in the end. When we have them for lunch tomorrow, I think I'll just toast up a couple English muffins to serve them on instead.


Sunday, July 08, 2007

The second treat for their trip... Crisp Oatmeal Cookies

With our visitors and getting back from the Minneapolis trip, we had a very slow week for new recipes - while we did make quite a few dishes, only 4 were new. I'll just pick one this week as our favorite and that would have to be the outstanding Lemon-Lime Meringue Ice Cream Pie in Toasted Pecan Crust.

As I mentioned yesterday, we made two cookies for Jen and Steve to take back with them: the second type were these Crisp Oatmeal Cookies. These golden rounds have a high ratio of rolled oats to flour, so they have a very homely appearance to them. Unlike the chocolate chip cookies from yesterday, the texture of these are definitely crisp, but not dry or rock hard - they also have a chewy bend to them. They seem to be very sturdy and would hold up well in a lunch box or even thrown into a pack to enjoy on a nature hike.

I used golden raisins since they are juicy and plump and added toasted pecans for a nutty crunch. The cookies have a lovely aroma and a spicy bite from cinnamon, ground cloves and fresh grated nutmeg. The batter calls for both vanilla and almond extract - I don't use almond too much as I find it often overpowering, but in these cookies it adds just enough unique flavor to have you guessing to find out what that secret ingredient is.

Saturday, July 07, 2007

The first cookie for their trip - Chewy Chocolate Chip

I asked Jen and Steve if they would like me to make them anything for their long driving trip back to MN... Steve voted for chocolate chip cookies while Jen wanted Oatmeal Raisin. She conceded to the chocolate chip cookies, but I decided to go ahead and make them a batch of each. I asked Steve if he had a preference to the texture of the cookies and he asked for a chewy kind.

I don't have enough time to talk about both cookies today, so we'll start with the chocolate chip and I'll post the oatmeal raisin tomorrow. Both of the recipes were "new" ones to us, so I was going on name alone that these Chewy Chocolate Chip Cookies would actually be chewy.

These cookies baked up soft and are chewy, but they are not cake-like nor do they have any crispness to them. Dark brown sugar and corn syrup add to their chewiness, and a bit of shortening cut with the butter ensures that they don't go too flat as they bake. I was going to use chunks of bittersweet chocolate, but Steve mentioned that he really likes peanut butter, so I went ahead and used some of those swirled chocolate and peanut butter chips instead. I only used about 2 cups as I actually like some cookie with my chocolate, but use the full amount if you like a lot of chips in your cookies. You may scoff at the addition of vinegar to the dough, but the flavor does not transfer into the cookies - it tones the sweetness down just a touch and helps react with the baking soda.

Recipes

Friday, July 06, 2007

More like banana bread than an oatmeal cookie...

Jen and Steve departed yesterday for their long drive back to Minnesota, so we are slowly getting back into our daily routine. I did, of course, make some treats for them to enjoy on their 17 hour trip, but I'll be posting about those tomorrow! Today should have been a busy day, but I felt more lazy than normal - I usually like to mow the lawn on Friday's, but it has just been so dry around here that the grass does not want to grow.

Since we really didn't plan ahead for dinner tonight as this week was so hectic, I asked Jeff what he would like - he wanted breakfast for dinner, so I browsed through my recipe stash and plucked out a pancake recipe. These Oatmeal Banana Bread Pancakes were based on a recipe from Rachael Ray, but after tasting them, we both thought a change to the recipe title was called for. With apologies to Ms. Ray, they did not really taste like "oatmeal cookie pancakes", however, they sure did come close to banana bread!

Some dry ingredients including old-fashioned rolled oats, flour and rich brown sugar are spiced up with our favorite Vietnamese Cassia Cinnamon from Penzeys Spices along with some toasted walnuts for crunch. Keeping these pancakes extremely tender is a few heaping spoonfuls of sour cream that is blended with milk, eggs, vanilla and mashed bananas to moisten the dry ingredients. For a touch of extra sweetness and texture, plump golden raisins are stirred into the batter before cooking these golden rounds. I don't think I would classify these as "light and airy", but they are not heavy either - they have a hearty chew to them while still having a bit of lift. Feel free to douse these in sticky maple syrup, but we choose to lightly dust them with snowy confectioners' sugar to let the pure banana flavor shine through.


Thursday, July 05, 2007

Wow... two years already! I think that calls for a pie!

My how time flies around here! Can you believe it has already been 2 years since we started this little blog? I certainly cannot! Our tastes have grown so wildly and we have come such a far way from our old "routine" - though, we still have our chicken salads every Saturday night and Jeff occasionally gets his Mickey eggs just as he likes! Yes, these pictures below are some of the very first pictures we posted on the blog... I hope we have gotten a little better since then!

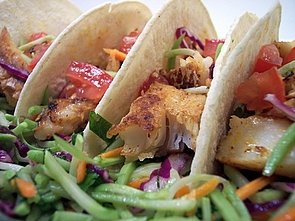
While we originally started this site to prove that we actually eat more than chicken fingers and fries now (some people wouldn't believe us!), this site has turned into so much more from the comments and new friends we've met or made through e-mails - we even had one of our photographs published! That was the picture of the Fish Tacos with Broccoli Slaw from June of last year.

We have now added just about 1100 recipes to the site and we have made each and every single one - crazy! I didn't really have anything planned as this anniversary crept up so fast, but I did make this Lemon-Lime Meringue Ice Cream Pie in Toasted Pecan Crust (say that 5 times fast!) as a treat for us to enjoy while Steve and Jen drove out for their visit.

While this pie took forever to make, it was fun to put together. There is just a lot of down time between making the curd, waiting for the layers to firm up before the next goes on and then waiting for it to finish freezing before making the meringue. The base crust of this pie is simply raw chopped pecans, sugar and melted butter to bind it together - the crust is baked until the nuts gently toast and fuse the combination together. As it bakes, it will most likely slide down the sides of the pie dish - this is okay, just use a spoon and press it back into shape as soon as it comes out of the oven. It is most pliable then because it gets quite crisp as it cools.

Covering the crust is a layer of creamy vanilla bean ice cream - topping that is a luscious and tangy lemon-lime curd. The original recipe did call for just a lemon curd, but we wanted to give the flavor a little boost. Because the curd needs a good 4 hours or so to chill down and firm up, it is best to start this recipe by making that first. Once these two layers are fairly frozen, another layer of vanilla bean ice cream is spread on top and then the pie goes back into the freezer for its final trip. A generous mile-high pile of slightly-sweetened fluffy white meringue is quickly whipped up and then swirled over the frozen pie. When you are adding the meringue, be sure that it goes all over the top of the pie, touching the crust, so that it seals the cold ice cream in. Since I don't have a kitchen torch, we just put the pie into a very hot oven for only 2 minutes to turn that bright meringue into a golden crisp treasure. The rich ice cream helped to keep the tart curd in check, while the pecan crust gave a devilish contrasting crunch to the soft and light-as-air topping. Excuse me please while I go snag my second piece... that is, if there is any left!


Wednesday, July 04, 2007

Playing the tour guide...

Happy Fourth of July!
Be safe if you are out and about tonight!

We took Jen and Steve into downtown DC yesterday so they could see some of the sites. We decide to go before the 4th so we would hopefully miss most of the crowds - it seemed to work well as it was not too busy! They were preparing for quite the crowds that should be there today, so I can only imagine how hectic that area will be throughout the day.

Since we had been there before, we didn't take too many pictures - here are a couple that we did take though.

While we were getting groceries at the market the other day, they had a killer deal on fresh cherries (just over $1/pound!), so after we got back from DC, I thought we could cool down with a glass of this Fresh Cherry Smoothie. All this refreshing drink calls for is fresh ruby cherries, ice, vanilla yogurt and a bit of orange blossom honey to bump up the sweetness a touch. You could of course use plain yogurt, but the touch of vanilla was a nice match to the robust cherry flavor. To me, this smoothie was a bit thin, so I might think about popping the cherries (!... umm... no comments please - let's keep this PG!) in the freezer for a couple hours before I make our next batch.

This morning for breakfast, I made them a batch of the Peanut Butter-Chocolate Chips Waffles that we made a few months ago. Peanut butter and chocolate chips? This definitely got two sticky thumbs up from the guests!

I forgot to mention on Monday's post that we threw together that quick and easy Sesame Noodles with Chicken for lunch. It was a flavor combination they have not had before and they cleaned their plates! Score!