Friday, February 09, 2007

Toasting - a step worth an extra few minutes...

Sometimes it is the little things that can really enhance the end results in a recipe. In tonight's dinner, Warm Quinoa Salad with Edamame and Tarragon, we utilized toasting a couple ingredients in a dry skillet to reach a depth of flavor you would not achieve if you skipped this easy step. We started out by first toasting the quinoa until it took on a golden tinge and began to crackle. In the same dry skillet, we then toasted some chopped walnuts until they released an intense nutty aroma that filled the kitchen. Before we dropped the quinoa into the broth to cook, I made sure to rinse it very well - you want to remove any residue that coats the grain as it will leave a bitter taste if left on. When the quinoa was about half done, we added in thawed shelled edamame (green soybeans) - when you drop them in, don't stir the two together. You don't want to disturb the quinoa, so just lay them in on top and quickly re-cover the saucepan.

As they finish cooking, a stimulating dressing made from fresh lemon juice and zest, extra-virgin olive oil and fresh tarragon is whisked together. The cooked quinoa and edamame, with a handful of chopped roasted red bell peppers are tossed into the mixture and coated with the pungent, yet not overpowering, anise-flavored dressing. The crunchy toasted walnuts are a fitting finish to match the natural nutty flavor (brought to the front by toasting) in the quinoa. Quick, colorful and full of texture, this would be a fantastic easy way to introduce this protein-packed grain (however, it is technically a seed) into your diet.


Thursday, February 08, 2007

Dipping into the cranberry supply...

I tend to go a little overboard when fresh cranberries come out and buy more than a couple "extra" bags to keep in the freezer. I have quite a few recipes that call for fresh and it is hard to fit them all in before the quick season for them is up. Now I am able to space the recipes out and we can enjoy the fresh cranberry experience all year around.

Today's recipe, Cranberry-Apple Coffee Cake, didn't even make a dent in the supply, but still uses a good amount of the tart fruit. A topping made from brown sugar, cornstarch, cinnamon, chopped cranberries, chopped Granny Smith apples and apple cider are brought to a boil and cook for just a couple minutes until the mixture thickens and the berries soften. While this cools, a light lemon-scented batter is combined and placed in a round spring-form pan for easy removal. The fruit topping is dropped on top and gently spread over the batter - be careful to not stir this into the batter, you want it to just rest on top. This moist topping is going to make it a little tough to test the cake doneness - it will be puffed up in spots, so just do your best to find an opening to stick the toothpick in to check or at least make sure that the edges are starting to come away from the sides. For a little sparkle and crunch to the jewel-toned top, a sprinkling of vanilla sugar in scattered on top as soon as the warm cake is taken out from the oven. The tender moist cake is mildly sweet, so it would be an excellent mid-day snack - I will have to remember and make it again near the end of the year as it would definitely fit in for a fall-time party.

I mentioned that we need to have breakfast for dinner more often, so on tap for tonight was Banana-Cornmeal Crunch Pancakes. These whole-grain pancakes are about midway on the scale between light and heavy - they are thick and hold up on their own, but have a delicate puffy quality to them. The textural crunch of these pancakes comes in two parts - first from using whole yellow cornmeal with the second part coming from toasted chopped almonds. I used very ripe (read almost black) bananas for this - when you mash them, try not to get them completely smooth as a little chunky texture is desired.

As the bananas brought their own unique sweetness, a couple tablespoons of brown rice syrup was just enough to finish the job. I know this is an expensive product, so you could use honey instead or if you are feeling a little more indulgent you could substitute some Lyle's Golden Syrup for a delicious burnt sugar background. Instead of milk or buttermilk to thin the batter, yogurt is used which adds a little tang to the pancakes. You could use plain yogurt, but we went the vanilla route to give a little more character to these sweet soft rounds.


Wednesday, February 07, 2007

Nutty for noodles...

We woke up to the most beautiful snowfall we have seen in some time. It was not the usual dense and heavy mess - it was light as a feather and could be easily disturbed by just breathing in its direction. The best part? No shovel needed for clean up - just use the leaf blower!

With only the time it takes to cook up some pasta, tonight's dinner, Sesame Noodles with Napa Cabbage, is a pretty versatile recipe and I think it would be just as good cold as it was hot. It was a little unusual for us at first because we don't often have cabbage, especially with noodles, and we were not exactly sure what the texture was going to be like. Though, once we took a couple bites, we quickly became members of the clean plate club! As the pasta boils away, creamy natural peanut butter, toasted sesame oil, soy sauce, mirin, rice vinegar, a dash of sugar and just a few crushed red pepper flakes are heated in a small saucepan to quickly combine them and warm the dressing. Mirin is a sweet rice wine; if you don't have access to this, feel free to substitute the same amount called for with sherry (if you use dry sherry, add a pinch of sugar).

When the pasta is ready, it is drained over the firm shredded napa cabbage to soften it slightly, but still let it retain some bite to it. The nutty dressing has just enough peanut butter flavor so you know exactly what you're eating, but does not overwhelm the savory sesame oil and saltiness of the soy sauce. The vinegar and sweet rice wine do a superb job keeping the balance of sweetness in check while the crushed red pepper gently nudges the back of your throat with an inkling of heat.


Tuesday, February 06, 2007

Crumble bars and learning to like phyllo dough...

You know by now that Tuesdays are the day we reserve to bake treats so Jeff can bring in to share (he would say force...) with his coworkers for the weekly Wednesday Treat Day. Today's baking produced these wicked Chocolate Drizzled Cherry Bars.

With just a few simple ingredients, these bars couldn't be easier to make, but taste like they took all day to create. Whole wheat pastry flour, all-purpose flour, rolled oats and quite a few tablespoons of softened butter are combined to create a mixture that forms the crisp base and is also used to form a crumble on top.

Between the two is a rosie red-colored layer of cherry filling that has been invigorated with almond extract - this adds just a different twist and will have people asking what makes these so good! Now, the buttery bars are delicious as is... but they scream for something else - what else could possibly make them better? When I think of cherries, I can't help but think of chocolate - a final drizzle of melted bittersweet chocolate over the top adds a special touch to transcend these bars over the edge. I was very pleased to see they also cut into exceptionally clean triangles!

I've never been real comfortable working with phyllo dough - it really is not that big of deal, but stresses me out for some reason! So when we made tonight's dinner of a Spanakopita Strudel, I didn't feel as comfortable as I normally do in the kitchen. When you are working with the paper-thin phyllo dough, make sure that it has a chance to thaw overnight in the refrigerator (at least 12 hours). If you try to thaw it at room temperature, it may get gummy and you would end up wasting pieces. You also don't want to open the package or remove it from the refrigerator until you have all ingredients prepared and ready to assemble. The filling for this strudel begins by softening thin sliced leeks, chopped onions and garlic. A dash of fresh grated nutmeg is mixed in, followed by chopped spinach. Once cooked, a splash of lemon juice is added to brighten the flavors and then this mixture is left to cool.

As you wait, a couple eggs, crumbled feta and Romano cheese are mixed together - when cooled down, the spinach is then added in. Now that the filling is prepared, the phyllo sheets are stacked together, filled and rolled up into a log instead of making triangles or formed into in a pie shape. Right before baking, you need to cut slashes on the top of the logs - this lets them expand without exploding and making cutting after they are baked much easier. We loved how crisp the phyllo gets while staying somewhat bland - this way the flavors from the salty feta and spinach filling can play the star role while being supported by the flaky crust. Jeff commented that this would be a fantastic appetizer and said he can't wait to toast up some leftovers for lunch tomorrow.


Monday, February 05, 2007

Trying to keep warm with a bowl of soup...

We certainly woke up to a very cold start this morning - it was 2 degrees when we let the dogs out and that is not counting the nasty wind chill! I don't think the high got much past 17 today... hmm I think Phoenix is looking pretty good again right about now!

What could be a better way to warm up than a big bowl of soup filled with fresh vegetables and meatballs? Although this recipe for Turkey Albondigas Soup does not call for it, I went ahead and roasted the poblano peppers under the broiler to bring out that sweet smoky flavor - you could skip this, but the intensity they bring roasted is worth the extra few minutes. Poblanos can also range in degree of heat - while roasting can mellow that somewhat, you could use just one or two if you know you don't enjoy a spicy flavor. The meatballs are made from ground turkey, panko breadcrumbs, an egg, cumin and oregano. When you add the oregano, be sure to crush the dried leaves between your fingers - it is something I've always done and seems to perk them back up. These meatballs do need to be done ahead of time (at least 20 minutes) as they need to chill so they will keep their shape when you add them into the soup.

The base of the soup is made by softening onions and carrots, then adding the roasted poblanos and some chopped plum tomatoes. Chicken broth is added and the mixture simmers for a few minutes so the flavors can meld together - the meatballs are then dropped in, followed by some cooked brown basmati rice a few minutes later. To pop the flavors in the soup, we stirred in a couple tablespoons of fresh lime juice right before serving. We topped each bowl with chopped fresh cilantro and few pieces of minced jalapeƱo for an additional burst of heat.


Sunday, February 04, 2007

Week in review with a cinnaburst bar...

We made 13 new recipes this week! Going through the recipes, I think our favorites for this week were the Chocolate Salami, Honey-Chipotle Barbecue Chicken Sandwiches, and the Cornmeal-Maple Biscuits.

Today's goodie, Buttermilk Cinnamon Bars, is like a cross between a chewy bar and a dense moist cake. These bars are brought together a little different than most recipes - but this method makes them a breeze to throw together. There's no creaming the butter and sugar or keeping ingredients separate - everything besides a couple items are all added into the mixing bowl at the beginning. It may seem to go against typically recipes, however I found the results spoke for itself. I was worried that all the mixing would make the bars tough as even the flour is added in the beginning - but from what I gather, the softened butter coats the grains of flour which will slow down the development of gluten. Once the batter is ready, we folded in shredded coconut and cinnamon chips for an extra burst of flavor. After the bars have baked and cooled, we made a quick basic vanilla buttercream from softened butter, a dash of vanilla, confectioners' sugar and thinned out the mixture just a bit of milk to slather the tops with a sweet creamy frosting. If you wanted to accentuate the coconut inside, you could garnish the top with some toasted coconut - we decided to leave it as is so the cinnamon would shine through.


Saturday, February 03, 2007

A craving satisfied...

Yesterday when I was going through the King Arthur Flour Whole Grain Baking book to pick out a biscuit recipe, I came across a cookie recipe that sounded too good to pass on. I was thinking of making them later in the week, but Jeff said he wanted some cookies for a snack today... how could I say no?

This recipe, Cranberry-Apricot Chocolate Chews, is like a basic chocolate chip cookie bulging with a few fun additions to transform them into a tangy and quite chewy treat. As you glance through the ingredient list, there may be one that sticks out - what's the orange juice doing in there... right? Some people can detect a bitter taste when using all whole-wheat flours in baked goods, so a small amount of orange juice works to mask that tannic flavor without giving the item any orange flavor. The mix-ins for this cookie are bittersweet chocolate chunks, dried cranberries, dried apricots (tangy!) and chopped cashews. Feel free to use whatever combination of nuts and dried fruit that float your boat, but just make sure to use the same measurements. While the cranberries and apricots certainly add to the chewy texture, the brown sugar in the dough also gives the cookie itself a nice chew.

I loved the saltiness the cashews added, but that flavor may not be for everyone - pecans, walnuts or almonds would be excellent substitutions. Jeff was happily surprised when I told him that they are whole grain - he could not taste the difference and decided it meant he could justify a couple more cookies! I will typically refrigerate all-butter cookie dough whether the recipe calls for it or not to help with spreading issues, but I noticed I had to flatten the cold dough a bit to get the cookies to spread out a little more. You could probably skip that step in my instructions and bake right after mixing, if desired.


Friday, February 02, 2007

Wrapped in a big blanket of carbs...

We had a pasta dish on the menu for this evening and I was going back and forth trying to think about what would be a good, but quick, side to have with it. When we bought the new King Arthur Flour Whole Grain Baking book, I stocked up on all sorts of different flours and ingredients so they would be on hand when a recipe came up that looked good. I flipped through the recipes for biscuits and noticed one that I could throw together in just minutes and bake. This recipe, Cornmeal-Maple Biscuits, uses whole yellow cornmeal and white whole wheat flour to make them whole grain. Only 7 ingredients are needed and the only liquids called for are milk and sweet pure maple syrup. Rather than rolling this dough out, it is simply dropped on a baking sheet which makes it a snap to get in the oven. Since I used a tablespoon to drop the biscuits, I did flatten them a little bit to spread out the dough. The small dollops puff into buttery biscuits with a slight crunch to them that are reminiscent of cornbread, except a bit lighter with an inviting hint of maple.

The pasta dish that I spoke about above, Pasta with Prosciutto and Peas, is a recipe I've had laying around waiting for me to have some extra prosciutto to use up. I never end up with much extra (too many ways to use it and snack on!) so we decided to get some to make this dish... and of course, it gave me the excuse to buy some extra to use later! I chopped the prosciutto and added the chunks to a hot skillet to crisp them up. In the same pan, I added some extra-virgin olive oil and then quickly cooked very thin slices of fresh garlic just until they started to turn golden - this also gave me a chance to pick up any delicious bits of prosciutto left on the bottom of the skillet. When I removed the pan from the heat, I let the oil sit for a few minutes while I was working on the above biscuits so the garlic would have a chance to infuse some additional flavor to the oil. I mixed the garlic and oil combination with the crisped prosciutto, fresh parsley, lemon juice, salt, pepper and bright tender green peas. I tossed in some hot whole wheat fusilli pasta and dinner was ready to be devoured. Before serving, I used a vegetable peeler and got some shavings of Asiago cheese off a brick we had in the refrigerator to add on each plate - besides adding eye candy, it lent a delightful nuttiness that married well with the salty tinge in the prosciutto.


Thursday, February 01, 2007

Flurry of activity in the kitchen...

We'll start off tonight's post a bit in reverse and talk about dessert first. Our freezer is usually well stocked, but it has been lacking lately and nothing grabbed my interest when I checked inside. So I peaked through my recipe stacks and picked out one that would be quick and different enough from a cookie, cake or other baked goods we already had in the freezer.

I picked this recipe for Maple-Walnut Polenta Pudding as it uses up a bunch of pantry staples that we always have on hand. I was a bit skeptical though as when I think of polenta, the first thing that comes to mind is not something in the sweet realm. The recipe uses instant polenta which takes just a couple minutes to cook - so at least we would know quick enough if it was going to work for us. The polenta is whisked into vanilla soymilk with a touch of cinnamon and salt. Once it comes to a boil, dried cranberries are mixed in and the mixture slowly bubbles away and thickens up. Pure maple syrup is then stirred in to fully lure the polenta to the sweet side. To serve, we scattered crunchy toasted walnuts on top and added a dusting of cinnamon. We also warmed up just a little more maple syrup and let it sit for a minute to cool back down; this thickens the syrup just enough so we could drizzle on top. Creamy, thick and very satisfying, this unusual concoction was pleasantly surprising and can be whipped up in a snap to itch that sweet scratch.

I'm not sure if the freezing temperatures out West are causing a shortage or what, but I had a hard time locating fresh broccoli for tonight's side dish of Pan-Roasted Broccoli with Spicy Southeast Asian Flavors. First up to make is a thick spicy sauce made from peanut butter, hoisin sauce, fresh lime juice, garlic, brown sugar and sriracha. When the sauce is done, a large skillet with canola oil is heated until quite hot - then chunky broccoli floret pieces are added and left alone until the bottoms begin to caramelize. Just a couple tablespoons of water with seasonings are added and the skillet is covered to allow the broccoli to steam just until crisp-tender. Fresh basil is added for a quick punch of flavor, followed by the sauce which gives the broccoli a zesty coating that has a bit of a tang to it. To add a bit of crunch and tie the flavors together, chopped roasted peanuts are scattered over the top. Be sure to have everything ready to go when you start this recipe; this dish progresses quickly and you don't want to overcook your veggie!

Most of the work for tonight's main dish of Black Bean and Corn Stew is just opening up a few cans of pantry goods! All you need to do is chop an onion, mince some garlic and stir the pot once in awhile... not too shabby for a weeknight eh? This is a chunky and hearty veggie stew filled with black beans, fire-roasted diced tomatoes, corn and some green chiles that add a depth of flavor, rather than heat. Cumin is added with the garlic which allows it to gently toast and unearth its smoky taste - it also pairs well with the black beans and backed up the flavor of the chiles. After the stew has simmered a bit, just a couple cups are taken out to be pureed - this will naturally thicken the mixture and allow it to still have some texture and integrity. If you don't feel like dirtying up more dishes, you could probably just use an immersion blender and be careful to not over-process. When I tasted to check for seasonings, it was very good - however, it felt like it needed something else... I looked around and remembered I still had some pepitas in the freezer. I toasted them up and gave each bowl a small handful - it brought an enticing nutty flavor and made for a snazzy finish.


Wednesday, January 31, 2007

Testing out summer recipes...

During the summer, we try to make time to go out and have a picnic in the park or in some outdoor area to enjoy the weather. Now that it is cold, we don't get a chance to do that - so for dinner tonight, we tried out a couple recipes for the next warm season and had a little picnic inside!

For the side tonight, I made a recipe for Bulldog Salad - basically a lighter version of a Waldorf Salad. There are a couple things in this recipe that make it more colorful and have a bit of a different taste to change up the flavors. Sweet pieces of Fuji and tart chunks of Granny Smith apples are mixed with green and red grapes, celery, golden raisins and toasted pecans. For a fun and squishy addition, miniature marshmallows are tossed into the mixture. Coating the fruit and veggies is a tangy dressing made from yogurt, mayonnaise and sour cream. If you use a plain yogurt, you may want to add some lemon juice to brighten up the dish - although we used a vanilla yogurt to add a slight hint of sweet vanilla to the salad instead.

So what did we make to go along side that would work for a picnic? Honey-Chipotle Barbecue Chicken Sandwiches! While we would have to do a couple changes to cook these outside on a grill, it will be very doable. Since we are using boneless/skinless chicken breasts, we wanted to gently cook the chicken to keep it as moist as possible, but we still wanted give them a boost in flavor. We quickly poached the chicken in water (you could use chicken broth if you had some leftover) laced with cumin and thin slices of fresh garlic. While the chicken cooled, we made a thick homemade barbecue from garlic, cumin, tomato puree, chipotle chiles with adobo sauce, cider vinegar, honey and Worcestershire sauce. As this cooks, we thinly sliced the chicken breasts and added them into the sauce for a couple minutes to allow the chicken to warm back up and take on some of the flavor. We toasted up a couple of our favorite burger buns and topped the bottoms with the sliced chicken dripping in sauce. We opted to top them with smoked mozzarella that we needed to use up, but feel free to use what you like - Monterey Jack would be an excellent choice. The tangy barbecue sauce is quite hot from the chipotles - but a sweet and smoky background keeps your appetite wet and anxious to go for that next bite. However, you may want to seed the chiles if you don't do well with heat or would be serving these delicious filling sandwiches to young ones. Jeff is not keen on raw onions, but a couple thin slices on top would be a pleasant accent to the chicken and sauce.


Tuesday, January 30, 2007

Double duty kitchen utensil...

We're back with another round of what we made for the weekly Wednesday Treat Day at Jeff's office. Today's recipe, Crispy Peanut Butterscotch Fudge Squares, brought several of our favorite flavors together in a sweet little package.

The bottom layer is your basic Rice Krispie Bar with an addition of smooth peanut butter mixed in when you are melting the marshmallows. This is then pressed into the bottom of a baking dish to form the crisp crust. What is poured on top is a layer of butterscotch and peanut butter fudge. This is made from butter, sugar, evaporated milk, marshmallows, butterscotch chips and peanut butter. A sprinkling of chopped peanuts on top adds a final touch to bring the two layers together. When you take your first bite, you notice the ultra creamy fudge that has a complex duo of flavors and then you hit the contrasting crunch of the peanut buttery Rice Krispie layer. You could easily adapt this to a variety of flavors to match what you like... one example that quickly came to my mind - you use cocoa rice kripies in the bottom layer and bittersweet chips in the fudge to satisfy the chocolate/peanut butter lovers out there. Would you like to take a bite out of these sweet indulgent treats? Besides, it's just a Rice Krispie Bar with a fancy new hair-do... no?

A long time ago (right about when we started getting into cooking), we attempted to make spaetzle even though we had no spaetzle maker or even a colander as suggested in several recipes. We ended up using a plastic zip-lock bag and cut the tip off to dribble the batter into the boiling water.... it worked, but what a mess! I got the urge to try this recipe for Herbed Spaetzle and even though I've been tempted to buy the tool used to drop the batter into the water, I didn't want to wait to get it. I ended up using a large spoon-like utensil we already owned that had the requested 1/4" round holes. We do have a colander, but I thought this tool might work a little better.

While it actually worked quite well, it was still messy - I'll think I will be cleaning up for awhile! To make these little nuggets bursting with fresh thyme flavor, milk is first steeped with a few springs of thyme. The sprigs are discarded and the milk is pureed with more fresh thyme leaves, parsley, salt and eggs. This is then whisked into all-purpose flour until the mixture is smooth. We pushed the mint colored batter through the utensil and into boiling salted water - when they floated up, we shocked them in ice water to stop the cooking. This took quite a few batches, which is something I didn't account for... so dinner was a little late tonight. My batter was a little on the thin side, so I think my pieces cooked up a bit on the smaller side - when I make this again, I might decrease the milk just a touch. Once the batter is used up, the spaetzle is then lightly browned in a hot skillet of melted butter. The spaeztle have a tender texture on the inside with a buttery shell that help to keep them separate. Jeff mentioned that he thought they were going to be mushy when he saw me pull them from the water, but after he ate his first fork-full, he muddled "this is so going to be my lunch tomorrow!" I see! Maybe it is time to invest in one of those fancy spaetzle makers after all?


Monday, January 29, 2007

Jeff's first comment... Chocolate what?

Always looking for different and fun treats to make, this recipe for Chocolate Salami really caught my eye - although I have to say I did change the name. It was originally called "Divinely Dairy-Free Chocolate Coins"... however, I like our less-wordy version better - call it whatever you like! The only "cooking" at all that happens with this recipe is melting bittersweet chocolate - I did this over a double boiler, but feel free to nuke it on medium in the microwave. Whole raw almonds (skins on please!) are coarsely chopped with a dash of cinnamon in a food processor. Dried black mission figs are added and the mixture is processed until finely chopped. Mixed into the melted chocolate, this is then formed into a long thick roll. As the roll is a little tacky to the touch (not sticky though), it is then coated all over with a very small amount of vanilla sugar. After chilled in the refrigerator, the roll can easily be cut into dense rounds. Nutty and rich, I was afraid you would only be able to taste figs - but each flavor held up on its own. While adding a bit of sweetness to off-set the chocolate, the figs also added a slight crunch. This was a surprisingly delicious, easy and healthy treat!

We doctored up a couple store bought items for tonight's dinner of Pot Stickers and Slaw with Asian Dressing. The original recipe called for a mix of shredded cabbage and carrots, but we prefer the broccoli slaw version that has broccoli, shredded red cabbage, carrots and cauliflower - it is crunchier and we like the variety of flavors. The other store-bought item we had to locate were some veggie pot stickers - I've never had a reason to buy them before, but after a strolling through a couple stores we finally found some at our local natural food co-op called The Common Market that we've mentioned before.

To doctor up the slaw a little, we mixed in fresh cilantro and a green onion - then drizzled it with a sauce made from rice wine vinegar, soy sauce, cilantro, toasted sesame oil and fresh ginger. To tie in the flavor from the sauce, we also go on to crisp up the pot stickers in some more toasted sesame oil. Once browned, we added water and covered them to finish warming them through. For a snappy finish, we quickly cooked sugar snap peas in the same pan until they were crisp-tender. The salty sauce made for a good counterpoint dressing to the slightly bland slaw and a fantastic dipping pool for the vegetable pot stickers. With lots of satisfying crunchy textures all around, I have to say that we quite enjoyed having pot stickers for the first time - we just may have to make our own next time!


Sunday, January 28, 2007

Dinner with not too much effort...

9 new recipes this week - our favorites this time were the Vermont Oatmeal Maple-Honey Bread, Smoked Cheese Pasta Bake, and the fun, but tedious, Key Lime Sugar Cookies. I am almost caught up with the recipe section to the left - I am about a week behind, but I added quite a few more today.

Today's side dish and dinner were both of the quick and easy variety. After a long day today, I didn't feel like doing too much. To go with dinner, we threw together a Quick Carrot and Raisin Salad. While cutting the carrots into sticks did take a little bit of time, you could always go ahead and buy the pre-cut bagged version to save even more time. The crunchy carrots are tossed with plump golden raisins, fresh parsley and just a couple tablespoons of red onion to give it slight bite. A creamy dressing made from mayonnaise, fresh lemon juice, sugar, cumin, paprika, salt, cinnamon and garlic add a slightly sweet and smoky coating. After a quick rest in the refrigerator so the flavors have a chance to take hold, a sprinkle of toasted almonds adorns the top for a nutty finish.

I always have pieces of boneless/skinless chicken breasts in the freezer, wrapped individually, so they can thaw quickly and I am able to pull out as many as I need at the time. With this dish, Black Pepper Citrus Chicken, the chicken is seasoned simply with salt and pepper and seared in a touch of olive oil until each side gets a golden finish. Even though the chicken is still raw in the center, it is removed so you can cook some start cooking the sliced onions and garlic together. Once they are softened, a splash of white wine goes in to loosen any tasty bits left on the bottom and then the half-cooked chicken is placed back in. Fresh orange juice and lemon juice are added and the skillet is covered to allow the chicken to finish cooking without drying out. You could definitely taste the extra pepper here, but I could have probably added a touch more (or used a bit coarser textured peppercorn). With the wine and bright citrus juices, the sauce was a bit acidic, but it didn't seem to overpower at all and we found that the added onions helped to cut that taste down. While this was not anything too exciting, it was a quick, basic and flavorful dish.


Saturday, January 27, 2007

Another new variation....

Because there are endless ways to make one of our favorite cookies, we rarely make the same biscotti twice. We've even made them colorful with jelly beans! This time we turned to the dark side for these cookies with today's recipe of Double Dark-Chocolate and Ginger Biscotti.

Dutch-process cocoa powder along with chunky pieces of dark chocolate are the two forms of chocolate here. Usually, but not always, some sort of nut is added to biscotti dough - I think hazelnuts would be a fantastic choice here, but we went a different route and chose a more rich walnut. To give the cookies a spicy edge, we added some finely chopped crystallized ginger with the nuts. We either make biscotti with softened butter (more tender) or using only eggs as the binder (more crunchy) - however, this time canola oil is used. The dough was about the same - maybe a little more sticky, but I thought the texture after baking was intriguing. It was a little more soft than using only eggs, yet more crumbly than when we use butter. Even though the texture in your mouth was more crumbly, we still got clean slices when we went to cut the baked biscotti loaves. Since the crystallized ginger has a sweetness to it, it pairs well with the chunky pieces of the slightly bitter dark chocolate - which surprisingly stay somewhat soft and a little gooey in spots.


Friday, January 26, 2007

Trying to redeem myself to the pups...

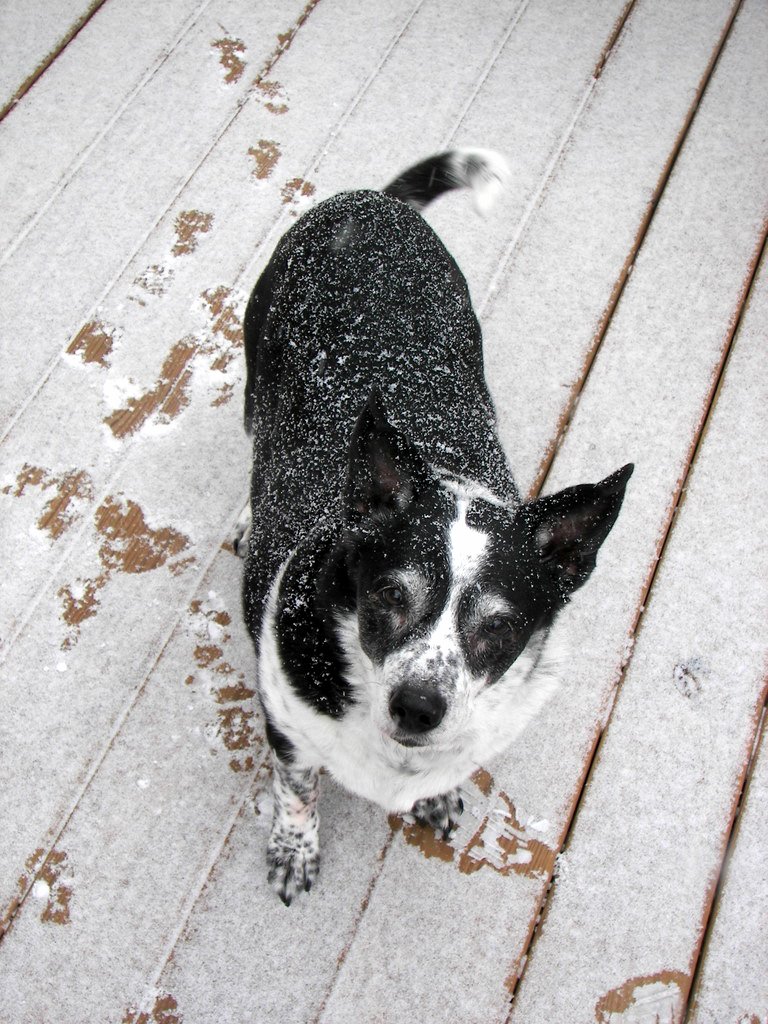
Uh oh... the dogs have been without treats for almost a week now! I couldn't stand the "look" they give in the mornings anymore, so I figured I better get going on making them more! If you're looking to give your pups an extra special treat (or your feeling guilty!), then these Peanut Butter Bones may be one to try.

These bones have quite the ingredients in them - mashed potatoes, milk, molasses, chicken broth and chunky peanut butter... how could they resist? The dough looks a little ragged when you start, but after just a couple minutes of kneading it turned into this beautiful supple dough. Depending on the moisture in your potatoes and the weather, you may need to add more or less all-purpose flour as you go along - just gradually add what you need until it does not stick to your fingers. This was a dream to roll out and makes a large amount of biscuits, depending on the size cutter you use. I kept the dough fairly thick when I rolled it out - right around 1/2" thick, as I wanted to keep these more chewy than rock hard. You could roll them thinner if your pup likes those extra crisp treats. While this is a yeasted dough, you won't need to let it rise - it just gives them a little lift and helps with the texture.

Tonight's dinner, Turkey-Potato Casserole, sure turned into an interesting meal tonight. Basically this is a two layered sliced potato dish with ground turkey in between. When we have done something like this before, any type of meat has usually been cooked - however, this time it just called for ground turkey so we went with it. Once it was all layered and seasoned, it called for 3 cups of milk (full disclosure - it also said you could use cream) to be poured on top - which we did. This cooks for 1 1/2 hours to allow the potatoes to get very tender and to fully cook the hidden layer of turkey. Before serving, we scattered sharp cheddar and crumbled bacon on top and set it under the broiler until bubbly and melted. Now, I'm not sure if we did something wrong or there was too much liquid, but after it had finished cooking there was so much milk left that we could pour it out of the pan! We both looked at each other with that "huh!" look on our face as we were not sure what happened. Maybe if you use cream it would thicken up enough in 1 1/2 hours, but for us it did not. Besides that issue, it was actually quite good! The turkey was fully cooked and surprisingly still quite juicy as it basically poaches and slowly soaks in the seasonings.

The potatoes, while still being very tender, we not overly mushy and had a good texture to them with a slight tang from the Dijon. The gooey and salty mixture on top added just the right finishing touch. By the way, if you happen to use a food processor to thinly slice the potatoes as I did, please do your self a favor and remember that when you go to wash the dishes that the slicing blade is lurking near the bottom. One deeply sliced finger (which makes it hard to type) will be all that I need to remember next time. Ouch!

Recipes
Peanut Butter Bones

Turkey-Potato Casserole

PS - We will be switching the blog over to the new version tonight. If you happen to spot any issues, please don't hesitate to send us a note with any problems!

Thursday, January 25, 2007

The aroma alone was worth the effort...

I noticed that our bread supply was getting low in the freezer and I had some extra time today so I went ahead and baked a couple loaves of this Vermont Oatmeal Maple-Honey Bread. This is a tender and slightly sweet bread that would make for a great sandwich or a killer piece of toast slathered with peanut butter. It has an interesting start by mixing rolled oats, maple sugar, maple flavoring, honey, butter and a dash of cinnamon with boiling water. This will soften the oats and allow them to melt into the bread and add a hearty chew to the loaf. The dough was very easy to work with and I had no problem incorporating some white whole wheat flour along with the all-purpose. I already had maple sugar on hand, but I know it is not easy to find and can be fairly expensive. So if you want to make this, don't run out and try to find it - just use brown sugar. It won't have that deep accent of maple to it, but I think it would work out just as well.

Fresh homemade bread always smells wonderful, but the addition of cinnamon and maple made these very intoxicating. The aroma coming from these loaves as they cooled made it very difficult to wait and slice them. If we ever sell this house, I'll have to remember to bake these before a showing!

We had a fairly light dinner tonight... this Wheat Berry-Cranberry Salad was probably meant to be a side dish, but instead we just increased the portion size a bit and had a couple toasted slices of the bread we made earlier. While this is really a no-fuss recipe, there is a step or two that needs to be done hours before you want to eat from the use of wheat berries. This grain, also called hard winter wheat berries, is whole kernels of wheat that have only had their outer (inedible) hulls removed. Because of this, they need to soak for about 8 hours and then require another hour or so of cooking until they become tender. To dress this salad, we first boiled cranberries in pure maple syrup until they began to pop. This is then combined with cranberry juice, olive oil, vinegar and Dijon mustard. Crisp diced celery, sliced green onions, fresh parsley and chopped toasted pecans are then added to round out the salad. The dressing has a pleasant balance between the tangy and sweet flavors that coat the lightly nutty and chewy wheat berries. Besides adding flavor, the toasted pecans and celery add a welcome crunchy texture against the softer berries.


Wednesday, January 24, 2007

Surpassing a milestone...

When Jeff came home this afternoon, he brought me down to the computer and brought up the blog... he said "Can you believe it?" I had no idea what he was talking about and he finally pointed it out that the counter on the right side said we crossed over the 1,000,000 visitor mark! I'm not sure when it happened, but that's pretty cool! I had no idea when we started this blog that people would ever really come check out what we were bakin' for treats or what we had for dinner that night.

We've been turning to a lot of comfort-style meals with the chilly weather finally coming upon us - pasta dishes are a notable one for us (and can you believe I wouldn't touch the stuff growing up? Man I totally missed out!) so tonight's dinner of this Smoked Cheese Pasta Bake fit the bill. While we cooked a pound of whole wheat penne, we warmed up some leftover chunky marinara sauce from the freezer. I seasoned the sauce with a bit more salt, pepper and crushed red pepper - then tossed in some chopped frozen (but thawed!) spinach. Once this has a chance to warm up and the flavors begin to meld, the penne is mixed in and we started making a tangy cheese mixture. Sour cream, shredded smoked mozzarella and fresh basil are combined to form a creamy sauce that we layer in between the pasta when we assembled the dish. Fresh grated Parmigiano-Reggiano (which I didn't find too sharp this time... hmm!) is finally scattered on top and then this bakes until bubbly. I love how the top layer gets a little crispy, but the underneath layers still remain moist. The middle cheese layer has a mild, but detectable, smoky hint to it - I thought it could have used a bit more of the smoked mozzarella though. Filling and hearty, this is also a great way to sneak in some spinach to those spinach-haters out there - while the spinach does not totally melt away, it does not have a strong taste at all here.

*Bonus Tips -

The smoked mozzarella can be a little tough and messy to shred - if you have issues, you can freeze the cheese for about 15 minutes and it firms up just enough to be a lot easier to shred.

I've grown tired of squeezing the thawed spinach in a towel to remove the excess water - I've started using our potato ricer instead awhile ago and have not messed up another towel since!

Tuesday, January 23, 2007

Get your juicers ready!

We are back again with what we made for the weekly Wednesday Treat Day for Jeff's co-workers at his office. There are quite a few steps to this treat, so I started early by making the dough for these Key Lime Sugar Cookies yesterday. The dough needs time to firm up, so I figured I would break up the steps a bit and get a head start.

We had do a couple unique steps before we began to make the dough so you will have to do a bit of pre-planning if you want to make these. The first step is mixing fresh Key lime zest with mild canola oil and allowing them to sit and let the intense flavor from the zest infuse into the oil. The next step is reducing down 6 tablespoons of fresh Key lime juice to just 2 1/2 tablespoons to condense the tart flavor without adding too much liquid to the dough. Once the soft dough has been made and divided, it is rolled out between pieces of parchment paper so you don't need to add additional flour that will toughen the dough. Before cutting out the circles, the dough needs a chance to firm up - it goes into the refrigerator for at least 30 minutes at this point. The well-chilled dough is then cut into circles and each round is cut in half. If the dough has warmed up too much to easily move them to the baking sheets, you can stick them in the freezer for a couple minutes. After being transfered, each half is scattered with a generous amount of coarse lime-tinted sugar. The cookies bake just until golden around the edges and then they need to fully cool before you begin to decorate them.

To suggest that they are slices of limes, a quick icing of confectioners' sugar, Key lime juice and a few drops of coloring are combined. This mixture is then piped in lines around the cooled cookies. I would suggest using a fine #2 tip to do this or a pastry cone made from parchment paper - I had issues getting nice clean lines with mine as my smallest pastry tip is a #4. I would have liked them to be a little nicer looking, but I guess we can just call them "rustic" right? The cookies themselves are very crisp and pack a wallop of a sweet, yet still tart flavor. As you start to nibble your first bite, you immediately notice how the strong citrus scent commands your attention. The coarse sugar brings a sandy crunch on top with the firm icing adding a sweet lime accent. Be sure to try these with the little fresh Key limes - I know they are no fun to juice, but it is worth it!


Monday, January 22, 2007

Is it still risotto if you don't use rice?

Well we hoped for a bit more snow, but we ended up with about an inch - Jeff even called his work's "hotline" to see if, for some reason they decided to tell people to stay home... he was a little disappointed when that was not the case! I felt tonight's dinner, Barley Risotto with Roasted Winter Vegetables, was fitting given the weather we've had over the past couple of days.

While there are a few steps to this dish, it ends up coming together pretty fast as you are working on separate parts at the same time. Parsnips, cauliflower and red bell peppers are first roasted until tender and they turn a light golden color. While these roast, onions are lightly browned in olive oil, followed by the additions of pearl barley and chicken stock. At this point, unlike traditional risotto, you do not need to constantly stir while it goes through the initial cooking - it is left alone to simmer until the barley absorbs the broth. The last cup or so of chicken broth is constantly stirred in once the barley is al dente to give it that creamy edge - however, it just won't be like a rice risotto as far as texture goes. Parmigiano-Reggiano and the roasted veggies are then mixed in and once plated, each serving gets a few toasted chopped pecans, a scattering of more fresh grated cheese and a sprinkle of parsley. I loved the crunch that the toasted pecans added to the tender and somewhat creamy barley along with the chunky golden roasted vegetables which brought a natural depth to the dish. I was not sure if I would like the sweeter parsnips here, but Jeff and I both enjoyed them. My only issue was with the cheese - I'm definitely in the "more cheese please" crowd, but our Parmigiano-Reggiano was almost a tad too sharp for us. It was a fairly higher-priced cheese than we would normally get, so it may be that we just are not used to its strength - I would reduce it a tad if we used it again.

Sunday, January 21, 2007

It may not be much, but it is a start!

Here we are on January 21st and it is finally snowing more than one or two flurries! I think Spike might pass out from excitement!

Now, we can't get too excited as they are only calling for maybe an inch, but at least it is something! If it is going to be this chilly, I would rather see some white outside, rather than the dingy brown grass!

Before we went out grocery shopping this morning, I wanted to make a warm and hearty breakfast that didn't take a lot of time to throw together. While we do quite like waffles or pancakes, I went for something that would be a little different and made a Ranchero Frittata.

Frittata's are fantastic vehicles for those bits and pieces of ingredients laying around waiting to be used up or tossed. In this recipe, chopped onions and juicy halved cherry tomatoes are cooked in olive oil until the onions soften. Eggs and egg whites are whisked together with parsley - this is then stirred into the tomato and onion mixture with a couple chopped jalapeƱo peppers for a southwestern flare. Crumbled soft goat cheese is then scattered over the top and the mixture cooks, covered, until the eggs are just beginning to set. A quick trip under the broiler will finish the eggs off and give the top a gorgeous brown color. We loved the tang the goat cheese with the mild heat from the jalapeƱos added to the creamy eggs - Jeff said the only downside was that it had a slightly too onion-y flavor for him. We choose to serve some quickly warmed black beans seasoned simply with salt and pepper on the side.