Monday, July 02, 2007

What's ahead and where we have been...

You may have noticed that we missed a post yesterday - it turned into a very long day and we were pretty tired by the time we arrived home. This past week we flew out to Minneapolis (which is why we were able to play catch-up with recipes that we had not posted yet!) so Jeff could be at his new job for the first week. (PS... as with all of the pictures we post, you can click on them to see a larger and clearer version!)

We stayed right in the heart of downtown - it was so nice being back in the hustle and bustle of the city... always something happening!

We did stay extra day so we had time to meet with our new Realtor out there and drive around to see what has been built since we last lived there. It brought back a lot of memories as we drove past old houses and places we used to go! One of the places I missed the most was the Farmers Market that they have downtown. It claims to be the largest in the Midwest - while I can't confirm that, it blows anything that we've seen out here in MD or Phoenix for that matter out of the water!

We thought we'd share a few snaps that we took while we were out there enjoying all of the beautiful fruits and vegetables... it is also the place to go to people watch!


There will be a few new recipes we hope this week, but it may be kind of slow. My sister and her new husband of one year drove all the way out here from MN to visit! Remember when we posted about their wedding last year? If you are new to us here, you can see pictures from the farm and wedding here, here, here, here and here! I can't believe how much time has passed already! By the time our flight arrived yesterday in DC, they had already gotten to Frederick... so we've been going non-stop! I've been very busy in the kitchen, but it has been mostly repeat recipes that we thought they would enjoy.

Last night we started them off with the Lasagna Soup that never fails to please!

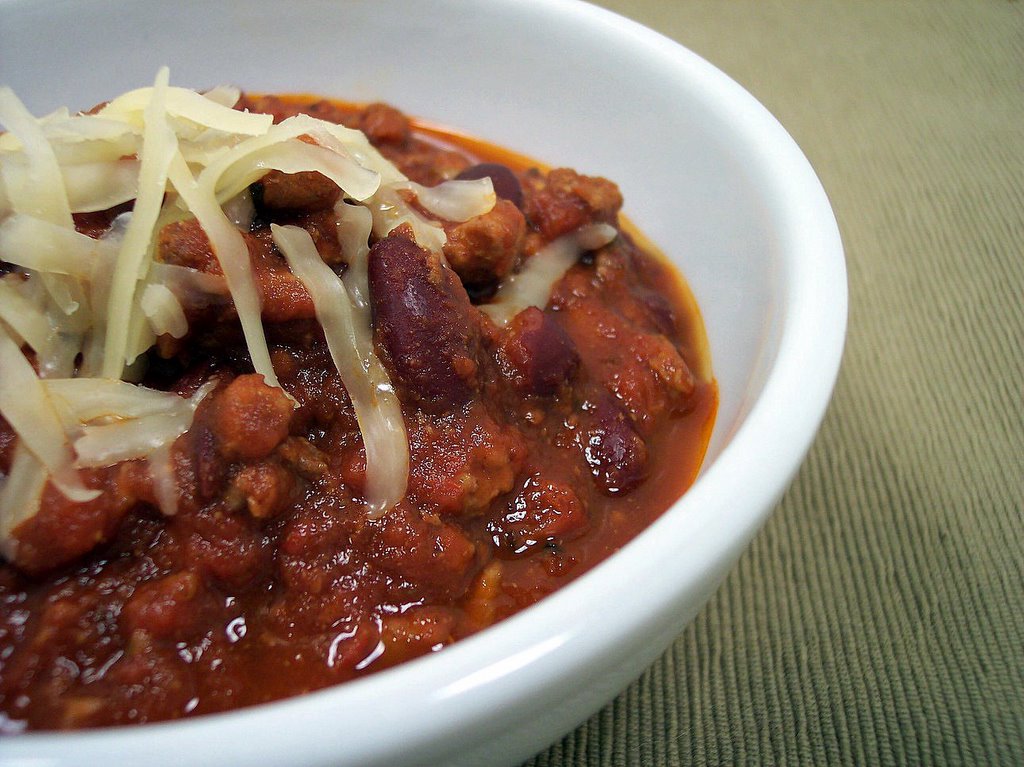
Since the weather was starting to cool off a bit tonight, we thought the All-American Chili that we first made quite some time ago would be good - and it just as delicious as we remembered!

Saturday, June 30, 2007

Leftover ricotta in the fridge? I've got just the recipe for you...

Sometimes we may have to halve a recipe if it makes too much for just us two or if the leftovers won't hold well for a couple days. This often leaves us with open containers of ingredients - we either end up tossing said ingredient or somehow try to use it up before it expires. We had this happen recently when we only used half a container of ricotta cheese - we used the first half it in a savory recipe, but decided to re-purpose the rest into a sweet treat for us.

Our adaptation of this Ricotta Cappuccino from Giada De Laurentiis made just enough for us two, but you could double the ingredients (using a whole 15 ounce container of ricotta instead) if you wanted to squeeze out 4 servings. The original recipe has you blend granulated sugar with a vanilla bean, but I always have a jar of vanilla sugar going in the pantry, so we just used that. Using just a few ingredients, the plain ricotta is transformed using a food processor into a sweet and luscious treat with the additions of the floral sugar, instant espresso powder, a few drops of vanilla, just a touch of cocoa power and a pinch of cinnamon.

Since the mixtures warms up a bit from being processed, the creamy concoction is divided between two glasses and placed in the refrigerator to chill and firm up a bit. Right before serving, a crumbled piece of biscotti is scattered over the top of both glasses to add a textural crunch against the soft ricotta. This has just enough sugar to move the ricotta into the dessert category, but not so much that it overtakes the delicate flavor - this turned into a delicious and a bit unusual way to use up that last little bit we had leftover.


I know exactly what I'm making the next time we have leftover ricotta... but who am I kidding? I think I would go ahead and buy a tub just to make this again!

Friday, June 29, 2007

Gumbo without the guilt...

Gumbo recipes are usually thickened with a roux made with quite a bit of oil, but this Chicken and Sausage Gumbo we had a few days ago uses a different method to lighten up the dish. I wouldn't say this method saves a lot of time, but it does cut down on the calories. All you need to do is slowly toast the flour over medium heat until it begins to turn a light golden color, a little darker than the shade of straw. You can also do this in the oven, but using the stove-top allows to you easily stir it and be able to watch it closely so it does not burn. Just be patient - however, once it starts to turn color, it can go from brown to burnt in no time.

The base flavors come from sauteed onions, red bell pepper, celery and onion - once those have softened, chunks of lean chicken and smoked sausage are added and allowed to cook. Fire-roasted diced tomatoes, chicken broth and seasonings are added and the mixture bubbles away, allowing the flavors to converge. The recipe does call for two cans of tomatoes, but don't miss the part where one of them is drained of excess liquid while the other is not. I was expecting the gumbo to be a bit thicker than what we ended up with, but since we were serving it over brown basmati rice, it ended up being just about right as the rice absorbed some of the flavorful juices. Mixing the smoked sausage with the chicken was a nice touch to add some richness to the gumbo - be sure to serve some extra hot sauce on the side so you can spice it up as it could have used a bit more heat for us.

Thursday, June 28, 2007

Speckled flatbreads and an interesting spinach-bake...

Still have a few more recipes to go until we are somewhat caught up on the ones we have been waiting to post about. These two recipes I'm posting about tonight are ones that we had this past weekend. Jeff has really taken to homemade cracker-like breads or flatbreads as of late and I came across these Chilli Flatbreads in an import magazine that we don't often get - the Delicious Magazine from Australia.

With just a few basic ingredients, this flatbread raced up our list of "must make again" recipes as it was very flavorful for how quick it came together. It is a very lean dough with no added fat, except for a bit of golden olive oil that is brushed on the dough for color and crispness as it bakes. Isn't it amazing how the simple combination of flour, yeast, salt and water can be taken into so many different directions just by altering the amounts? The dough was a little sticky for me to roll out easily, so I ended up having to add a bit more flour than I am used to - I'm guessing I used a light hand while dusting the dough as I kneaded it and probably could have added another 1/4 cup or so. As you roll out the little dough balls, the flecks of diced bright red chillies and dried green parsley begin to emerge and make themselves quite visible. We loved the texture of these flatbreads once they were baked - they were crisp on the outside, but still had enough thickness in the middle to give them some chew.

We just enjoyed them plain, but I bet these would make a killer platform for a variety of spreads or maybe to serve as an edible base for a light salad on top.

I also served this Spinach-Cheese Bake the same night. I had some hesitation while preparing this dish as it didn't look like it was going to work, but once it came bubbling out of the oven my fears were quickly put to rest. See, the recipe has you stuff 12 ounces of tender baby spinach into a 9" x 13" baking dish - this almost filled our dish up to the very top! I am used to wilting the spinach first in a dish like this, but this recipe had other plans! Topping the generous mound of greens is a combination of sharp white cheddar and Monterey Jack cheeses. Milk, eggs, egg whites, Dijon mustard, salt, baking powder, pepper, fresh grated nutmeg and cayenne pepper are mixed together and then added to a bit of flour to bind it all together. This is then poured over the spinach and cheeses - I did have to press my spinach down to get the liquid to come up to the top, but it still didn't cover it all. I didn't need to worry though...the eggs and baking powder worked their magic as it baked and helped the liquid bubble up and cover any pieces sticking out on top. I wouldn't call this the most flavorful dish ever, but it did fare well enough from the mustard, cayenne and nutmeg. I know that not everyone likes nutmeg in savory dishes, so you may want to think about that when adding it. I found that I could taste it more in this recipe for some reason - it usually just adds a little "something" in the background, but it was more noticeable here. Be sure to use your best sharp cheese to give this the most flavor - it might be a bit bland if you go with something that doesn't lend enough of a punch. With so much fresh spinach, it was fun to see how much the layers showed up as we sliced these into tidy little rectangles - I wonder if these would hold up well enough to be cut into little squares and skewered on a toothpick to serve as an appetizer-type dish?


Wednesday, June 27, 2007

Will these chocolate cookies bring world peace? I don't know, but I'd settle for a house sale...

Well, we were without internet access yesterday... so I was not able to get the post up for the weekly Wednesday Treat Day. Jeff, however, did bring in the treats and all was well - I decided to add some variety this week and made two different recipes!

Let's start off with the Lemon Almond Biscotti that I made first... I'm sure you are thinking "geez, do these people ever make anything other than biscotti?!" We do, but we also are crazy for these crunchy cookies. With lots of softened butter, I think this was the stickiest dough that I've had to work with for biscotti - however, the recipe did warn that the dough would be very soft. Don't be tempted to use extra flour - either use a spatula to deal with the stickiness or lightly wet your fingers. Any extra liquid from using wet fingers will evaporate fairly quick as soon as you place the baking sheet in the oven.

With paper-thin almonds and almond extract in the dough, almond is certainly the predominant flavor... but rubbing the juicy lemon zest into the granulated sugar makes for a subtle, yet tantalizing light lemon flavor. While the cookies do get crisp from being twice-baked, they have another layer of crunch from the addition of yellow cornmeal. Since there were no chunky mix-ins, the baked loaves didn't crumble at all and were very easy to slice. I didn't think about it at the time, but I would have loved a light drizzle or maybe a half dunk into some creamy melted white chocolate.

I probably don't even need to say much about these World Peace Cookies as I'm sure you've seen them more than a few times posted on other sites. We both thought that these absolutely lived up to the hype and it was pretty hard to give these away! You may also see these called Korova Cookies as they is what they were originally called. These slice and bake cookies were a snap to throw together and you could keep the dough in the refrigerator or freezer to bake off as needed. They have a fairly unique texture - not chewy nor crisp, but somewhat sandy and crumbly with a rich chocolate flavor.

How these bittersweet cookies stand out from the rest of the pack is from the battle of sweet against the salty addition of fleur de sel. You could just use a fine sea salt, but we both thought this extra special touch was worth it. You may notice when you go to slice the dough that it has a tendency to crumble a bit as you hit a chunky piece of chocolate - these cookies are so sturdy though that you can just press them back together and you would never know the difference!

So... I'll go ahead and admit it - I've already made another batch and have two more logs in the freezer. You know, for those stressful days I'm sure are heading our way as we deal with selling the house. Besides, this way I'll have something to bake before a showing - maybe these cookies will be what actually sells this place!

Monday, June 25, 2007

Meatballs... minus the meat!

Now that most of the project has been completed, things are finally starting to slow down around the house and I actually had some time last weekend to throw together lunch, rather than finishing up some of the leftovers in the fridge. I had some soy crumbles in the freezer leftover from another recipe, so I finally got around to making this recipe for Orecchiette with Mini Soyballs that I've been meaning to make.

I was a little apprehensive about making the "meatball" portion of this dish as I've never used these types of crumbles in anything but their ground form (like in a chili or tacos). I figured they would just fall apart and not hold their shape, but they actually did quite well after a short stint in the refrigerator. The soyballs are a mixture of the crumbles, sharp Pecorino Romano, whole wheat breadcrumbs, an egg, fresh garlic and seasonings. Once formed and chilled, they get a nice golden crust after being cooked in a bit of olive oil. Green peas and vegetable broth are added to the same skillet and they cook until everything is thoroughly heated through. While you wait for that to finish, little ear-shaped pasta are cooked and tossed with a fresh and simple mixture of bright lemon juice, olive oil, parsley and thyme. The little pockets in the pasta were just the right size to hold a pea or two, while the dressing was just enough to keep the pasta moist and from sticking together, but it was not very saucy at all. The recipe claims to create a "cheesy" sauce - I'm guessing that is suppose to be from the cheese melting into the dish, but that didn't happen so much for us. Maybe adding some of the starchy pasta water would help with that? If you want to speed things along, you could probably just pick up some already-prepared soy "meatballs" and skip the work, but we thought it was worth the extra few minutes as they really was pretty easy to make and well seasoned.


Recipes

Sunday, June 24, 2007

Coming up with a cookie to use some unusual baking chips...

We ended up with 9 new recipes for us this week - our favorites this round were the Maple Walnut Cake, Fresh Pea and Edamame Risotto with Fresh Mozzarella and Prosciutto and the delicious Strawberry-Chocolate Tart. The next few days are going to be mostly trying to play catch-up on recipes we've made that I have just not gotten a chance to post about yet. We'll start out today with a cookie recipe I made earlier in the week that I put together to use up a special kind of flavored baking chip that has been giving me the evil eye every time I open the pantry door.

I was given these cherry-flavored chips quite some time ago, but didn't have a clue what I was going to do with them. I thought I would pair them with some chopped bittersweet chocolate in a cookie recipe that's been floating around in my head aching to be made. I wanted a sturdy cookie that had a hearty chew to them with a crisp ring around the outside. I used a combination of butter and shortening and threw in a couple handfuls of old-fashioned rolled oats to hopefully get my desired texture in these Chocolate-Cherry Chip Oatmeal Cookies. Adding to the chewiness is a cup of light brown sugar which also gave some needed moisture to the finished cookie. The dark molten pools of chocolate in the cookie came from a big chunk of bittersweet chocolate I had in the pantry with the red-hot colored spots being the cherry-flavored chips.

I may have a tweak here or there to do still, but these are just what I hoped they would be - Jeff's first words after taking a bite were "Mmm... chewy-goodness!". The cherry flavor was certainly a fun addition, if not a bit artificial tasting - but I don't think you could expect much else from that kind of flavored "baking chip". After a day or so, they did loose a bit of their crispness, but their dense-chewy texture held up quite nice... even after freezing.


Saturday, June 23, 2007

Can it get better than gorgeous fresh strawberries and lots of chocolate?

I mentioned in yesterday's post about a sweet treat I made involving strawberries and chocolate, but it needed to rest in the refrigerator first before we snapped a couple photos. Because of the time involved with chilling, I would suggest making this Strawberry-Chocolate Tart a day before you want to serve it, unless you make it early enough in the day.

The cookie-like crust for this tart comes together in a snap - it is simply made from rolled oats, granulated sugar and salt that are mixed in a food processor until the oats are finely ground. Chilled chunks of butter are added and after a couple tablespoons of icy water, the crust came together in no time. The best part of this dough? No rolling it out! You just scoop it into the bottom of a tart pan and use your hands to easily mash it over the bottom and up the sides.Since the filling is cooked in a saucepan, the crust does need to be fully baked before being filled.

The ultra-smooth custard filling is made from milk, sugar, Dutch-processed cocoa powder for a smooth chocolate flavor and cornstarch to thicken the mixture. A splash of vanilla and a handful of bittersweet chocolate chunks are added off-heat and stirred into the mix until the chocolate disperses into the filling. After filling the crisp golden crust, a layer of beautiful sweet strawberries are assembled over the dark slick of rich chocolate custard. The filling needs as much time in the refrigerator that you can give it - this allows the filling to set up correctly so your sliced tart pieces will be clean and hold up well.

My only concern is after the 8 hours in the refrigerator, the bottom crust was not as crisp as the sides were - I wonder if you gave the crust a quick brush with a beaten egg white, before baking, would be enough to protect it and prevent the softening. Soft crust or not, this was completely swoon-worthy for being a fairly light recipe - just be sure to use the best strawberries you can get your hands on. We ended up going to a local u-pick farm and picked a couple baskets worth for ours - because you know... while we were assembling it went something like one for the tart, two for me!


Friday, June 22, 2007

Pushing new flavor combinations...

Hmm, I think I was being a little ambitious when I was preparing the menu for tonight. By the time I had dinner ready, the kitchen was quite messy with lots of pots and pans scattered on the counters - I then glanced at the clock to see it was already 30 minutes later than when we normally eat... oops!

Oh and before we get started... I did actually get something sweet made today, but you will have to come back tomorrow as it needs to rest overnight in the refrigerator! I will give you a hint though... it involves strawberries and chocolate!

The main portion of tonight's dinner was going to be a little unusual flavor-wise for us tonight, so I thought I would keep the theme going even if the side dish didn't match well. I don't know how authentic the flavor was in this Tandoori-Style Cauliflower, but it certainly tantalized our taste buds! Blanched cauliflower is coated in a pungent homemade sauce that began by toasting whole cardamom pods, cloves, a cinnamon stick and a bay leaf. Once the fragrant spices are ground, they are added to caramelized chopped onions along with ground almonds, grated fresh ginger, turmeric, salt, spicy red pepper and minced garlic. Once heated through, the sauce is placed in a blender and thinned with a bit of water to allow the mixture to be pureed fairly smooth. The sauce at this point is very flavorful, but it needed the addition of plain whole milk yogurt to give it a rich body and a lush creamy texture.

As the snowy white vegetable was tossed with the sauce, the turmeric in the sauce stained the cauliflower with a deep yellowish-orange color - the two then go into the oven to bake until they are thoroughly heated through. The combination of the cauliflower and toasted sweet spices is new to us and I didn't really know how it would go over. With just a bit of heat in the background to play off the sweet, it took us a few bites to really get into this dish with its complex flavor and by the time we had finished, we were both glad that we gave this recipe a try!

We first tried millet just a few weeks ago and really loved the taste and texture, so I've been on the hunt for more recipes that we could use the whole grain in. The directions for these Mediterranean Burgers is fairly lengthy as a few ingredients need to cook first and then cool down before you can proceed. Once all of the prep work was done, the cooked millet is combined with re-hydrated sun-dried tomatoes, cooked onions, wilted baby spinach, garlic, feta cheese, fresh basil and breadcrumbs to help bind the patties together. With all of the additions to the nutty millet, the mixture easily holds together enough so you can cook and flip the patties without concern that they will fall apart. Once the thick patties achieve a golden crust on each side, they are served on crunchy toasted whole wheat English muffins with a bed of tender spinach leaves underneath.

Jeff's only negative remark was for the texture - they don't have that firmness that a meat burger would have - while they have a nice crust on the outside, the inside is more soft than he would have liked. We loved the salty edge that the feta brought along side of the intense flavor from the woven pieces of sun-dried tomatoes coursing threw each burger. You could even make them extra fancy and top each one with an olive relish or even a gourmet ketchup.



Thursday, June 21, 2007

A risotto not quite as intended, but it may just be better!

Sometimes I either can't get a specific ingredient that a recipe calls for or when I go to the market, the ingredient just does not look good at all. However, it was a combination of both for this Green Pea and Edamame Risotto with Fresh Mozzarella and Prosciutto - it originally called for fresh unshelled fava beans, but they didn't have enough in stock and the beans they did have looked like they should have been tossed a couple days ago. This recipe was one that I had been wanting to make for awhile, so I ended up changing things around and used some fresh green peas and frozen edamame instead.

Nothing too different in preparation than any other risotto in this springtime flavored dish - I did like the use of leeks to give a bit more more complex onion flavor while still staying somewhat mild. I am sure that the fresh favas would have been excellent, but Jeff and I both loved how the little grassy green peas popped as you ate them along side the firm, yet tender, edamame. Instead of finishing the dish off with Parmesan cheese, we used small white pearls of fresh mozarella - the resulting risotto was still creamy, but I almost missed the edge that Parmesan adds in dishes like this. Before serving, the risotto is also given a leg up with the addition of peppery arugula, whose tender leaves gently wilt from the residual heat. Giving this recipe a big push towards the "definitely make again" pile was the delicious pieces of crispy prosciutto sprinkled on top - a little salty, a bit of crunch and it exuded an alluring aroma that seeped from the kitchen and flowed through the rest of the house as it baked in the oven, alerting Jeff that dinner was almost ready.


Wednesday, June 20, 2007

Simple chicken and rice...

I knew I was not able to devote a bunch of time to make dinner tonight, so when I was planning the menu this week, I picked out a recipe that was mostly hands off with little prep time. For this Sesame Brown Rice Salad with Shredded Chicken and Peanuts, I was able to be off doing other projects as the rice didn't need much tending to since it took awhile to cook.

Once the nutty rice was finished, we mixed in chunky shredded chicken breast, bright orange carrot strips, green onions, peanuts and cilantro. To give the salad a zesty tang, a simple dressing made from fresh lime juice, canola oil, toasted sesame oil and minced garlic is combined and drizzled over the rice. You really only need just a teaspoon of the sesame oil to get the needed punch of flavor for this dish - we both thought that if you used any more that it may be a bit overwhelming. The peanuts added a nice textural crunch against the tender pieces of chicken and floral brown jasmine rice. Pretty easy, very pleasing to the palate and since it is fairly quick with little hands-on time, I will definitely be keeping this one handy for those upcoming busy days!


Tuesday, June 19, 2007

Lots of fruit used up today!

While not quite as enormous as my blueberry stash, I do have a few bags of cranberries inside the chest freezer in the garage. Since they have such a short availability in the fall/winter, I always make sure I have enough frozen so we can have more chances to enjoy their refreshing and tart flavor well into the warm summer season.

Today was probably not the best day to have the oven on for awhile as it was very hot and humid outside, but these Cape Cod Cranberry Bars certainly made it worth pushing the AC a little more today. These bars burst with layers of flavor from the rich nutty base up to the buttery crumbles on top. The bottom and top of these bars are actually the same ingredients - this is a mixture of flour, fluffy confectioners' sugar and brown sugar that are rubbed with softened butter until the combination turns crumbly. Chopped pecans are then tossed in to complete the mix - do make sure to take the extra step of first toasting them, it adds such of depth of flavor that you would be missing out if you skipped it! If you don't groove on pecans, I bet this would be just as good with walnuts if you prefer them.

As you wait for the crust to bake, the tart crimson cranberry orbs are pulsed a few times with crisp chunks of apple, sweet fresh raspberries and granulated sugar in a food processor to create the bright ruby filling. Flour and a little melted butter are added to tighten up the filling and thicken any excess juices as the bars bake. Before the bars go into the oven, a reserved mixture of the buttery crumbles from the base are strewn across the filling to create the little golden brown nuggets you see on top. You can make these as large or small as you want - if you squeeze the crumble mixture in your hand, you will see it holds together quite nice, so how much coverage you get is up to you! Once they had cooled, they cut very well into neat and tidy squares with clean layers - love when that happens! If you do make this dish and are using frozen cranberries, be sure to use them right from the freezer, don't bother thawing before you use 'em!

I was not going turn on the oven again today, so we declared tonight another breakfast-for-dinner night and made these Citrus Waffles with Marmalade Compote. We used an "American" style waffle maker to make these, rather than the deeper pocketed Belgian - since there is not a lot of added fat in the batter, this enables the waffles to still get fairly crisp. Making these waffles a little healthier is the addition of whole wheat pastry flour and wheat germ in the batter; however, with the additions of tangy buttermilk and fresh grated orange zest, they definitely don't have an overly "wheat-y" taste to them and are still quite light.

Since we don't have those deep golden pockets to pool a thick syrup in, a fruity compote made from chunky orange marmalade, orange juice, lemon juice, sticky honey and fresh orange sections is heated in a saucepan and left to keep warm over low heat until the waffles are ready to serve. I just used the sections in the picture so the waffles would not end up soaking up the juice while we took the pictures, but there was enough sauce from the compote to go around and keep things moist.

Monday, June 18, 2007

To make or not to make...

Every once in awhile, I come across a recipe that has an ingredient or two that looks a little out of place or the combination just sounds odd to us. Many times I end up deciding not to make the dish, but after I went over tonight's recipe with Jeff, we decided we had to try this Baked Eggs with Potatoes, Spinach and Cheese Sauce just to see what it was going to taste like!

To start us off, a combination of tender Yukon Gold potatoes, buttermilk, butter and seasonings are mashed together to create a creamy base once spread in a baking dish. Next, a layer of wilted spinach, that has been mixed with sautéed onions, is scattered over the top of the mashed taters. Not too different yet, right? Well, now comes a layer of thinly sliced hard-boiled eggs... and what would be the best way to finish off this dish? A cheesy sauce of course! Flavoring the thick sauce is Dijon mustard, a dash of fresh grated nutmeg and the best part; earthy Gruyère cheese. The sauce is poured on top of the sliced eggs and the whole enchilada goes into the oven to bake until completely warmed through and the edges have turned golden. I didn't have enough time to wait for it to cool down, so our servings were a bit soft still as it was pretty warm - by the time we were done eating, it held its shape much better.

So, we thought this combination was weird on paper, but it was actually pretty darn good! It was a lot of work and made a few dishes, so I'm not sure I would assemble this next time on a weeknight, but it was interesting enough to make again! The only thing I was thinking about while eating it was how some salty crisp bacon would have been an excellent addition scattered on top.

Sunday, June 17, 2007

Sweet maple goodness...

This week flew by with 10 new recipes again for us - our favorites this time were the Peanut Butter Graham Cookies, Pepperoni Biscotti and the Warm Snow Pea and Chicken Salad. I've got quite a few recipes on the menu this week to get made with a couple fairly unique ones that we are anxious to try!

Today's baked good, Maple Walnut Cake, takes a slightly different look at sticky toffee pudding by adding an intense maple flavor, which makes up for a lack of the rich toffee sauce that would normally accompany that recipe.

Inside this tall golden cake is an extremely moist crumb - this comes from sweet pitted dates that have been softened in boiling water and then puréed until smooth. Since we are set in the moisture department, the flavor of the cake received a rich depth from infusing toasted walnuts into the mixture of all-purpose and slightly nutty whole wheat pastry flour by giving them a thorough whirl in the food processor. Robust maple flavor is bursting out of each piece as we used a dark amber (grade B) pure maple syrup - if you can only find light, go ahead and use it, but searching for the darkest will give the best flavor. Replacing the toffee sauce is a sticky, sweet and explicitly maple glaze that slowly soaks in. To tie the flavors together and add some crunch, toasted chopped walnuts are all this cake needs as a garnish. It's not often that both Jeff and I look at each other after our first bite and say "wow!"


Saturday, June 16, 2007

Plowing through the blueberry stash in the freezer...

Another blueberry recipe today... my supply of wild blueberries in the freezer is dwindling down, but I still have quite a bit left. The freeze was sparse of muffins, so this morning I made a recipe for Blueberry Oatmeal Muffins I've been meaning to make for quite a long time.

I loved the texture of these muffins - it was kind of a cross between a regular muffin and a cupcake - they were light, notably moist and as you can see below, packed with a generous amount of tiny purple-hued juicy berries in each muffin. I think the flavor of lemons goes brilliantly well with blueberries, so we added fresh lemon zest to the batter, along with using a lemon flavored yogurt.

Besides lending flavor to these golden crusted muffins, the yogurt absolutely helped give them their soft and moist texture - feel free to substitute another flavor if you like, I bet vanilla or raspberry would be quite nice too. There is also a half cup of quick oats thrown into the dry ingredients - this added a bit of a chew to the muffins and gave them a little weight, without making them heavy, if that makes sense. If you have access to fresh blueberries, by all means use them if you like - I just prefer the wild as they are so small, it seems like you get more (besides the fact that I have a ton in the freezer anyway...)!


Friday, June 15, 2007

Biscotti... pepperoni style?

By now, you have to know just how much we really enjoy sweet biscotti, but every once in a while we go b-a-n-a-n-a-s and make a savory version. While most biscotti recipes are very crisp and crunchy, these Pepperoni Biscotti have a softer edge to them as the recipe contains a good amount of butter.

Taking these biscotti into the savory depths is minced garlic, sharp Parmesan cheese, Italian seasonings, chopped red peppers, chopped onions, fresh parsley and of course the most fundamental ingredient, chopped pepperoni! There is just a dash of sugar in the recipe, but it is mostly there to give the biscotti some color as it bakes, rather than to sweeten. The dough was nice to work with and is on the drier side of most recipes, as I was not very sticky when I went to roll the dough halves into logs. To give them an extra special touch, the logs of dough are rolled into a bit more Parmesan cheese before being flattened on the baking sheet. After baking, the recipe calls for leaving the loaves on the baking sheet to cool for 60 minutes, but I cut them after about 35 and they cut just as clean as I could have hoped.

Once they have gone through their second baking, the tender biscotti are still firm and crisp, but they have more of a give to them than a sweet version. This was such a fun and different way to change up biscotti - they are very pizza-esque in flavor with the garlic, Italian seasonings, pepperoni and cheese. I will definitely be making these again... I imagine they would be an enjoyable side to dunk into some creamy warm tomato soup during the cool fall nights later this year!

Tonight's dinner recipe, Feast from the East, sure lived up to its name as it is packed with lots of colorful and filling ingredients. To stand up to all of the ingredients in the salad, a killer combination of hoisin sauce, broth, soy sauce, seasoned rice vinegar, toasted sesame oil, fresh ginger, orange zest and a clove of garlic make up the generous dressing. The salad is a bountiful mixture of whole wheat spaghetti, grilled sirloin steak, crunchy broccoli florets, cool diced cucumber, carrots, green peas, green onions and a good handful of fresh basil from our plants on the deck. While this was certainly busy with many flavors and textures, they all seemed to play off with each other and combine into a cohesive, refreshing and attractive dish that left our bellies quite happy and stuffed.


Thursday, June 14, 2007

More buns and a zesty pasta dish...

I didn't bake anything new today, but I did throw together another batch of these fantastic hamburger buns that we love so much. I did change it up a touch by tossing on some sesame seeds... however, I ran out of the regular ones and threw some black sesames on the last couple of buns. I can't count how many times we've made these since I started them back in August of last year!

We've managed to stock up on a lot of pasta over the past few months for some reason, so you may have noticed a lot of recipes calling for it lately as we slowly downsize the pantry in anticipation of selling the house. Though, with the market as slow as it is out here, we will probably be out here for a little longer than we thought. Instead of boring house details, let's jump right in and get talking about what we had for dinner tonight.

I can definitely see making this Pasta with Lemon and Spinach dish again when it is the middle of summer and we're searching for a speedy, but light and fresh dinner to beat the heat. Once the batch of whole wheat penne is cooked, the sauce to coat the pasta is combined in the same pot to save on dishes. Butter, minced garlic, smooth ricotta cheese, fresh grated Parmesan cheese, lemon zest and lemon juice form the creamy base of the sauce with a bit of the starchy pasta water being added to thin it out. Tender baby spinach and sweet red bell peppers are tossed into the sauce just until the spinach has a chance to wilt. After the pasta is tossed with the sauce and the dish is plated, a quick shower of sharp Parmesan cheese is the last step before diving in. The flavors popped in this dish with a bright citrus-y kick from the lemon zest and juice - the spinach and peppers gave it roots and splashes of color. If you still have access to good asparagus, feel free to toss in thinly sliced pieces instead of the spinach. Oh and the camera doesn't lie, the differences in pasta color are because I had to mix and match different brands.


Wednesday, June 13, 2007

Woo... spicy!

As you will see below, dinner was fairly labor intensive, so I wanted to keep the side tonight quick and easy. I was able to prepare this New Potato Salad during the bits of downtime I had while waiting for a part of the main portion of dinner to finish.

To make sure they kept their shape, we used small whole red potatoes for this potato salad. They are first cooked just until tender - they are then given a chance to cool down to easily be cut into quarters. Coating the potatoes is a crunchy, yet creamy dressing of mayonnaise, crisp celery, red bell peppers, shallots, green onions, white wine vinegar and Dijon mustard. We are not a huge fan of raw onions, but the shallots and green onions are mild enough to add flavor without being too obtrusive. Since you are already getting some texture from the celery, I might think about changing the peppers around and using roasted red peppers for more depth to add one more layer to this speedy dish.

Don't take the title of tonight's main dish lightly as this Fiery Flank Steak with Tomato Jam was darn hot! Lately the jalapeños we've gotten have been duds with very little heat, but these little guys tonight sure had a fire inside them! You can make the jam ahead of time, if desired, as it is a little labor intensive - but be sure to let it come to room temperature when serving. For a different way to remove the skins of the tomatoes, the pulp is extracted by rubbing the tomatoes against the large holes of a grater, leaving the tough skins behind in your hand. The pulp is cooked down with a little sugar to sweeten, grated onion, minced garlic and jalapeños with bright cilantro and lime juice being stirred in at the end to brighten the flavors. We're on the fence about the jam - while it was tasty and quite spicy, it was kind of overwhelming to the meat in this dish!

The flank steak is marinated in a mixture of fresh lime juice, lime zest, a bit of oil, a couple more jalapeños and some garlic - while the tender steak was flavorful enough by itself, it was hard to tell there was a steak underneath the jam if you got too much of it in one bite. If you don't like meals too spicy, I would still use the same amount of peppers, but just be sure to remove the seeds and ribs before you add them.

Tuesday, June 12, 2007

Caramel treats and you used what as a pizza base???

What would Tuesday be without baking for the weekly Wednesday Treat Day? I asked Jeff this weekend what he thought might be good to bring in, but he couldn't think of anything... I think we were a bit overloaded with getting the house on the market! After glancing through some cookbooks, we decided to go the bar cookie route today and made these sublime Caramel Crunch Bars.

Where to start with these groovy bars?! Flecked with creamy pieces of sweet milk chocolate, the foundation of these bars is a buttery shortbread with an inkling of espresso and cinnamon lingering in the richness. The brown sugar in the dough imparts a caramel flavor when combined with the creamy butter - I decided to use vanilla sugar for greater dimension, but using regular granulated would be fine. With just enough flour to bind the ingredients, the dough at this point will be quite soft and sticky - be sure to just stir until the flour has been absorbed, you wouldn't want to overwork this delicate dough. Usually you would be able to just scoop the mixture into the pan and use your hands to push the dough around, but this almond-colored dough has a creaminess to it and would just stick to your fingers. I found that it was easiest to drop small dollops all over the bottom of the pan and then connect them with a small off-set spatula. If for some reason you don't have one, you could lightly wet your fingers and use a rubber spatula to help spread the mixture out.

After the base of the bars is baked to a medium golden brown, they are scattered with a good fistful of chopped bittersweet chocolate. They are then quickly placed back in the turned-off oven for just a couple minutes to soften the chocolate. The chocolate softens just enough so you can spread the chocolate chunks into a decadent frosting. Now that you've gone this far, you can't stop now - a scattering of crunchy toffee bits is the final step to take these bars over the top. While it may not look like one, if your a fan of Heath Bars, you will not be disappointed in these treats!

Just like last night's salad had no lettuce, tonight's pizza does not have a typical "crust". In this Whole Wheat Spaghetti Pizza, cooked and well-drained pasta is used, instead of dough, to form a base for the toppings. To bind the noodles together, a mixture of spices, milk and an egg are whisked together with the pasta then being added in. The spaghetti mixture is then formed into a round pizza shape using a pizza pan (no holes here please!). When you cook the noodles, be sure to break the long strands of pasta in half or thirds so it will be easier to shape in the pizza pan.

Topped with shredded chicken, marinara sauce, mozzarella, pepperoni and thinly sliced garlic cloves, it certainly did look like a pizza as it came bubbling out of the hot oven. The outside "crust" that was not covered by topping did get quite crispy, but keep in mind, underneath the tender spaghetti will firm up enough to cut nicely, but it won't have the same texture you would get when you use a dough... as you can imagine! I was worried that it would just fall apart when we tried to move it from the pizza pan, but it stayed together very well. The whole wheat pasta brought a nuttiness that you would find if you used a whole wheat dough, but the spaghetti made the pizza a little lighter. We both thought this was an awesome way to change up pizza - it was very filling and exceptionally good!


Monday, June 11, 2007

No lettuce in this salad!

Just a quick note to start - the recipe sections to the left have been brought up to date!

When thinking about salads, the first thing that comes to mind is lettuce - however, as we found with tonight's dinner, this does not always have to be the case! In this dish, Warm Snow Pea and Chicken Salad, bright grassy green slivered snow peas quickly won us over with their crunchy sweetness instead of using some variety of lettuce.

We started off by gently poaching chicken breasts in chicken broth, rather than water, which gave them an extra boost of flavor. After they have cooled a bit, the juicy chicken is then shredded into bite sized pieces. Next, quite a lot of raw snow peas are trimmed and slivered lengthwise - they are then quickly cooked in a mixture of toasted sesame oil, garlic and fresh ginger. Once their color has brightened up, the strips of peas are placed with the bits of chicken into an Asian-flavored dressing. Rice vinegar and soy sauce give the dressing a salty tang with nutty cashew butter and toasted sesame oil giving it a rich creamy texture. Once plated, a shower of crunchy chopped cashews graces the top of each serving to tie into the luscious sesame dressing. Light, clean and very refreshing, this lovely take on salad with its crisp texture was just the right choice to end a warm summer day. I make my own cashew butter often, but if it is not something you would normally have, you could use some tahini (sesame seed paste) instead.